Serious threats from Heartbleed Bug

Heartbleed-bug-150x150What is Heartbleed(CVE-2014-0160 ) issue?

Heartbleed is a serious vulnerability through which attacker can easily steal the sensitive data like login credential, card number and other encrypted information used in online banking and e-commerce site.  It was found In early April, and available in the software library OpenSSL which is considered as most secure and used by many web application for secure transaction.

How this bug works?

Heartbleed virus was basically tricking the computer with fake information. The computer then responded to hackers by giving them the stored memory. This compromises the secret keys used to identify the service providers and to encrypt the traffic, the names and passwords of the users and the actual content. This allows attackers to spy on communications, take information straightforwardly from the services and users and to imitate services and users.

Things to worry about?

Many cyber experts consider that Heartbleed is the worst vulnerability found (at least in terms of its potential impact) since commercial traffic began to flow on the Internet. Why it so?

  • Open SSL(secure socket layer) basically provides communication security and privacy through encryption functionality over the Internet for applications such as web, email, instant messaging (IM) and some virtual private networks (VPNs). As this bug available to this layer so It has been undermine around half a million secure websites, email, instant messaging and likely a variety of other programs and applications
  • Discovered in early April, Heartbleed lets attackers steal data from computers whereas recent report showed that it can also access to forum and chat-rooms which is very hard to penetrate.
  • The big problem is that it is undetectable and you don’t know it is happening. If your Gmail was hacked and they tell you to change your password and you do, the hacking still doesn’t go away.
  • Heartbleed.com had attacked their own server from attackers perspective and they found that the bug can able to steal sensitive data without using any privileged information or credentials, which make situation more severe.

Typically, OpenSSL implementations are present on servers running Apache and nginx. Unfortunately, Apache remains the dominant web server today with more than half of the internet’s active sites running on it and nginx has about another 14%.  The Heartbleed bug was introduced in December 2011. The bug affects OpenSSL version 1.0.1 which was released in March 2012 through to 1.0.1f which hit on Jan 6 of this year.

What to not worry about?

Heartbleed has no effect on

  • DOD classified networks, and minimal effect on DOD unclassified sites.
  • Common access cards and the PIN numbers associated with them
  • The products which do not include OpenSSL in their server
  • Applications which use OpenSSL 1.0.1g, OpenSSL 1.0.0 branch, OpenSSL 0.9.8 branch and OpenSSL 0.9.7 branch.

How we stopped it?

To address this vulnerability, we followed the steps mentioned below.

Step#1 : We checked the version of openSSL in server.

# yum info openssl.

Step#2 : Then, we updated the version of it to the version which is not affected by Heartbleed.

# yum update -y openssl

Step#3: After updating OpenSSL, reboot the services using the library or server itself.

To combat with such type of bugs or vulnerabilities, you require an expert and accomplished QA engineers. You can also offshore QA Services which provides you savvy and smart solution to your goal.  Andolasoft also launched free security testing where you can check your web app health report at no cost.

Like this blog? I’d love to hear about your thoughts on this. Thanks for sharing your comments.

5 Reasons Why Web Development is Faster With Ruby On Rails

Ruby on Rails aka “RoR” is an open-source MVC framework built using the Ruby programming language.

It is considered as the epitome of the latest generation of high-productivity, open source web development tool. The growing demand for Ruby on Rails has been driven by successful RoR development companies like Andolasoft, who benefit from the speed and agility of building applications in Rails, which results in increased productivity and company growth.

1. Framework Built on Agile Methodology

RoR is faster because the framework was built based on Agile development methodology, best practices are emulated so web development is done with high quality and speed.

RoR framework includes support programs, compilers, code libraries, tool sets, and application programming interfaces (APIs) that bring together the different components to enable development of a project or solution.

Never miss an update from us. Join 10,000+ marketers and leaders.

It’s possible to build sites that used to take 12 weeks in just 6 weeks using Ruby on Rails. It means you can save 50% on your development expenses.

2. Less Code Writing

Rails creates a skeleton for an application or module by executing all the code libraries. You must write some commands to accomplish this. This is what makes the process of web development faster.

Rails makes database deployments simpler than any open, or proprietary solution by allowing for migrations.

  • Adopting principle of DRY

    It also adopts the principle of “Don’t Repeat Yourself”. So all information can be retrieved from a single unambiguous database which tends to easier development.

  • Easy Configuration

    A key principle of Ruby on Rails development is convention over configuration. This means that the programmer does not have to spend a lot of time configuring files in order to get setup, Rails comes with a set of conventions which help speeding up development.

  • Modular Design

    Ruby code is very readable and mostly self-documenting. This increases productivity, as there is little need to write out separate documentation, making it easier for other developers to pick up existing projects.

  • Designer Friendly Templates

    HTML templates is a core feature of Rails. It allow templates to be composed of a base template that defines the overall layout of the page,the base template is called a “layout” while the individual page templates are “views”. The Rails application retrieves the list of tags from the database and makes it available to the view.The section of the view that renders these category is:

    <%= render :partial => 'category' %>

    This refers to a Ruby partial, a fragment of a page, which is contained in _category.html.erb. That file’s content is:

<h3>categories</h3>
<p class="categorylist">
<%= render :partial => 'categorylist', :collection => @category %>
</p>
  • This generates the heading then refers to another partial, which will be used once for each object in the collection named “categorylist”.

3. Third Party Plugin/Gem Support

Mature plugin architecture, well used by the growing community. Rails plugins allows developer to extend or override nearly any part of the Rails framework, and share these modifications with others in an encapsulated and reusable manner.

Rails community provides a wealth of plugins as Ruby Gems that you simply add to your project Gem-file and install. This significantly accelerates development and maintenance time as you’re not trying to integrate disparate libraries, it’s already done for you.

4. Automated Testing

Rails has developed a strong focus on testing, and has good testing suit in-built within the frameworks.

Rails makes it super easy to write your tests. It starts by producing skeleton test code while you are creating your models and controllers.

I’ve worked with the team at Andolasoft on multiple websites. They are professional, responsive, & easy to work with. I’ve had great experiences & would recommend their services to anyone.

Ruthie Miller, Sr. Mktg. Specialist

Salesforce, Houston, Texas

LEARN MORE

Rails ships with a built-in test suite. There are many tools available in the market for testing Rails application as mentioned below with other web apps from many different aspects.

  • Rspec
  • Cucumber
  • Test Unit
  • Shoulda
  • Selenium (not really a ruby thing but more of a web thing)

But if you are new to testing we highly recommend you start with learning Rails own testing suite before start using other tools

5. Easier Maintenance

Once site launches, future modifications to your site (e.g., adding new features, making changes to the data model) can be made more quickly, for the same reasons noted above.
New features can be added quickly and maintaining applications over time can also be more cost-effective.

If you like this one, you might also like Why Rails framework popular among Ruby developers and The Best practices for Rails App Development .

How To Monetize IOS App Through Apple In-App Purchase Integration

What Is In App Purchase?

Apple’s In-App purchase lets you the ability to sell items within your free or paid app which includes premium content, virtual goods, upgrade features and subscriptions. Apple takes 30% of the commission and you receive 70% of the purchase price.

Each purchase is associated with a product type. The product types are:

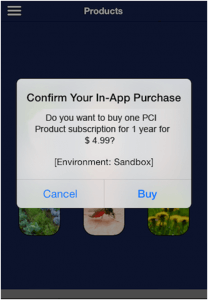
  • Apple-In-App-Purchase-208x300

    Consumable Products:

Consumables are In-App Purchases that must be purchased each time the user needs that item.

  • Non-Consumable Products:

Non-Consumables are In-App Purchases that only need to be purchased once by the user and are available to all devices registered to a user.

  • Auto-Renewable Subscriptions:

Auto-Renewable Subscriptions allow the user to purchase episodic content or access to dynamic digital content for a set duration time. At the end of each duration, the subscription will renew itself, until a user opts out.

  • Non-Renewable Subscriptions:

Non-Renewing Subscription allow the sale of services with a limited duration. Non-Renewing Subscriptions must be used for In-App Purchases that offer time-based access to static content.

  • Free Subscriptions:

Free Subscriptions are an extension of Auto-Renewable Subscriptions that permit the delivery of free subscription content to Newsstand-enabled applications.

Never miss an update from us. Join 10,000+ marketers and leaders.

The Free Subscription In-App Purchase type is implemented in the same way as an Auto-Renewable Subscription, just without any charges to the user. Free Subscriptions do not have expiration, but the user can turn off the subscription at any time.

You can use any one of the above as best suit to your application.

For example, integrating InApp purchase for Non-consumable type product.

In Non-consumable products type, user has to pay only once. Then the content or items will be available to all the device against that user’s apple ID.

What To Do Before Integrating In App Purchase To Your Application?

  1. Connect to iTunes
  2. Then create an unique App ID for your application and enable in-app purchases for that.
  3. Update the app with created bundle ID and code signing in Xcode with corresponding provisioning profile.
  4. Create the app using the AppID you’ve registered. Then goto Manage Applications in iTunes Connect.
  5. Make sure you have set up the bank details for your app as it is necessary for supporting In-App purchase.
  6. Then Add a new non-consumable product for In-App purchase.
  7. Last step is to create a test user account using Manage Users option in iTunes connect page of your app.

Lets write the code

First include StoreKit Framework into the app.Then write the following code in ViewController.h file

#import <UIKit/UIKit.h>
#import <StoreKit/StoreKit.h>
 
@interface MyViewController : UIViewController
<SKProductsRequestDelegate,SKPaymentTransactionObserver>
 
{
 
}
-(IBAction)PurchaseButtonClicked:(id)sender;
 
- (void) completeTransaction: (SKPaymentTransaction *)transaction;
- (void) restoreTransaction: (SKPaymentTransaction *)transaction;
- (void) failedTransaction: (SKPaymentTransaction *)transaction;
 
@end 
Write the following code in ViewController.m file
-(IBAction)PurchaseButtonClicked:(id)sender {
    SKProductsRequest *request= [[SKProductsRequest alloc]
initWithProductIdentifiers: [NSSet setWithObject: @"your_product_ID"]];
    request.delegate = self;
    [request start];
}
- (void)productsRequest:(SKProductsRequest *)request didReceiveResponse:(SKProductsResponse *)response
{
   [[SKPaymentQueue defaultQueue] addTransactionObserver:self];
 
   NSArray *myProduct = response.products;
   NSLog(@"%@",[[myProduct objectAtIndex:0] productIdentifier]);
 
   //Since only one product, we do not need to choose from the array. Proceed directly to payment.
 
   SKPayment *newPayment = [SKPayment paymentWithProduct:[myProduct objectAtIndex:0]];
   [[SKPaymentQueue defaultQueue] addPayment:newPayment];
 
   [request autorelease];
}
 
- (void)paymentQueue:(SKPaymentQueue *)queue updatedTransactions:(NSArray *)transactions
{
 for (SKPaymentTransaction *transaction in transactions)
   {
      switch (transaction.transactionState)
      {
         case SKPaymentTransactionStatePurchased:
              [self completeTransaction:transaction];
              break;
         case SKPaymentTransactionStateFailed:
              [self failedTransaction:transaction];
              break;
         case SKPaymentTransactionStateRestored:
              [self restoreTransaction:transaction];
         default:
              break;
      }
    }
} 
 
- (void) completeTransaction: (SKPaymentTransaction *)transaction
{
    NSLog(@"Transaction Completed");
    // You can create a method to record the transaction.
    // [self recordTransaction: transaction];
    // You should make the update to your app based on what was purchased and inform user.
    // [self provideContent: transaction.payment.productIdentifier];
    // Finally, remove the transaction from the payment queue.
    [[SKPaymentQueue defaultQueue] finishTransaction: transaction];
}
 
- (void) restoreTransaction: (SKPaymentTransaction *)transaction
{
    NSLog(@"Transaction Restored");
    // You can create a method to record the transaction.
    // [self recordTransaction: transaction];
    // You should make the update to your app based on what was purchased and inform user.
    // [self provideContent: transaction.payment.productIdentifier];
    // Finally, remove the transaction from the payment queue.
    [[SKPaymentQueue defaultQueue] finishTransaction: transaction];
}
 
- (void) failedTransaction: (SKPaymentTransaction *)transaction
{
    [activityIndicator stopAnimating];
    if (transaction.error.code != SKErrorPaymentCancelled)
    {
      // Display an error here.
      UIAlertView *alert = [[UIAlertView alloc] initWithTitle:@"Purchase Unsuccessful"
      message:@"Your purchase failed. Please try again."
      delegate:self
      cancelButtonTitle:@"OK"
      otherButtonTitles:nil];
      [alert show];
      [alert release];
     }
 
    // Finally, remove the transaction from the payment queue.
    [[SKPaymentQueue defaultQueue] finishTransaction: transaction];
}

That’s it, now your app is integrated with the inApp purchase with non-consumable subscription.

Note: Please review Apple Guidelines (https://developer.apple.com/appstore/resources/approval/guidelines.html) before publishing the app to the app store.

Andolasoft has expertise in iOS application development and other iOS integration.

See Also: E-Signature SDK for iOS App Developer

Like this blog? I’d love to hear about your thoughts on this. Thanks for sharing your comments.

Containable Behavior in CakePHP

When we are going to retrieve records of (user) using User model, we can get the associated model’s record at the same time. That might not require at some point. To avoid this, CakePHP provides the bindModel/unbindModel methods. But this is not be a good practice. You can streamline your operation using the containable behavior. The performance and the speed will increased as well. It will mostly reduce the joining of tables.

Usage & Examples:

class User extends AppModel {
     public $actsAs = array('Containable');
   }

Where “User” is the model for which you are adding the containable behavior.

You can also do the following on the fly:

$this->User->Behaviors->load(‘Containable’);

Operations:

Without the use of Containable

$this->User->find('all');
  Here User model has hasMany relation with the Comment.
  [0] => Array
        (
            [User] => Array
                (
                    [id] => 1
                    [title] => First article1
                    [content] => aaa1
                    [created] => 2008-05-17 00:00:00
                )
            [Comment] => Array
                ( [0] => Array
          (
            [id] => 1
            [User_id] => 1
            [author] => Daniel1
            [email] => dan@example.com1
            [website] => http://example.com1
            [comment] => First comment1
            [created] => 2008-05-17 00:00:00
          )
        [1] => Array
          (
            [id] => 2
            [User_id] => 1
            [author] => Sam1
            [email] => sam@example.net1
            [website] => http://example.net1
            [comment] => Second comment1
            [created] => 2008-05-10 00:00:00
          )
      )
  )
  [1] => Array
  (
    [User] => Array
      (...

Using Containable:

Case 1: If we need only User data.

$this->User->contain();
      $this->User->find('all');
  OR
  $this->User->find('all', array('contain' => false));
  Out Put:
  [0] => Array
        (
            [User] => Array
                (
                    [id] => 1
                    [title] => First article1
                    [content] => aaa1
                    [created] => 2008-05-17 00:00:00
                )
        )
       [1] => Array
        (
            [User] => Array
                (
                    [id] => 2
                    [title] => Second article1
                    [content] => bbb1
                    [created] => 2008-05-10 00:00:00
                )
        )
  Case 2: With complex associations
       $this->User->contain('Comment.author');
           $this->User->find('all');
 
           // or..
 
           $this->User->find('all', array('contain' => 'Comment.author'));
  Out put:
  [0] => Array
        (
            [User] => Array
                (
                    [id] => 1
                    [title] => First article1
                    [content] => aaa1
                    [created] => 2008-05-17 00:00:00
                )
            [Comment] => Array
                (
                    [0] => Array
                        (
                            [author] => Daniel1
                            [User_id] => 1
                        )
                    [1] => Array
                        (
                            [author] => Sam1
                            [User_id] => 1
                        )
                )
        )
 
   $this->User->find('all', array('contain' => 'Comment.author = "Daniel1"'));
 
    Out put:
  [0] => Array
        (
            [User] => Array
                (
                    [id] => 1
                    [title] => First article1
                    [content] => aaa1
                    [created] => 2008-05-17 00:00:00
                )
            [Comment] => Array
                (
                    [0] => Array
                        (
                            [id] => 1
                            [post_id] => 1
                            [author] => Daniel1
                            [email] => dan@example.com1
                            [website] => http://example.com1
                            [comment] => First comment1
                            [created] => 2008-05-11 00:00:00
                        )
                )
        )
  [1] => Array
        (
            [User] => Array
                (
                    [id] => 2
                    [title] => Second article2
                    [content] => bbb2
                    [created] => 2008-05-22 00:00:00
                )
            [Comment] => Array
                (
                )
        )

The gray area showing that the User data always returned irrespective of the “Comment”.

Pagination Using Containable:

Including the ‘contain’ parameter in the $paginate property we can achieve find(‘count’)
and find(‘all’) on the model. This is a most valuable feature of CakePHP.

$this->paginate['User'] = array(
    'contain' => array('Comment', 'Tag'),
    'order' => 'User.name'
  );
  $users = $this->paginate('User');

If you are searching for PHP or CakePHP developers, then we are the ideal and cost savvy option for you.

Like this blog? I’d love to hear about your thoughts on this. Thanks for sharing your comments.

Asynchronous processing with Sidekiq gem in Rails

Introduction to Sidekiq

Sidekiq gem is used to move long running jobs to background for asynchronous processing.

It is more efficient, with respect to memory usage, than delayed_job and Resque as it uses threads instead of forks.

Need of background process

For example, in a mailing application you need to send emails to a large list of recipients. It will take large time to process with the large list of recipients, which is too long for a User to wait for a response after clicking a link. So, it’s better to move the long running task as the background process by using Sidekiq gem.

Integration of Sidekiq in a Rails application

Steps to integrate Sidekiq gem in a Rails Application :

Step#1 – Add the gem to the Gemfile to use Sidekiq with Active Record

gem 'sidekiq'

You can also view the web interface to manage the background jobs. It isn’t included by default with Sidekiq. To use the web interface we need to add couple of gems to the Gemfile like ‘sinatra‘ and ‘slim

 gem 'sidekiq', '2.9.0'
 gem 'sinatra', '1.3.6', require: false
 
 gem 'slim', '1.3.6'

Run “bundle install” to install the sidekiq gem

Step#2 – Install Redis Server to manage its job queue

Redis is an open-source, advanced key-value pair store. It is often referred to as a data structure server.
Sidekiq uses Redis to manage its job queue.

If you’re running OS X follow the steps as below:
Logged in as a Admin user or add sudo prefix on terminal

$ brew install redis

After installation completed starts the Redis server up with the following command

$ redis-server /usr/local/etc/redis.conf

if you’re running CentOS 5.6 follow the steps as below:

yum install make gcc wget telnet
 wget http://redis.googlecode.com/files/redis-2.2.12.tar.gz
 tar -xf redis-2.2.12.tar.gz
 cd redis-2.2.12
 make && make install

Change the default redis.conf file to daemonize it.

mkdir /etc/redis /var/lib/redis
sed -e "s/^daemonize no$/daemonize yes/" -e "s/^dir \.\//dir \/var\/lib\/redis\//" -e     "s/^loglevel debug$/loglevel notice/" -e "s/^logfile stdout$/logfile     \/var\/log\/redis.log/" redis.conf > /etc/redis/redis.conf

To make management easy, use an init script by using sed to update it.

 Wget https://raw.github.com/gist/257849/9f1e627e0b7dbe68882fa2b7bdb1b2b263522004/redis-server
 sed -i "s/usr\/local\/sbin\/redis/usr\/local\/bin\/redis/" redis-server
 
 chmod u+x redis-server
 
 mv redis-server /etc/init.d
 
 /sbin/chkconfig --add redis-server
 
 /sbin/chkconfig --level 345 redis-server on
 
 /sbin/service redis-server start

Step#3 – Start up the jobs process

There are couple of ways to do this,

  • If application is in development mode, we should use the below rake task file instead.
bundle exec sidekiq

If application is in production mode, then it is preferred to daemonizes the job process and allows multiple background processes to be spawned. To use this, follow the following step:
1. Add gem “daemon-spawn”, “0.4.2” to your Gemfile
2. Run bundle install
3. Run the below command to run it in background

bundle exec sidekiq -d -L log/delayed_job.log

4. You have to pass path of log file while using above command.

Step#4 – Add task to run in background

We need to add the background work in a separate class and store it in a new directory, let’s say app/background_jobs and ensures that it’s auto-loaded by the application.

We need to include the Sidekiq::Worker module.

class NotifyUsers
   include Sidekiq::Worker
   def perform
     User.find_each(is_subscribed: true) do |user|
       NewsMailer.newsletter_mail(user).deliver
     end
   end
end

This class must have a perform method. Add the code that need be to run in the background. Then call NotifyUsers.perform_async method inside the controller which will add the job to Redis and then it will call function perform asynchronously.

For Example:
Before background job in UsersController

class UsersController < ApplicationController
  def send_email
    User.find_each(is_subscribed: true) do |user|
      NewsMailer.newsletter_mail(user).deliver
      flash[:notice] = "Mail delivered"
      redirect_to root_path
    end
  end
end

After implementation of UsersController after adding to background job

class UsersController < ApplicationController
   def send_email
      NotifyUsers.perform_async
         flash[:notice] = "Mail is being delivered"
         redirect_to root_path
      end
   end
end

Conclusion

  • No need to wait for a response after clicking a link to do a big stuff
  • Sidekiq has client-side middleware which runs before a job is inserted into Redis
  • It has server-side middleware which runs before the job is being processed. This middleware retry jobs, log them and handle exceptions

SEE ALSO: How to Install and Configure Redis-Server on Centos/Fedora Server

Sidekiq handles the processing of the jobs after they’re pulled from Redis and multithreaded behavior.

It is also providing a web interface there are a couple of gems that we need to add to the gem file too. To visit the web interface just go to the /sidekiq path

It tells us how many jobs have been processed, the number of failures, the currently-active workers and the number of jobs in queues.

Like this blog? I’d love to hear about your thoughts on this. Thanks for sharing your comments.