Key Difference Between ReactJS And React Native

ReactJS and React Native are two leading JavaScript frameworks that allow users to build mobile user interfaces (MUI). They both provide developers with an opportunity to quickly prototype mobile apps and manage complexity as projects grow in scope. Both ReactJS and React Native are used to create native-like apps. However, there are certain differences between the two. Let me explain one by one

What is ReactJS?

React.JS often referred to as React or ReactJS is a JavaScript library responsible for building a hierarchy of UI components or in other words, responsible for the rendering of UI components. It provides support for both front-end and server-side.

Advantages of ReactJS

  1. Easy to learn and use: ReactJS is much easier to learn and use. Any developer who comes from a JavaScript background can easily understand and start creating web apps using react.
  2. Creating dynamic web applications becomes easier: To create a dynamic web application specifically with HTML was tricky, which requires complex coding, but ReactJS solved that issue and makes it easier. It provides less coding and gives more functionality.
  3. Reusable components: ReactJS web application is made up of multiple components, and each component has its logic and controls. These components can be reused wherever needed. The reusable code helps to make your apps easier to develop and maintain.
  4. Performance enhancement: ReactJS improves performance due to virtual DOM. The React Virtual DOM exists entirely in memory and is a representation of the web browser’s DOM. Due to this, when we write a react component, we do not write directly to the DOM. Instead, we are writing virtual components that will turn into the DOM, leading to smoother and faster performance.
  5. The support of handy tools: ReactJS supports a handy set of tools which make the task of the developers understandable and easier.

What is React Native?

React Native is an open-source JavaScript framework used for developing a mobile application for iOS, Android, and Windows. It uses only JavaScript to build a cross-platform mobile app. React Native is the same as react, but it uses native components instead of using web components as building blocks. It targets mobile platforms rather than the browser.

Facebook developed the React Native in 2013 for its internal project Hackathon. In March 2015, Facebook announced that React Native is open and available on GitHub.

Advantages of React Native

There are several advantages of React Native for building mobile applications. Some of them are given below:

  1. Cross-Platform Usage: It provides the facility of “Learn once write everywhere.” It works for both platform Android as well as iOS devices.
  2. Class Performance: The code written in React Native is compiled into native code, which enables it for both operating systems as well as it functions in the same way on both the platforms.
  3. JavaScript: JavaScript knowledge is used to build native mobile apps.
  4. Community: The large community of ReactJS and React Native helps us to find any answer we require.
  5. Hot Reloading: Making a few changes in the code of your app will be immediately visible during development. If the business logic is changed, its reflection is live reloaded on screen.
  6. Improving with Time: Some features of iOS and Android are still not supported, and the community is always inventing the best practices.
  7. Native Components: We will need to write some platform specific code if we want to create native functionality, which is not designed yet.
  8. Existence is Uncertain: As Facebook develops this framework, its presence is uncertain since it keeps all the rights to kill off the project anytime. As the popularity of React Native rises, it is unlikely to happen.

Disadvantages of React Native

  1. React Native is still new and immature: React Native is a newbie in Android and iOS programming languages and is still in its improvement stage, which can have a negative impact on the apps.
  2. Learning is tough: React Native is not easy to learn, especially for a fresher in the app development field.
  3. Lacks the Security Robustness: React Native is a JavaScript library and open-source framework, which creates a gap in the security robustness. When you are creating banking and financial apps where data is highly confidential, experts advise not to choose React Native.
  4. Takes More Time to Initialize: React Native takes a lot of time for initializing the runtime even for the hi-tech gadgets and devices.

ReactJS vs React Native

ReactJS

React Native

ReactJS initial release was in 2013. React Native initial release was in 2015.
Used for developing web applications. Used for developing mobile applications.
Can be executed on all platforms. Not platform independent. It takes more effort to be executed on all platforms.
Uses React-router for navigating web pages. Built-in navigator library for navigating mobile applications.
Uses HTML tags. Does not use HTML tags.
Use code components, which saves a lot of valuable time. Reuse React Native UI components and modules which allow hybrid apps to render natively.
Provides high security. Provides low security in comparison to ReactJS.
The Virtual DOM renders the browser code. Native uses its API to render code for mobile applications.

Which is better, React or React native?

Both ReactJS and React Native are important pillars for app and web development, and due to their flexible functionalities and an evolving Eco-system of libraries, they are gaining momentum with each passing day.

While ReactJS is basically a JavaScript library and React Native is the entire framework, the former is the heart of the latter, and compliments each other.

If ReactJS is optimal for creating apps with high functionality and complex calculations, then React Native is ideal to give a native feeling to your mobile apps.

Conclusion

React is a framework for building applications using JavaScript. React Native is an entire platform allowing you to build native, cross-platform mobile apps, and React.JS is a JavaScript library you use for constructing a high performing UI layer.

React.JS is the heart of React Native, and it embodies all react principles and syntax, so the learning curve is easy. The platform is what gave rise to their technical differences. Like the browser code in React is rendered through Virtual DOM while React Native uses Native API’s to render components on mobile.

So both the framework has huge market demand for web and mobile application development. We have also expertise in developing application in react and react native. If you have any quarries on these two framework then please book a free consultation or if you are looking to develop application on these two framework then you are in the right place. Contact us now

Best Lead Generation Plugins For Your WordPress Website

After developing a WordPress website the next important step is, you need how your website can generate leads to maximize your sales. Generating leads from website is not an easy task but some marketing strategies are there which simplify your work.

There are plugins available for a WordPress website and lead generation plugins comes to the picture. You need to install the best Lead Generation Plugin in your WordPress website to do the needful.

WordPress has a variety of lead generation plugins. These plugins help you to nurture, manage, and meet your potential customers at every step of their buying process. Lead Capture Plugin provides all the tools that are necessary to grow your email list fast and provides growth to your marketing.

Whether you are running a blog or online business or an e-commerce shop. Collecting information from the one showing interest in your services or product and selling your product to them is the main motto.

More than 75% of people who visit your website, they don’t return once leave. In such cases, you lose many opportunities. And as most of the traffic is anonymous, you can’t sell your website to anyone who you don’t know.

In this scenario, WordPress Lead generation plugins help to generate leads. You can grow the email list, develop a long-lasting relationship with your customers, and more. You need to choose the right lead generation tools to get more customers and sell easily to grow your business.

Never miss an update from us. Join 10,000+ marketers and leaders.

What is Lead Generation?

Lead generation is defined as the process of how you attract your potential clients to your WordPress website and convert them into your long-term customers.

With Lead Generation tools you are generating the interest of your prospective customers. It can be done in various ways. Lead Generation on your website means getting visitors into you’re:

  • Email newsletter
  • Contact submission or inquiry form in your website
  • Improving contact with your customers through live chat
  • Book a call with your sales team.

Therefore, Lead Generation becomes essential for all online businesses. It helps you to have a strong process of converting your leads into customers.

A good lead generation strategy can target and locate your valuable prospects and initiate the journey of your sales pipeline. A good lead Generator tools is effective for your marketing sector.

WordPress Plugin(Source – Brndle)

Once you generate these leads, you can engage or re-engage with them at each stage of the customer’s journey. The more leads you develop, the amount of sales increase. Also, the better you manage the lead, the speed and the quality of sales also increases.

A lead generation tool and WordPress plugin are connected directly with the website and provide new features and functions. You should think of these plugins as apps that can be loaded into your iPhone or Android device. You can install any app and all will provide these unique services.

Do you want a WordPress website but don’t know how to create one? We will install and setup WordPress for you, absolutely free of cost!

What are the best WordPress lead generation plugins?

With a WordPress lead generation plugin, you can connect it directly to your website and provide new features and functions. You need to consider these plugins as an app that is loaded to your android or iPhone device. You can download several apps and they all offer you some unique service.

An ideal lead generation strategy includes a combination of tools each working together to improve the sales pipeline. You cannot get avail to a one-size fit- for all plugins. You get a better return when you invest in any individual tools that work best for any unique business model

CRM Plugin:

WordPress CRM Plugin(Source – wordpress.org)

CRM Plugin refers to the Customer relation plugin that helps you to organize and store information of your prospective customers. The system manages all the aspects of your relationship with each customer. Whether it means monitoring the engagement with any of your cold email campaigns or tracking the personalized messages that are sent to long-term clients.

By using a CRM plugin, you can automate tasks like email creation, form builder, and data analysis that are used to improve communication with each prospect at an affordable range. This stored information provides an insight into the potential business efficiency and you can act based on that information.

Lead Capture Plugin:

Lead Capture Plugin(Source – wordpress.org)

Lead capture is defined as the process that helps in attracting and collecting all necessary information about your customers. So you can develop a business relationship.

For example, you might get the email address from the capture form that is attached to any free Webinar or E-book. As the clients put all their information (that is collected in your CRM), you can use this data to increase communication and start your marketing journey.

WP Forms:

WPForms(Source – wpforms)

It is the best drag and drops Plugin form WordPress. You can easily get simple contact forms and also more powerful forms like survey forms and e-commerce order forms.

Contact forms are a great way of capturing leads. It is one of the most used and the oldest way of collecting emails to be in touch with the users. Apart from the contact forms, interactive forms such as survey, quiz, polls, etc., that helps to gather the Email address and improve sales.

It comes with more than 100 pre-built form templates that can be used as a starting point. You can easily customize your form to match all your needs. This is an easy-to-use plugin that can be used to create forms by using the drag and drop builder.

HubSpot:

Hubspot CRM Plugin(Source – wordpress.org)

HubSpot is the ultimate WordPress plugin to grow your mailing list, generate leads and manage contacts. The plugin will automatically collect the form submission from your website and add it to the fully integrated WordPress CRM. With HubSpot, you can measure the growth of your business. You can also create live chat and chatbots, manage your contact database and provide the drag and drop email feature.

OneSignal:

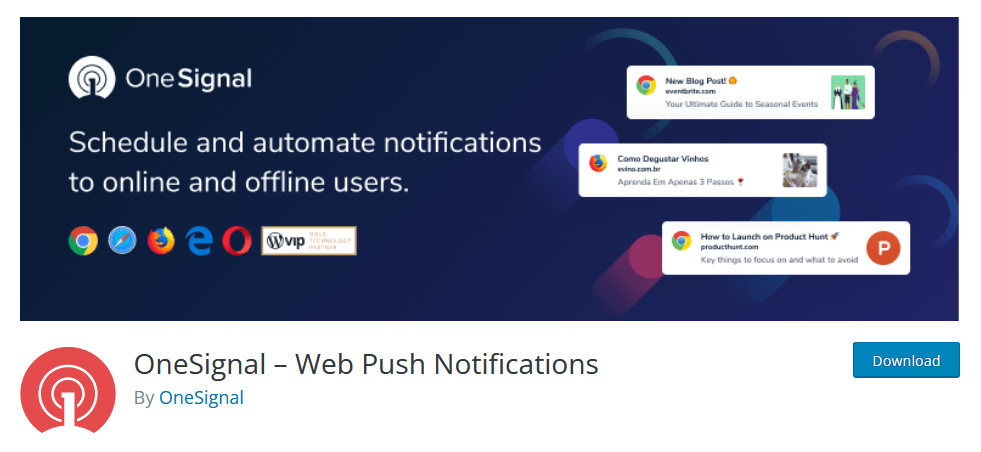
OneSignal Web Plugin(Source – wordpress.org)

This plugin allows you to easily create push notifications for various situations. Such as the signature of any new entries at the end of a new subscription, etc. With these plugins, you can send the targeted notification, increase the engagement of the user, opt-in for push notification, and provide real-time analytics. With OneSignal you can enjoy the free plan which covers upto 30,000 desktop subscribers and unlimited plans on mobile.

Thrive Leads:

It is a popular lead generation plugin that is used to grow your email list. It is a pre-designed template and drop editor, with easy to use and drag. You can create highly converting optin forms.

This flexible lead generation plugin allows you to develop mobile-optimized forms, with 2 steps options and the widgetized forms can be placed throughout your website.

Thrivethemes(Source – Thrivethemes)

FAQ:

What is a lead generation plugin?

A lead generation plugin is used to collect email addresses and other necessary details of your potential customers. So you can develop a healthy relationship with them and convert them into customers.

Why do you need a lead generation plugin?

Lead generation is defined as the process that provides visibility, trust, credibility, and interest from a particular group of people (potential leads). Hence by focusing on lead generation, you can drive traffic from the high-quality prospects that provide high-value customers.

What is the best lead generation plugin for WordPress?

The best Lead Generation Plugin for WordPress are:

I’ve worked with the team at Andolasoft on multiple websites. They are professional, responsive, & easy to work with. I’ve had great experiences & would recommend their services to anyone.

Ruthie Miller, Sr. Mktg. Specialist

Salesforce, Houston, Texas

LEARN MORE

Conclusion:

Lead Generation is important for any business. But you need the right set of plugins to streamline your sales pipeline. It doesn’t matter if you are running an eCommerce store, simple blogs or a business website, you can grow your business with it by converting lots of visitors into subscribers and leads. With these plugins, you can attract more priority clients and provide them a better user experience, all of that can improve the conversion rates.

If you are finding any difficulty in choosing the right lead generation tools for your business. Or want to collect more information for integration of your WordPress website, you can contact us, we will serve you with the right solution for your WordPress website.

Integrate Marketing Stuffs In WordPress Website To Track Performance

In the world of digital marketing, there are advanced strategies being developed every day. In order to make your marketing efforts more efficient, you need to integrate your marketing efforts.

If you want your marketing efforts to be more effective, you need to integrate them.

Integrating your marketing efforts will help you track the performance of your marketing campaigns.

To do this, you need to integrate your marketing efforts with your website to track the performance of your website.

After you develop your WordPress website you need to market it properly to get more visibility. Marketing tools and WordPress plugins has great role to make your website more visible in front of your target customers.

From individuals to small businesses and big brands like National football league and CNN use WordPress to run their websites.

Therefore marketers always focuses on leveraging WordPress plugins to streamline your workflows and reach new audiences.

More than 58,000 WordPress plugins are available and you need to choose the right plugin that give more value to your website and improves the performance of your Business website.

Never miss an update from us. Join 10,000+ marketers and leaders.

WPForms:

Your website should have a contact form, so it becomes easy for visitors to be in touch with you. WPForms is a user-friendly contact form plugin for your WordPress website.

It is a drag and drops online form builder that allows users to easily create contact forms, online order forms, and all other types of online forms with only a few clicks.

You can easily integrate the WPForms to any popular marketing and payment platform. With this plugin, you can make your website more powerful.

WPForms(Source – WPForms)

Google Analytics:

It is your one and only tool that provides lots of insights about your visitors and their specific behaviors. With this tool, you can track your audience’s actions on the site.

You can get statistical data on the number of users in a period, sessions, page views and pages per session, session duration, bounce rates, popular pages/ posts, conversions, and more.

Google Analytics is a free tool that can be integrated into your WordPress website with a simple embed code that is provided by Google.

Google Analytics(Source – Google Analytics)

Yoast SEO:

Yoast SEO provides marketers with all the necessary guidance that ensures each blog post and page are completely optimized.

These plugins are easy to use and offer a comprehensive solution.

For ex: It has page analysis functions that prevents the marketers from doing any common kind of mistakes such as missing alt text description.

This helps to increase the search visibility and lengthy titles. These little things can affect the rankings and these plugins will help you identify the error.

Yoast SEO(Source – yoast.com/wordpress/plugins/seo/)

Google XML Sitemaps:

With Google XML sitemaps you can directly communicate with the search engines. By alerting them about the new or modified content quickly, it helps to ensure that the content gets indexed faster. With Google XML sitemap plugins you can get your post visible at the top of the search result.

The Google XML sitemaps doesn’t need any technical knowledge to start with. You need to follow the simple step by step process to develop a sitemap. These can be used at every search engine like Yahoo, Google and Bing.

Google xml sitemaps(Source – treewebsolutions )

WP Rocket:

With WP Rocket, you can immediately improve your WordPress Website Performance and speed. You don’t need any technical skills for it.

It automatically activates the recommended WordPress caching settings such as gzip compressions, cache per-loading, and page cache.

You also get the option to turn on optional features such as lazy loading images, DNS pre-fetching, Minification, CDN support and more features that help to improve the page load times.

Also, WP Rocket doesn’t wait for someone to request a page, to save it in the cache. It will automatically crawl and develop your website cache that results in instant improvement in performance.

WP Rocket(Source – Themaverickspirit )

WooCommerce:

If you are an E-commerce brand and use WordPress to operate, then WooCommerce is the only plugin that you require. The Plugin will assist you to handle payments with a variety of payment options, it helps you to access your stock levels and create your own online store themes.

WooCommerce offers flexibility with an array of free and premium extensions. It is the best solution for E-commerce that powers 30% of all online stores.

Woocommerce

(Source – WooCommerce )

Elementor:

Elementor is a popular visual page builder for WordPress. Using these plugins you can develop tons of layouts, forms, templates, and landing pages that make your website look fancy.

With Elementor, you can develop a page focusing on the marketing purposes. When you implement these new functions you can boost your content marketing, get your website into more conversions, increase social engagement and more.

Elementor(Source – Elementor)

Google Keyword Planner:

It is a WordPress digital marketing plugin that allows you to get the content keywords straight from the search source.

You can see all the advertisers’ keywords which can be bid on for your own campaigns. It will show the estimated search volume, difficulty level, number of results and help you choose the best keywords.

With this plugin you can research keywords that improve the search rank and help to outrank other sites.

Google Keyword Planner(Source – Infidigit )

I’ve worked with the team at Andolasoft on multiple websites. They are professional, responsive, & easy to work with. I’ve had great experiences & would recommend their services to anyone.

Ruthie Miller, Sr. Mktg. Specialist

Salesforce, Houston, Texas

LEARN MORE

FAQ:

How to improve WordPress Website Performance?

You can improve your WordPress website performance by following these steps:

  • Choose a Good WordPress hosting for your website
  • Update your themes and plugins
  • Use high quality theme
  • Remove plugins that is not used in your website
  • You can optimize your WordPress database
  • Use CDN

What do you mean by WordPress Optimization?

WordPress optimization is defined as the process of enhancing, customizing and tweaking the WordPress set up to improve the WordPress performance. So you can make it faster and easily get discovered.

This consists of several things, right specification, updated WordPress, Managed Plugins, Optimized database and more.

What are top 5 WordPress Plugins for your WordPress website?

The top 5 plugins for better performance of your Websites are:

  • WP-Optimize
  • WPForms
  • Yoast SEO
  • Google Analytics
  • Google Keyword Planner
Do you want a WordPress website but don’t know how to create one? We will install and setup WordPress for you, absolutely free of cost!

Conclusion:

Your Business might not require all the above mentioned plugins and tools, but at least you need some of these tools that provide effective results.

Integrating your marketing efforts with your website can help you track the performance of your marketing campaigns.

Integrating these tools into your website’s backend will not only make your job easier but also more efficient as it tracks performance and helps optimize different aspects on a regular basis.

You can either download these plugins directly using WordPress.org or through links. But make sure to avoid all the plugins that are not required for your website or these can put you at risk.

Now that you get your best WordPress plugins to improve your Business Websites, you can also check on How to choose the best WordPress agency for your Website development?

Alcohol and Aging Effects: Does Alcohol Make You Look Older?

does alcohol make you look older

Alcohol abuse in older adults is a quiet but serious problem. It may not be as easy to recognize, but alcoholism in older adults is common. If you believe that you or a loved one has problems with alcohol, you can contact your family doctor and they can perform a substance abuse screening. While drinking may help some people fall asleep, it ultimately leads to a less restful night’s sleep, which can be debilitating when combined with other menopause symptoms. When uncertainty about, well, everything, was too much to bear, I found solace in a glass of wine.

These conditions don’t have a cure, but treatment can help make symptoms more manageable and have less of an effect on your appearance. The same study found a correlation between drinking wine and the visibility of blood vessels in the cheeks. One study found that women who consumed eight or more drinks a week perceived themselves as looking older than those who didn’t drink (8).

tell-tale physical traits of a heavy alcohol drinker, according to experts — from brittle hair to skin blotches

Insider talked to Utter and other specialists about some tell-tale signs of alcohol misuse or abuse — and how to change your patterns for better health and looks. Alcohol abuse in older people has become more common in the past few decades. Alcohol is now the most abused substance among people over 65. Alcoholism is often overlooked or misdiagnosed in older people.

  1. This includes vitamins A, B, D, and E; minerals like calcium, magnesium, iron, and zinc; and even basics like proteins and carbohydrates.
  2. The rest of the alcohol will leave your body through your sweat and breath.
  3. Give your body the best chance at health and reclaim your youthful energy.
  4. At Grace Land Recovery, we know the challenges that come with addiction.
  5. Mixing alcohol with opioids or benzodiazepines like diazepam (Valium) is one potentially deadly combination.

Is alcohol physically addictive?

Alcohol can change the appearance of your mouth and the skin on your face.

Alcohol’s effect on the brain

does alcohol make you look older

It’s no secret that unwanted weight gain can be a reality of menopause. Not only does an increase in body fat continue to slow down the metabolization of alcohol, but drinking alcohol, in turn, increases body fat. Every alcoholic drink goes “straight to your head,” or at least to your brain. Heavy drinking over a long time can shrink brain cells and lead to alcohol-related brain damage (ARBD) and certain types of dementia. Symptoms of that include lack of judgment, organization, or emotional control, trouble staying focused, and anger issues.

Such actions can even revitalize the skin and body and help prevent physical aging due to alcohol use. Heavy drinking can cause irritation to the blood vessels in your eyes. This is why oftentimes when someone is drunk they get bloodshot eyes.

Over time, heavy alcohol use can result in changes to the skin. This is because of the damage that alcohol can do to the body’s organs as well as chemicals in the body. Let’s take a look at some of the ways that alcohol affects the aging process.

“Heavy alcohol drinking might change the aging clock before one develops medical disease. Broken bones from a stumble are a serious health issue for seniors. It’s because alcohol can affect your balance and sense of judgment.

If you’re blessed with genetics that resists wrinkles and other visible signs of aging, you might not notice the way that alcohol affects your appearance. Drinking alcohol may make you feel younger as you lose your inhibitions and gain some energy, but the hangover the next day can make you feel sick, sluggish, and downright old. Even if you don’t experience acute after-effects, alcohol can age you. You may not realize it, but alcohol and aging effects go hand-in-hand. Popular methods such as meditation, yoga, therapy, and exercise may help if you drink to manage mental health conditions. But these alone may not be enough, so ask your doctor alcoholism and narcissism about additional treatment options.

When participants also were given an infusion of alcohol, this decreased by another 19%. “It was just not pretty,” Grace said in one of her videos for The 30-Day Alcohol Experiment, her program that helps people reevaluate their relationship with alcohol. “When skin gets inflamed, it produces a condition called rosacea,” he said. Rosacea is characterized by redness on the face, what does flakka smell like and sometimes the ears, back, and chest. Alcohol disrupts sleep, too, and poor sleep saps your face of precious time to repair.

Supporting a Loved One: Medication & Recovery

Even diet-conscious alcoholic beverages like vodka sodas can lead to disproportionate belly weight if you drink enough of them. Now a clinical psychologist who works with people with addictions, Utter knows alcohol-use disorder falls on a spectrum. While some people with it do look like those bar patrons, many look perfectly healthy.

For example, young people who drink regularly have been shown to perform poorly in tests of executive function. As you age, what is whippits the body’s mechanisms that protect you from free radicals diminish. Therefore, you’re at a greater risk of developing a wide range of health problems, including the neurodegenerative conditions that affect your cognition and memory. Broken capillaries, the tiny blood vessels near the surface of the skin, tend to crop up as you get older.

How To Manage API Request with AXIOS on a React Native App

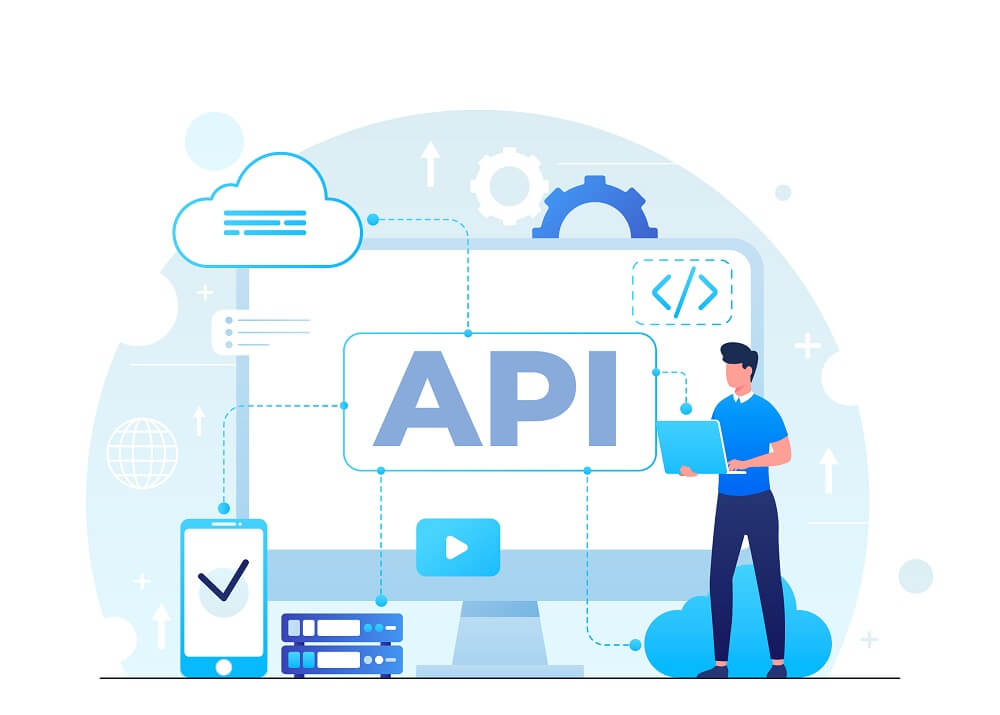
APIs can make your life a whole lot easier. With an API, you can send requests to other services and get responses without having to build those requests and responses yourself. But building an API isn’t as simple as it sounds. It requires careful planning, testing, and debugging.

If you’re building an API for the first time, it can feel like an impossible mountain to climb. That’s where APIs like Axios come in. It has a great API and lots of helpful features. Here in this article you’ll understand how to use Axios to manage API requests in your React Native app.

What is AXIOS?

Axios is one of the easiest HTTP clients to learn and use. Making an API request is as simple as passing a configuration object to Axios or invoking the appropriate method with the necessary arguments. You will learn the basics of Axios in this section.

Configuring Axios

Type following command on terminal window to install Axios:

NPM Install Axios

How to make requests to an API using Axios

Making a call to an API using Axios, you can pass a configuration object to Axios or invoke a method for the corresponding CRUD operations.

Never miss an update from us. Join 10,000+ marketers and leaders.

For example, you can make a GET request to the /api/users endpoint in one of the following two ways:

[code language=”css”]</pre>
import axios from ‘axios’;
const baseUrl = ‘https://reqres.in’;
// Passing configuration object to axios
axios({
method: ‘get’,
url: `${baseUrl}/api/users/1`,
}).then((response) => {
console.log("<<<<<< Passing configuration object to axios >>>>>>", response.data.data);
});

// Invoking get method to perform a GET request
axios.get(`${baseUrl}/api/users/1`).then((response) => {
console.log("<<<<<< Invoking get method to perform a GET request >>>>>>", response.data.data);
});
[/code]

There are several other fields such as baseURL, transformRequest, transformResponse, and headers, among others, which you can include in the configuration object you pass to Axios.

[code language=”css”]</pre>
// Passing configuration object to axios
const fetchUserFirst = async () => {
const configurationObject = {
method: ‘get’,
url: `${baseUrl}/api/users/1`,
};
const response = await axios(configurationObject);
console.log("<<<<<< Fetch User First >>>>>>", response.data.data);
};

// Invoking get method to perform a GET request
const fetchUserSecond = async () => {
const url = `${baseUrl}/api/users/2`;
const response = await axios.get(url);
console.log("<<<<<< Fetch User Second >>>>>>", response.data.data);
};
[/code]

How to make multiple concurrent API requests using Axios

We can use the Promise.all or Promise.allSettled method of the Promise API with Axios to make multiple concurrent API requests from a React Native application.

[code language=”css”]
const concurrentRequests = [
axios.get(`${baseUrl}/api/users/1`),
axios.get(`${baseUrl}/api/users/2`),
axios.get(`${baseUrl}/api/users/3`),
];
// Using Promise.all
Promise.all(concurrentRequests)
.then((result) => {
console.log(result);
})
.catch((err) => {
console.log(err);
});
// Using Promise.allSettled
Promise.allSettled(concurrentRequests)
.then((result) => {
console.log(result);
})
.catch((err) => {
console.log(err);
});
[/code]

How to abort network request in Axios

Axios provides functionality for aborting network requests. A typical use case of this feature in React Native is the cancellation of network requests in the use effect hook when a component is unmounted while data is still in flight.

[code language=”css”]
useEffect(() => {
const source = axios.CancelToken.source();
const url = `${baseUrl}/api/users/${userId}`;
const fetchUsers = async () => {
try {
const response = await axios.get(url, { cancelToken: source.token });
console.log(response.data);
} catch (error) {
if(axios.isCancel(error)){
console.log(‘Data fetching cancelled’);
}else{
// Handle error
}
}
};
fetchUsers();
return () => source.cancel("Data fetching cancelled");
}, [userId]);
[/code]

How to create an instance of Axios

You can also create an instance of Axios with a custom configuration. Axios will merge the configuration object passed while creating the instance with the configuration passed to the instance method:

[code language=”css”]
const axiosInstance = axios.create({ baseURL: ‘https://reqres.in/’ });
axiosInstance.get(‘api/users/1’).then((response) => {
console.log(response.data);
});
[/code]

How to make GET request using Axios in React Native

Make a GET request to the /api/users endpoint to retrieve a user and store the user ID in state as shown in the code snippet below. You can change the user ID inside the onPress event handler attached to the Load User button. Changing the user ID will trigger a GET request to the API inside the useEffect hook.

After triggering a network request, we display a loading indicator on the screen. If we fetch the data successfully, we update state and remove the loading indicator. If we fail to retrieve the data for some reason, we stop the loading indicator and display an appropriate error message.

We abort the network request in the clean-up function if the user decides to close the app before getting a response from the server. Check the return value of the effect function in the useEffect hook. Following is the code in the App.js component:

[code language=”css”]
import axios from "axios";
import React, { useState, useEffect } from "react";
import {
StyleSheet,
Text,
ScrollView,
View,
Button,
Image,
Platform,
} from "react-native";
import Constants from "expo-constants";
const baseUrl = "https://reqres.in";
function User({ userObject }) {
return (
<View>
<Image
source={{ uri: userObject.avatar }}
style={{ width: 128, height: 128, borderRadius: 64 }}
/>
<Text style={{ textAlign: "center", color: "white" }}>
{`${userObject.first_name} ${userObject.last_name}`}
</Text>
</View>
);
}
export default function App() {
const [userId, setUserId] = useState(1);
const [user, setUser] = useState(null);
const [isLoading, setIsLoading] = useState(false);
const [hasError, setErrorFlag] = useState(false);
const changeUserIdHandler = () => {
setUserId((userId) => (userId === 3 ? 1 : userId + 1));
};
useEffect(() => {
const source = axios.CancelToken.source();
const url = `${baseUrl}/api/users/${userId}`;
const fetchUsers = async () => {
try {
setIsLoading(true);
const response = await axios.get(url, { cancelToken: source.token });
if (response.status === 200) {
setUser(response.data.data);
setIsLoading(false);
return;
} else {
throw new Error("Failed to fetch users");
}
} catch (error) {
if(axios.isCancel(error)){
console.log(‘Data fetching cancelled’);
}else{
setErrorFlag(true);
setIsLoading(false);
}
}
};
fetchUsers();
return () => source.cancel("Data fetching cancelled");
}, [userId]);
return (
<ScrollView contentContainerStyle={styles.container}>
<View style={styles.wrapperStyle}>
{!isLoading && !hasError && user && <User userObject={user} />}
</View>
<View style={styles.wrapperStyle}>
{isLoading && <Text> Loading </Text>}
{!isLoading && hasError && <Text> An error has occurred </Text>}
</View>
<View>
<Button
title="Load user"
onPress={changeUserIdHandler}
disabled={isLoading}
style={styles.buttonStyles}
/>
</View>
</ScrollView>
);
}
const styles = StyleSheet.create({
container: {
flex: 1,
backgroundColor: "dodgerblue",
alignItems: "center",
justifyContent: "center",
marginTop: Platform.OS === "ios" ? 0 : Constants.statusBarHeight,
},
wrapperStyle: {
minHeight: 128,
},
buttonStyles: {
padding: 100,
},
});
[/code]

How to make a POST request

POST is the HTTP method you use to send data to the server for updating or creating a resource. Making a POST request in Axios is similar to making a GET request. Most of the time, POST requests are made with user-generated data submitted using a form. Data requires validation on the client side before it is submitted.

Two main React packages for managing forms are Formik and React Hook Form. React Native form for the user’s full name and email in the code snippet below. Both TextInput components are controlled components.

After clicking the submit button, the TextInput fields and the submit button are disabled before you display a message to show you are creating the resource. Disabling the submit button ensures the user doesn’t make multiple submissions. After successfully submitting a POST request, you display a success message to the user:

[code language=”css”]
import axios from "axios";
import React, { useState, useEffect } from "react";
import {
StyleSheet,
Text,
ScrollView,
View,
Button,
Image,
Platform,
} from "react-native";
import Constants from "expo-constants";
const baseUrl = "https://reqres.in";
function User({ userObject }) {
return (
<View>
<Image
source={{ uri: userObject.avatar }}
style={{ width: 128, height: 128, borderRadius: 64 }}
/>
<Text style={{ textAlign: "center", color: "white" }}>
{`${userObject.first_name} ${userObject.last_name}`}
</Text>
</View>
);
}
export default function App() {
const [userId, setUserId] = useState(1);
const [user, setUser] = useState(null);
const [isLoading, setIsLoading] = useState(false);
const [hasError, setErrorFlag] = useState(false);
const changeUserIdHandler = () => {
setUserId((userId) => (userId === 3 ? 1 : userId + 1));
};
useEffect(() => {
const source = axios.CancelToken.source();
const url = `${baseUrl}/api/users/${userId}`;
const fetchUsers = async () => {
try {
setIsLoading(true);
const response = await axios.get(url, { cancelToken: source.token });
if (response.status === 200) {
setUser(response.data.data);
setIsLoading(false);
return;
} else {
throw new Error("Failed to fetch users");
}
} catch (error) {
if(axios.isCancel(error)){
console.log(‘Data fetching cancelled’);
}else{
setErrorFlag(true);
setIsLoading(false);
}
}
};
fetchUsers();
return () => source.cancel("Data fetching cancelled");
}, [userId]);
return (
<ScrollView contentContainerStyle={styles.container}>
<View style={styles.wrapperStyle}>
{!isLoading && !hasError && user && <User userObject={user} />}
</View>
<View style={styles.wrapperStyle}>
{isLoading && <Text> Loading </Text>}
{!isLoading && hasError && <Text> An error has occurred </Text>}
</View>
<View>
<Button
title="Load user"
onPress={changeUserIdHandler}
disabled={isLoading}
style={styles.buttonStyles}
/>
</View>
</ScrollView>
);
}
const styles = StyleSheet.create({
container: {
flex: 1,
backgroundColor: "dodgerblue",
alignItems: "center",
justifyContent: "center",
marginTop: Platform.OS === "ios" ? 0 : Constants.statusBarHeight,
},
wrapperStyle: {
minHeight: 128,
},
buttonStyles: {
padding: 100,
},
});
[/code]

How to make a DELETE request

DELETE requests using Axios the same way you make POST and PUT requests. DELETE request will delete a resource from the server side. You can replace the onSubmitFormHandler of the code for making a POST request with the event handler below to make a DELETE request.

[code language=”css”]
const onSubmitFormHandler = async (event) => {
if (!fullName.trim() || !email.trim()) {
alert("Name or Email is invalid");
return;
}
setIsLoading(true);
try {
const response = await axios.delete(`${baseUrl}/api/users/2`, {
fullName,
email,
});
if (response.status === 204) {
alert(` You have deleted: ${JSON.stringify(response.data)}`);
setIsLoading(false);
setFullName(”);
setEmail(”);
} else {
throw new Error("Failed to delete resource");
}
} catch (error) {
alert("Failed to delete resource");
setIsLoading(false);
}
};
[/code]

How to make a PUT request

Updating a resource requires either the PUT or PATCH method. If a resource exists, using the PUT method completely overwrites it, and creates a new resource if it doesn’t. PATCH makes partial updates to the resource if it exists and does nothing if it doesn’t.

Making a PUT request to an API is similar to making a POST request. The only difference is the configuration object passed to Axios, or the HTTP method needed to invoke to make a PUT request to the API. Replace the onSubmitFormHandler of the POST request with the code below to make a PUT request.

[code language=”css”]</pre>
const onSubmitFormHandler = (event) => {
if (!fullName.trim() || !email.trim()) {
alert("Name or Email is invalid");
return;
}
setIsLoading(true);
const configurationObject = {
url: `${baseUrl}/api/users/2`,
method: "PUT",
data: { fullName, email },
};
axios(configurationObject)
.then((response) => {
if (response.status === 200) {
alert(` You have updated: ${JSON.stringify(response.data)}`);
setIsLoading(false);
setFullName("");
setEmail("");
} else {
throw new Error("An error has occurred");
}
})
.catch((error) => {
alert("An error has occurred");
setIsLoading(false);
});
};
[/code]

How to handle errors

React-error-boundary (Simple reusable React error boundary component) is a simple reusable component based on React error boundary API that provides a wrapper around your components and automatically catches all errors from the children’s components hierarchy, and also provides a great way to recover your component tree. Create an Errorhandler component like the following code snippet.

[code language=”css”]</pre>
import * as React from "react";
import { ErrorBoundary } from "react-error-boundary";
import { View, StyleSheet, Button } from "react-native";
import { Text } from "components";
const myErrorHandler = (error: Error) => {
// Do something with the error
function ErrorFallback({ resetErrorBoundary }) {
return (
<View style={[styles.container]}>
<View>
<Text> Something went wrong: </Text>
<Button title="try Again" onPress={resetErrorBoundary} />
</View>
</View>
);
}
export const ErrorHandler = ({ children }: { children: React.ReactNode }) => (
<ErrorBoundary FallbackComponent={ErrorFallback} onError={myErrorHandler}>
{children}
</ErrorBoundary>
);
const styles = StyleSheet.create({
container: {
flex: 1,
flexDirection: "column",
alignItems: "stretch",
justifyContent: "center",
alignContent: "center",
paddingHorizontal: 12,
},
});
[/code]

Here you can find the sample code in this Github repository

Best Practices for using AXIOS

Global config

Set up a global configuration that handles all application requests using a standard configuration that is set through a default object that ships with Axios. This object contains:

    • baseURL: A relative URL that acts as a prefix to all requests, and each request can append the URL
    • headers: Custom headers that can be set based on the requests
    • Timeout: The point at which the request is aborted, usually measured in milliseconds. The default value is 0, meaning it’s not applicable.
    • With Credentials: Indicates whether or not cross-site Access-Control requests should be made using credentials. The default is false.
    • Response Type: Indicates the type of data that the server will return, with options including json (default), arraybuffer, document, text, and stream.
    • Response Encoding: Indicates encoding to use for decoding responses. The default value is utf8.
    • xsrfCookieName: The name of the cookie to use as a value for XSRF token, the default value is XSRF-TOKEN.
    • xsrfHeaderName: The name of the HTTP header that carries the XSRF token value. The default value is X-XSRF-TOKEN.
    • maxContentLength: Defines the max size of the HTTP response content in bytes allowed
    • maxBodyLength: Defines the max size of the HTTP request content in bytes allowed

Most of the time, only be using baseURL, header, and maybe timeout. The rest of them are less frequently needed as they have smart defaults, but it’s nice to know they are there in case you need to fix up requests.

Are you looking for a React Native developer

Contact Us

This is the DRYness at work. For each request, we don’t have to repeat the baseURL of our API or repeat important headers that we might need on every request.

Custom instance

Setting up a “custom instance” is similar to a global config, but scoped to specified components so that it’s still a DRY technique, but with hierarchy. Set up a custom instance in a new file (Ex: authAxios.js) and import it into the “concern” components.

[code language=”css”]
// authAxios.js
import axios from ‘axios’;
const customInstance = axios.create ({
baseURL : ‘https://axios-app.firebaseio.com’
})
customInstance.defaults.headers.post[‘Accept’] = ‘application/json’
// Or like this…
const customInstance = axios.create ({
baseURL : ‘https://axios-app.firebaseio.com’,
headers: {‘Accept’: ‘application/json’}
})
[/code]

Then import this file into the “concern” components:

[code language=”css”]

// form.js component import from our custom instance
import axios from ‘./authAxios’;
export default {
methods : {
onSubmit () {
axios.post(‘/users.json’, formData)
.then(res => console.log(res))
.catch(error => console.log(error))
}
}
}
[/code]

Axios Verbs

Group the Axios HTTP verbs, like GET, POST, DELETE, and PATCH, in the base config file, as below.

[code language=”css”]</pre>
export function getRequest(URL) {

return axiosClient.get(`/${URL}`).then(response => response);

}

export function postRequest(URL, payload) {

return axiosClient.post(`/${URL}`, payload).then(response => response);

}

export function patchRequest(URL, payload) {

return axiosClient.patch(`/${URL}`, payload).then(response => response);

}

export function deleteRequest(URL) {

return axiosClient.delete(`/${URL}`).then(response => response);
<pre>}
[/code]

Now import the custom functions directly wherever needed to make an API request, as in the code below.

[code language=”css”]</pre>
import { getRequest } from ‘axiosClient’;

async function fetchUser() {

try {

const user = await getRequest(‘users’);

} catch(error) {

//Log errors

}
<pre>}
[/code]

Interceptors

  • Interceptors helps with cases where the global config or custom instance might be too generic, in the sense that if you set up a header within their objects, it applies to the header of every request within the affected components. Interceptors have the ability to change any object properties on the fly. For instance, we can send a different header based on any condition we choose within the interceptor.
  • Interceptors can be in the main.js file or a custom instance file. Requests are intercepted after they’ve been sent out and allow us to change how the response is handled.

[code language=”css”]
// Add a request interceptor
axios.interceptors.request.use(function (config) {
// Do something before request is sent, like we’re inserting a timeout for only requests with a particular baseURL
if (config.baseURL === ‘https://axios-app.firebaseio.com/users.json’) {
config.timeout = 4000
} else {
return config
}
console.log (config)
return config;
}, function (error) {
// Do something with request error
return Promise.reject(error);
});
// Add a response interceptor
axios.interceptors.response.use(function (response) {
// Do something with response data like console.log, change header, or as we did here just added a conditional behaviour, to change the route or pop up an alert box, based on the reponse status
if (response.status === 200 || response.status 201) {
router.replace(‘homepage’) }
else {
alert(‘Unusual behaviour’)
}
console.log(response)
return response;
}, function (error) {
// Do something with response error
return Promise.reject(error);
});
[/code]

Conclusion

For most of your HTTP communication needs, Axios provides an easy-to-use API in a compact package.

There are some alternative libraries for HTTP communication, such as ky, a tiny and elegant HTTP client based on window.fetch; superagent, a small, progressive client-side HTTP request library based on XMLHttpRequest.

But Axios is a better solution for applications with a lot of HTTP requests and for those that need good error handling or HTTP interceptions.

We at Andolasoft has long expertise on API Request solution with AXIOS on a React Native App. We have highly experienced React Native and React developers to help you for the same. Book a free consultation on your issues.