Guide To Display Images In Grid View On IPhone

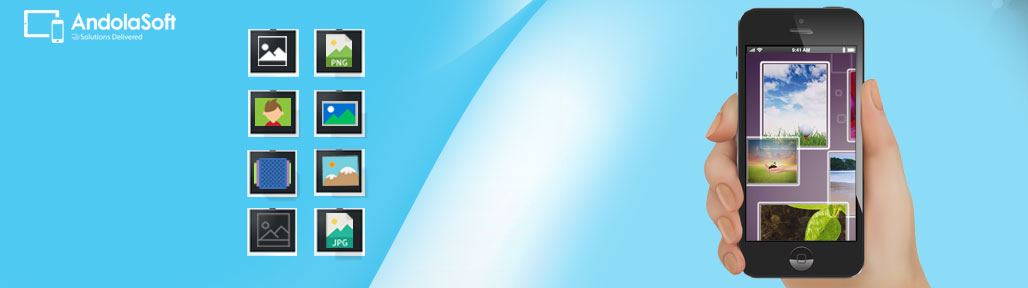
In some iOS apps, displaying images in a single view would make the UI lose its uniformity. It would be difficult to manage images of different resolution and impossible to keep track of thousand of images without using Grid View in iPhone.

This is just like a “Grid View” application. Here we will explore how to display images, programmatically in “Grid view” on an iPhone.

Here We Go…

Step 1:

  • Open Xcode
  • Create a View base applicationGridview-123
  • Give the application name “ImageGrid”.

Step 2:

The directory structure is automatically created by the Xcode which also adds up essential frameworks to it. Now, explore the directory structure to check out the contents of the directory.

Step 3:

Here you need to add one ‘NSObject’ class to the project.

  • Select  project -> New File -> Cocoa Touch -> Objective-C class
  • Give the class name “Images”.

Step 4:

Then add an image to the project and give the image name “icon.png”.

Step 5:

  • Open “ImageGridViewController” file and add ‘UITableViewDelegate’ and ‘UITableViewDataSource’
  • Define ‘UITableView’ and ‘NSMutableArray’ classes as well as the buttonPressed: method
  • Import the ‘Image.h’ class and make the following changes.

[sourcecode]#import <UIKit/UIKit.h>
#import "Image.h"
@interface ImageGridViewController:UIViewController <UITableViewDelegate, UITableViewDataSource> {
IBOutlet UITableView *tableView;
NSMutableArray  *sections;
}
@property (nonatomic, retain) UITableView *tableView;
@property (nonatomic, retain) NSMutableArray *sections;
-(IBAction)buttonPressed:(id)sender;
@end[/sourcecode]

Step 6:

  • Double click the ‘ImageGridViewController.xib’ file and open it in the Interface Builder.
  • First drag the ‘TableView’ from the library and place it in the view window.
  • Select ‘tableview’ from the view window and bring up connection inspector and connect ‘dataSource’ to the ‘File’s Owner’ and delegate to the ‘File’s Owner’ icon.
  • Now save the .xib file and go back to Xcode.

Step 7:

In the ‘ImageGridViewController.m’ file, make the following changes:

[sourcecode]#import "ImageGridViewController.h"
#import "Item.h" @implementation ImageGridViewController
@synthesize tableView,sections;

-(void)loadView{

[super loadView];
sections = [[NSMutableArray alloc] init];

for(int s=0;s<1;s++) { // 4 sections
NSMutableArray *section = [[NSMutableArray alloc] init];

for(int i=0;i<12;i++) {// 12 items in each section
Image *item = [[ Image alloc] init];
item.link=@"New Screen";
item.title=[NSString stringWithFormat:@"Item %d", i];
item.image=@"icon2.png";

[section addObject:item];
}
[sections addObject:section];
}
}

– (NSInteger)numberOfSectionsInTableView:(UITableView *)tableView {
return [sections count];
}

– (NSInteger)tableView:(UITableView *)tableView numberOfRowsInSection:(NSInteger)section {
return 1;
}

– (CGFloat)tableView:(UITableView *)tableView heightForRowAtIndexPath:(NSIndexPath*)indexPath {
NSMutableArray *sectionItems = [sections objectAtIndex:indexPath.section];
int numRows = [sectionItems count]/4;
return numRows * 80.0;
}

-(NSString *)tableView:(UITableView *)tableView titleForHeaderInSection:(NSInteger)section {

NSString *sectionTitle = [NSString stringWithFormat:@"Section  %d", section];
return sectionTitle;
}

– (UITableViewCell *)tableView:(UITableView *)tableView cellForRowAtIndexPath:(NSIndexPath *)indexPath {

static    NSString *hlCellID = @"hlCellID";

UITableViewCell *hlcell = [tableView dequeueReusableCellWithIdentifier:hlCellID];
if(hlcell == nil) {
hlcell = [[[UITableViewCell alloc]
initWithStyle:UITableViewCellStyleDefault reuseIdentifier:hlCellID] autorelease];
hlcell.accessoryType = UITableViewCellAccessoryNone;
hlcell.selectionStyle = UITableViewCellSelectionStyleNone;
}

int section = indexPath.section;
NSMutableArray *sectionItems = [sections objectAtIndex:section];

int n = [sectionItems count];
int i=0,i1=0;

while(i<n){
int yy = 4 +i1*74;
int j=0;
for(j=0; j<4;j++){

if (i>=n) break;
Image *item = [sectionItems objectAtIndex:i];
CGRect rect  = CGRectMake(18+80*j, yy, 40, 40);
UIButton *buttonImage=[[UIButton alloc] initWithFrame:rect];
[buttonImage setFrame:rect];
UIImage *buttonImageNormal=[UIImage imageNamed:item.image];
[buttonImage setBackgroundImage:buttonImageNormal forState:UIControlStateNormal];
[buttonImage setContentMode:UIViewContentModeCenter];
NSString *tagValue = [NSString stringWithFormat:@"%d%d", indexPath.section+1, i];
buttonImage.tag = [tagValue intValue];
//NSLog(@tag….%d", button.tag);
[buttonImage addTarget:self
action:@selector(buttonPressed:)forControlEvents:UIControlEventTouchUpInside];
hlcell.contentView addSubview:buttonImage];
[buttonImage release];

UILabel *label = [[[UILabel alloc]initWithFrame:CGRectMake((80*j)-4,                 yy+44, 80, 12)] autorelease];
label.text = item.title;
label.textColor = [UIColor blackColor];
label.backgroundColor = [UIColor clearColor];
label.textAlignment = UITextAlignmentCenter;
label.font = [UIFont fontWithName:@"ArialMT" size:12];
[hlcell.contentView addSubview:label];
i++;
}
i1 = i1+1;
}
return hlcell;
}
-(IBAction)buttonPressed:(id)sender {
int tagId = [sender tag];
int divNum = 0;
if(tagId<100)
divNum=10;
else
divNum=100;
int section = [sender tag]/divNum;
section -=1;// we had incremented at tag assigning time
int itemId = [sender tag]%divNum;
NSLog(@"…section = %d, item = %d", section, itemId);
NSMutableArray*sectionItems = [sections objectAtIndex:section];
Image    *item    =    [sectionItems objectAtIndex:itemId];
NSLog(@"Image selected…..%@, %@", item.title, item.link);

}

-(void)viewDidLoad{
[super viewDidLoad];
}

-(void)didReceiveMemoryWarning{
[super didReceiveMemoryWarning];
}

-(void)viewDidUnload{
// Release any retained subviews of the main view.
// e.g. self.myOutlet = nil;
}

-(void)dealloc{
[super dealloc];
}
@end[/sourcecode]

Step 8:

Open the ‘Image.h’ file and make the following changes:

[sourcecode]#import <Foundation/Foundation.h>
@interface Image:NSObject{
NSString*title;
NSString*link;
NSString*image;
}
@property(nonatomic, copy)NSString*title;
@property(nonatomic, copy)NSString*link;
@property(nonatomic, copy)NSString*image;
@end[/sourcecode]

Step 9:

Make the changes in the ‘Item.m’ file:

[sourcecode]#import "Image.h"
@implementation Item
@synthesize title, link, image;
@end[/sourcecode]

Step 10:

Now save it and compile it in the Simulator.

It would be smart to use Grid View to display a number of images in a single view because it enables to manage multiple images efficiently. Users are also facilitated to keep track of their images. It becomes eye soothing and looks great on the iPhone mobile devices.

Keep visiting regularly to Andolasoft blog to know our upcoming article about the process to show your android Smartphone captured images dynamically in “Grid View” Layout.

How to Import CSV Configuration File to Device’s SQLite db

Much like web applications, certain Android apps necessitate configuration adjustments to facilitate app testing and deployment across various environments.

Managing configurations for devices has become a critical task. One efficient way to handle configurations is by uploading them to an SQLite database within the device. This approach offers a structured and easily accessible repository for storing and retrieving configurations.

Incorporating distinct web services APIs, we employ the same Android APK to access data from both developmental and staging servers. Additionally, we exercise control over the integrated camera configuration within the Android APK.

Furthermore, seamless operationality demands the implementation of diverse configuration settings within the APK, dynamically applied without necessitating alterations to the source code during runtime.

  • We used different web services API to access data on server, so we need to use same android APK to access data in dev server as well as stager server.
  • We need to control the camera configuration integrated in android APK
  • Similarly, we need different configuration settings to set dynamically in APK without changing the source code at run-time.

Considering the above scenario, the best thing is to use CSV files, such as the properties files used in Java and .NET platform. In Android, we put CSV file in the device’s phone storage (in this example, the file path is “/storage/sdcard0/Android/data/com.example/”).

We have to write codes to read the CSV file and then spilt the data programmatically using separator. Then it has to be inserted in to a SQLite table (in this example uses ‘appconfigtbl‘).

The sample program in this blog will perform the below mentioned steps to achieve the above mentioned initialization of configuration value inside android app:

  • Check if the CSV file exists in the device with proper file path location defined in the APK
  • Use the asynchronous task that runs in the background of the app and initialize the CSV content to the targeted table.
  • While the data is imported from the CSV file to database, the user will see the progress bar of data being uploaded. In case of larger data, the progress bar dialog will be shown with the value of %completed.
  • Since the data is stored in a config-table, the app can retrieve the record from this table and use it in appropriate section.

Benefits:

  • The APK will be re-initialized with basic configuration data at any time.
  • No need to re-write the APK and compile it again.
  • Easier to setup and run inside the device. We get the changed configuration data at run time.
  • APK can be set up to a different configuration data base when required and can be deployed with different config data (CSV file) at different location easily.

Example of CSV File contents (appconfig.csv)

[sourcecode]
Config ID,Config Name,Config Value
validate_url,http://50.56.70.140/
webservice_url,http://50.56.70.140:8080/HOSTAPP/resources/inspection
camera_resolution_hight,800
camera_resolution_width,600
camera_flashlight_mode,auto
long_password,abc123
[/sourcecode]

Example of Layout xml

[sourcecode]
xmlns:tools="http://schemas.android.com/tools"
android:layout_width="match_parent"
android:layout_height="match_parent"
android:paddingBottom="@dimen/activity_vertical_margin"
android:paddingLeft="@dimen/activity_horizontal_margin"
android:paddingRight="@dimen/activity_horizontal_margin"
android:paddingTop="@dimen/activity_vertical_margin"
tools:context=".MainActivity" >

<TextView
android:id="@+id/showResult"
android:layout_width="wrap_content"
android:layout_height="wrap_content"
android:text="" />

[/sourcecode]

Example of  Main form Activity class

1. MainActivity.java

[sourcecode]
package com.example.csvdemo;

import java.io.BufferedReader;
import java.io.File;
import java.io.FileReader;
import java.util.Date;

import android.os.AsyncTask;
import android.os.Bundle;
import android.os.Environment;
import android.app.Activity;
import android.app.AlertDialog;
import android.app.Dialog;
import android.app.ProgressDialog;
import android.content.DialogInterface;
import android.content.Intent;
import android.content.SharedPreferences;
import android.content.res.Resources;
import android.database.Cursor;
import android.util.Log;
import android.view.Menu;
import android.widget.TextView;

public class MainActivity extends Activity {

private boolean isCsvFileNeedToInitialize = true;
private static final int DIALOG_DOWNLOAD_PROGRESS = 0;
private DBHelper mDbHelper;
private ProgressDialog mProgressDialog;
private static int totalRowsUpdate = 0;

public static final String external_sd = Environment.getExternalStorageDirectory().getAbsolutePath();
public static final File sdCard = Environment.getExternalStorageDirectory();
public static final String sdcardBaseDir = sdCard.getAbsolutePath();
public static final String externalPath = "/Android/data/com.example/";
public static final String csvFileName = "appconfig.csv";

@Override
protected void onCreate(Bundle savedInstanceState) {
super.onCreate(savedInstanceState);
setContentView(R.layout.activity_main);

mDbHelper = new DBHelper(this);
mDbHelper.open();
totalRowsUpdate = 0;

// create empty directory if not exist
File appDir = new File(sdcardBaseDir + externalPath);
if(!appDir.exists())
appDir.mkdirs();

File externalResourceFile = new File(sdcardBaseDir + externalPath + csvFileName);
isCsvFileNeedToInitialize = externalResourceFile.exists();
TextView lableResult = (TextView) findViewById(R.id.showResult);

if(isCsvFileNeedToInitialize)
{
new InitializeCSVFileAsync().execute("");

lableResult.setText( totalRowsUpdate + " fetched from ‘appconfig.csv’ into database successfully.");

} else {
lableResult.setText("’appconfig.csv’ not found!");
PopIt("Exit Application", "’appconfig.csv’ not found!");
}
}

public static void setTotalRecord(int ctr) {
totalRowsUpdate = ctr;
}

private void PopIt( String title, String message ){
AlertDialog.Builder alertbox = new AlertDialog.Builder(this);
alertbox.setTitle(title);
alertbox.setMessage(message);
alertbox.setPositiveButton("Ok", new DialogInterface.OnClickListener() {
public void onClick(DialogInterface arg0, int arg1) {
finish();
}
});
alertbox.show();
}

@Override
public boolean onCreateOptionsMenu(Menu menu) {
// Inflate the menu; this adds items to the action bar if it is present.
getMenuInflater().inflate(R.menu.main, menu);
return true;
}

@Override
protected Dialog onCreateDialog(int id) {
Resources res = getResources();
String reader = "";
int ctr = 0;
try {
File f = new File(sdcardBaseDir + externalPath + csvFileName);
BufferedReader in = new BufferedReader(new FileReader(f));
while ((reader = in.readLine()) != null) { ctr++; }
setTotalRecord(ctr);
}catch(Exception e) {    e.getMessage();  }

switch (id) {
case DIALOG_DOWNLOAD_PROGRESS:
mProgressDialog = new ProgressDialog(this);
mProgressDialog.setProgressDrawable(res.getDrawable(R.drawable.initialize_progress_bar_states));
mProgressDialog.setMessage("Initializing…");
mProgressDialog.setMax(ctr);
mProgressDialog.setProgressStyle(ProgressDialog.STYLE_HORIZONTAL);
mProgressDialog.setCancelable(false);
mProgressDialog.show();
return mProgressDialog;
default:
return null;
}
}

// Display Initialize progress bar for uploading CSVFiles to database
class InitializeCSVFileAsync extends AsyncTask<String, String, String>
{
@Override
protected void onPreExecute() {
super.onPreExecute();
mDbHelper.deleteCongigTableOldRecord();
if(isCsvFileNeedToInitialize)
showDialog(DIALOG_DOWNLOAD_PROGRESS);
}
@Override
protected String doInBackground(String… aurl) {
try {
float total = 0F;
float fctr = 1F;
String reader = "";
int ctr = 0;
boolean skipheader = true;
File f = new File(sdcardBaseDir + externalPath + csvFileName);
BufferedReader in = new BufferedReader(new FileReader(f));

while ((reader = in.readLine()) != null) {
// skip header column name from csv
if(skipheader) {
skipheader = false;
continue;
}
String[] RowData = reader.split(",");
mDbHelper.insertDB(RowData);
total += fctr;
publishProgress(""+(int)total);
//publishProgress((int)(total*100/lenghtOfFile));
}
in.close();
} catch(Exception e) {
e.getMessage();
}
return null;
}
protected void onProgressUpdate(String… progress) {
//Log.d("ANDRO_ASYNC",progress[0]);
mProgressDialog.setProgress(Integer.parseInt(progress[0]));
}
@Override
protected void onPostExecute(String unused) {

File f = new File(sdcardBaseDir + externalPath + csvFileName);
boolean result = f.delete();
if(isCsvFileNeedToInitialize)
dismissDialog(DIALOG_DOWNLOAD_PROGRESS);
mDbHelper.close();
//fillAllList();
}
protected void onDestroy() {
if (mDbHelper != null) {
mDbHelper.close();
}
}
}
}
[/sourcecode]

Example of  Helper class for sqlite database interaction:
Example of AbstractDbAdapter java

[sourcecode]
package com.example.csvdemo;

import android.content.Context;
import android.database.SQLException;
import android.database.sqlite.SQLiteDatabase;
import android.database.sqlite.SQLiteOpenHelper;

public abstract class AbstractDbAdapter {

protected static final String TAG = "ExampleDbAdapter";
protected DatabaseHelper mDbHelper;
protected SQLiteDatabase mDb;

protected static final String CONFIG_TABLE_CREATE =
"create table appconfigtbl (_id integer primary key," + "config_name text not null," + "config_value text," + " createdAt text, " + " updatedAt text);";

protected static final String DATABASE_NAME = "example";
protected static final int DATABASE_VERSION = 2;

protected final Context mCtx;

protected static class DatabaseHelper extends SQLiteOpenHelper {

DatabaseHelper(Context context) {
super(context, DATABASE_NAME, null, DATABASE_VERSION);
}
@Override
public void onCreate(SQLiteDatabase db) {
db.execSQL(CONFIG_TABLE_CREATE);
}
@Override
public void onUpgrade(SQLiteDatabase db, int oldVersion, int newVersion) {
db.execSQL("DROP TABLE IF EXISTS CONFIG_TABLE_CREATE");
onCreate(db);
}
}

public AbstractDbAdapter(Context ctx) {
this.mCtx = ctx;
}

public AbstractDbAdapter open() throws SQLException {
mDbHelper = new DatabaseHelper(mCtx);
mDb = mDbHelper.getWritableDatabase();
return this;
}

public void close() {
if (mDbHelper != null) {
mDbHelper.close();
}
//mDbHelper.close();
}
}
[/sourcecode]

Example of DBHelper java

[sourcecode]
package com.example.csvdemo;

import java.io.File;
import java.io.FileOutputStream;
import java.io.IOException;
import java.io.InputStream;
import java.io.OutputStream;
import java.sql.SQLException;
import java.util.ArrayList;
import java.util.Date;
import java.util.Hashtable;
import java.util.Vector;

import android.content.ContentValues;
import android.content.Context;
import android.database.Cursor;
import android.util.Log;

public class DBHelper extends AbstractDbAdapter{

public static final String KEY_ROWID = "_id";
public static final String KEY_CONFIG_NAME = "config_name";
public static final String KEY_CONFIG_VALUE = "config_value";
public static final String KEY_POSTED_DATE = "createdAt";
public static final String KEY_EDITED_DATE = "updatedAt";
public int maxLevelOnCurrentMenu = 1;

public int getMaxLevelOnCurrentMenu() {
return maxLevelOnCurrentMenu;
}

public void setMaxLevelOnCurrentMenu(int maxLevelOnCurrentMenu) {
this.maxLevelOnCurrentMenu = maxLevelOnCurrentMenu;
}

public static final String DATABASE_TABLE = "appconfigtbl";

public DBHelper(Context ctx) {
super(ctx);
}

public long insertDB(String config_name,String config_value, String createdAt, String updatedAt) {
ContentValues initialValues = new ContentValues();
initialValues.put(KEY_CONFIG_NAME, config_name);
initialValues.put(KEY_CONFIG_VALUE, config_value);
initialValues.put(KEY_POSTED_DATE,createdAt);
initialValues.put(KEY_EDITED_DATE,updatedAt);
return mDb.insert(DATABASE_TABLE, null, initialValues);
}

public long insertDB(String[] RowData)
{
long result = 0;
ContentValues values = new ContentValues();
values.put(KEY_CONFIG_NAME, RowData[0]);
values.put(KEY_CONFIG_VALUE, RowData[1]);
values.put(KEY_POSTED_DATE, "");
values.put(KEY_EDITED_DATE, "");
result = mDb.insert(DATABASE_TABLE, null, values);
return result;
}

public boolean deleteList(long rowId) {

return mDb.delete(DATABASE_TABLE, KEY_ROWID + "=" + rowId, null) > 0;
}

public boolean deleteCongigTableOldRecord() {

return mDb.delete(DATABASE_TABLE,  null, null) > 0;
}

}
[/sourcecode]

Example of initialize_progress_bar_states.xml [Used to show progressbar UI %progress value]

[sourcecode]

<gradient
android:startColor="#98887b"
android:centerColor="#ddd7c9"
android:centerY="0.95"
android:endColor="#0d1522"
android:angle="270"
/>

<corners
android:bottomRightRadius="7dp" android:bottomLeftRadius="7dp"
android:topLeftRadius="7dp" android:topRightRadius="7dp"/>

<gradient
android:startColor="#74c43f"
android:centerColor="#4a9c14"
android:centerY="0.85"
android:endColor="#06101d"
android:angle="270"
/>
<corners
android:bottomRightRadius="7dp" android:bottomLeftRadius="7dp"
android:topLeftRadius="7dp" android:topRightRadius="7dp"/>

[/sourcecode]

You’re just 2 steps away from implementing ‘Backbone’ in Rails 3

backbone1-300x300-123

Before illustrating steps to implement ‘Backbone.js’, let me explain what ‘Backbone.js’ really is. It is a convenient way to organize client side ‘JavaScript’ code into MVC pattern of Rails server applications. Just like in Rails, It has ‘Models’ to represent data, ‘Views’ to render it and ‘Controllers’ to coordinate between the two. It also has an object called “collection” which manages a list of models. Backbone was also designed with Rails backend in mind, and is easier to connect to a server application using JSON in order to transfer data back and forth.

Why need to implement ‘Backone.js’ into Rails applications:

  • The major advantage of “Backbone.js” is that it’s simple, lightweight, and provides structure to organize large JavaScript projects.
  • “Backbone.js” helps to reduce the load of server for code that really doesn’t need to be executed server-side.
  • Flexible with regards to data persistence.
  • Easier integration with RESTful interfaces.
  • “Backbone.js” gives structure to web applications by providing models with key-value binding and custom events, collections with a rich API of enumerable functions, views with declarative event handling, and connects it all to your existing API over a RESTful JSON interface.

Architecture of “Backbone.js”

Integration

Step#1

  • In rails 3.x

In Gemfile add below line

[sourcecode]gem ‘rails-backbone'[/sourcecode]

Run “bundle install”

Then install “Backbone.js” in the app by running the following command

[sourcecode]rails g backbone:install[/sourcecode]

This creates the following Directory structure under app/assets/javascripts/backbone.

[sourcecode]backbone/
routers/  (maps HTML routes to actions)
models/  (maintains state)
templates/ (presents clientside views)
views/ (presents model data in the DOM)[/sourcecode]

To setup initial requirements and name spacing, it also creates a coffee script file as app_name.js.coffee.

[sourcecode]app/assets/javascript/backbone/app_name.js.coffee[/sourcecode]

Step#2

It also provides 3 simple generators which only create client side JavaScript code

Create a backbone model and collection inside app/assets/javascripts/backbone/models to be used to communicate with rails backend.

[sourcecode]rails g backbone:model model_name field_name:datatype[/sourcecode]

Create a backbone router with corresponding views and templates for the actions.

[sourcecode]rails g backbone:router[/sourcecode]

For Scaffolding

[sourcecode]rails g backbone:scaffold[/sourcecode]

Example

Create a new rails application called Demo

[sourcecode]rails new Demo[/sourcecode]

Edit, /Gemfile.rb

[sourcecode]gem ‘rails-backbone'[/sourcecode]

Install the gem and generate scaffolding by running following commands

[sourcecode]bundle install
rails g backbone:install
rails g scaffold Job title:string description:string
rake db:migrate
rails g backbone:scaffold Job title:string description:string[/sourcecode]

Edit the jobs index view (app/views/jobs/index.html.erb)

[sourcecode]<div id="jobs"></div>
<script type="text/javascript">
$(function() {
// Demo is the app name
window.router = new Demo.Routers.JobsRouter({jobs: <%= @jobs.to_json.html_safe -%>});
Backbone.history.start();
});

</script>[/sourcecode]

Now start the server

[sourcecode]rails s[/sourcecode]

Then browse “localhost:3000/jobs” and now you will get a fully functioning single page crud app for Job model.

Benefits of implementing backbone on Rails application:

  • ‘Backbone’ speeds up loading of WebPages.
  • Backbone implementation is comparatively easier for the developers working on JavaScript applications.
  • It uses minimal set of data-structuring (Models and Collections) and user interface (Views and URLs).
  • It also facilitates in improving and maintaining the application structure.

How Do I Implement Localization In IOS Apps?

We know that, all the apps in the Apple App Store are English-speaking, i.e. the menu, information, settings and everything else is in English. However, the apps become almost useless for the consumers from non native English speaking countries. Hence, it becomes essential for the developers to release apps with multiple language support. This is where internationalization and localization comes in handy which facilitates the iOS application developers to support numerous native languages that greatly increase the global user experience.

What Exactly Is Internationalization And Localization?

  • Internationalization and localization means adapting the software product to different languages, regional differences and technical requirements of a targeted market.
  • Internationalization is the process of designing a software application, so that it can be adapted to various languages and regions without engineering changes.
  • Localization is the process of accommodating internationalized software product for a specific region or language by adding locale-specific components and translating text.

Here Is An Example To Help You Grasp The Concept:

Let’s say there is an iPhone/iPad application made for Brazilian client and he needs to localize that product to Portuguese language so that every users of Brazil can use it.

Each and every application must contain some hardcoded strings. We need to pull all of these hardcoded strings into a separate file so that we can localize them.

To do this, create a “.strings” file in the Xcode to contain all of the strings that your project needs. Then the hardcoded strings should be replaced with a function call to look up the appropriate string from the “.strings” file based on the current language.

For example:

To create a “.string” file, follow below mentioned steps

  • Select the Project group in Xcode, and navigate to File >>New >>New File.
  • Choose iOS >>Resource >>Strings File, and click Next, as shown in the below snapshot.
  • Name the new file Localizable.strings, and then click Save.

Note that the “Localizable.strings” is the default filename; iOS looks for when dealing with localized text. If you rename the file, you’ll need to specify the name of the .strings file every time.

The format for the strings file is:

[sourcecode]"KEY" = "CONTENT";[/sourcecode]

For our ‘Account’ text add in:

[sourcecode]"TITLE" = "Account";[/sourcecode]

Now switch to “ViewController.m”, and find the “viewDidLoad” method. Now you can set the text as below:

[sourcecode]self.titleLabel.text = @"Account";[/sourcecode]

We want it to read from our “.strings” file. For this, you need to change the current line to use a macro called “NSLocalizedString” as shown below:

[sourcecode]self.titleLabel.text = NSLocalizedString(@"TITLE", nil);[/sourcecode]

Adding A Portuguese Localization

Steps to add a Portuguese localization are as follows:

  • You need to select “Localizable.strings”, and open the Info pane.
  • You can do this by selecting the 3rd tab in the top toolbar of the View section, and selecting the 1st tab in the top section, as shown in the below screenshot.

To add support for another language execute following steps:

  • You need to simply click on the ‘+’ (Plus) in that ‘Localization’ pane on the right of the view.
  • At first it will create localization for English.
  • If the “Localizable.Strings” deselect after your click then select the “Localizable.Strings” again. After the “Localizable.Strings” selected click the ‘+’ button once again and choose ‘Portuguese(pt)’ from the dropdown.

Now, Xcode has set up some directories containing a separate version of “Localizable.strings” for each language that you selected, behind the scenes. To view this for yourself, go to your project folder in Finder and open it. There you’ll get the following:

  • ‘en.lproj’ and ‘pt.lproj’ contain language-specific versions of files.
  • ‘en’ is the localization code for English, whereas ‘pt’ is for Portuguese.

To change the text for Portuguese, select ‘Localizable.strings (Portuguese)’ and change the text as follows:

[sourcecode]"TITLE" = "Conta";
“Back” = “Voltar”;
etc.
[/sourcecode]

It’s all about how to localize a string. But you also need to localize the UI, as the text length for a button may vary in different languages.

How To Adjust UI Elements:

Let’s discuss about how to localize the button text.

  • For Portuguese let’s say the button text is ‘MODIFICAR’.
  • The problem is that you need your button border to be relatively tight around the text. This isn’t a problem for title label because there is no constraint on its width, but here you’ll need to adjust the size of the button to make it look perfect.
  • If you simply change the text in “viewDidLoad” it will look odd, as the text of that button may or may not fit into it.

So you need to add localization to your “xib” and make the button bigger in Portuguese.

  • Go to “ViewController.xib” and in the info pane on the right of the view, click the ‘+’ button to add a Localization and choose Portuguese.
  • Note you may need to scroll down in the Info pane as it has some Interface Builder content in that side.
  • Now we have copy of “ViewController.xib” in our Portuguese folder (pt.lproj).
  • Select “ViewController.xib (Portuguese)”, and edit the button text in that version to say ‘MODIFICAR’.
  • It will resize the button by default.

Once, all the set up is done perfectly, delete the application from simulator/device and select Project>>Clean to get a fresh build and install. Then build and run your app.

How To Apply Localization For Images:

If you have text in your image you need to localize it.Follow the steps mentioned below.

  • Select the .jpg file and add localization for Portuguese.
  • Check out the project folder.
  • The ‘.jpg’ image file has been added to the English folder (en.lproj) and then copied to the Portuguse folder (pt.lproj).
  • To make a different image for the Portuguese version, you need to overwrite the image in the Portuguese folder.
  • Rebuild and get the final result!

Benefits:

It is better to have localization in your iOS apps to target the global users. The app will display the contents according to the visitor’s language.

  • Same information can be shared across the world.
  • Great user experience.

4 Simple Steps To Implement “Delayed Job” In Rails

Here in this article, I going to tell you the best way to implement “delayed job” in rails

“delayed_job” is a ruby gem used to execute tasks as a background process in Rails environment, increasing page rendering speed.

Delayed::Job (or DJ) allows you to move jobs into the background for asynchronous processing.

Why you need a background process and is it really that important!

Let’s consider a scenario where a mailing application needs to send emails to a huge list of recipients. In such cases it is obvious that the processing time is too long, annoying the users.

Here are some of key points to consider:

  • Incredibly quick & easy to get rolling
  • No addition to your “stack”, runs just fine with Active Record
  • Good choice for beginners while migrating code from foreground to the background

Hence, it’s only wise to move the long running tasks as a background process by using “delayed_job” gem.

Detailed steps to integrate delayed job in a Rails application

Step# 1

  • Add gem to the Gemfile
  • “delayed_job” supports multiple back-ends for storing the job queue
  • To use “delayed_job” with Active Record, use gem ‘delayed_job_active_record’
  • To use “delayed_job” with Mongoid, use gem ‘delayed_job_mongoid’

Example

/Gemfile.rb

  • gem ‘delayed_job_active_record’, ‘4.0.3’
  • Run “bundle install” to install the “delayed_job” gem

Step# 2

  • Generate the related file for the Job run
  • Generate related files required to run the background job by running the following command
    • rails g delayed_job:active_record

It adds following files to the application

  • A Script named “delayed_job” inside “/bin” folder to run the jobs which are in queue.
  • Migration file to create a table to store the job with other information such as priority, attempts, handler, last_error, run_at, locked_at, failed_at, locked_by, queue.

Run the migration file by using the following command

  • rails db:migrate

Set the queue_adapter in config/application.rb

  • config.active_job.queue_adapter = :delayed_job

If you are using the protected_attributes gem, it must appear before delayed_job in your gemfile. If your jobs are failing with:

  • Setup Delayed::Job config in an initializer (config/initializers/delayed_job_config.rb)
    • Delayed::Worker.destroy_failed_jobs = false
    • Delayed::Worker.sleep_delay = 60
    • Delayed::Worker.max_attempts = 3
    • Delayed::Worker.max_run_time = 5.minutes
    • Delayed::Worker.read_ahead = 10
    • Delayed::Worker.default_queue_name = ‘default’
    • Delayed::Worker.delay_jobs = !Rails.env.test?
    • Delayed::Worker.raise_signal_exceptions = :term
    • Delayed::Worker.logger = Logger.new(File.join(Rails.root, ‘log’, ‘delayed_job.log’))

Step# 3

  • Replace script/delayed_job with bin/delayed_job
  • Start up the jobs process

There are two ways to do this.

  • If application is in development mode, we would use the below rake task instead.
    • rake jobs:work
  • If application is in production mode, then it is preferred to use the “delayed_job” script. This demonizes the job process and allows multiple background processes to be spawned.

To use this, pursue the following steps

  • Add gem “daemons” to your Gemfile
  • Run bundle install
  • Make sure you’ve run rails generate delayed_job
  • If you want to just run all available jobs and exit you can use rake jobs:workoff
  • Work off queues by setting the QUEUE or QUEUES environment variable.
    • QUEUE=tracking rake jobs:work
    • QUEUES=mailers,tasks rake jobs:work

Step# 4

  • Add task to run in background
  • In Controller just call .delay.method(params) on any object and it will be processed in the background.

Example:

UsersController before adding to background job

[code language=”html”]
class UsersController < ApplicationController
def send_email
User.find_each(is_subscribed: true) do |user|
NewsMailer.newsletter_mail(user).deliver
flash[:notice] = "Mail delivered"
redirect_to root_path
end
end
end
[/code]

 
UsersController after adding to background job

[code language=”html”]
class UsersController < ApplicationController
def send_email
User.find_each(is_subscribed: true) do |user|
# add .delay method to add it to background process. In case of mail sending remove the .deliver method to make it work.
NewsMailer.delay.newsletter_mail(user)
flash[:notice] = "Mail delivered"
redirect_to root_path
end
end
end
[/code]

Advantages of implementing above steps:

  • No more waiting for a response, after clicking a link to do a big stuff.
  • Just call .delay.method(params) on any object and it processes in the background.
  • Job objects are serialized to yaml and stored in the delayed_jobs table, so they can be restored by the job runner later.
  • It automatically retries on failure. If a method throws an exception it’s caught and the method reruns later. The method retries up to 25 times at increasingly longer intervals until it passes.
  • “delayed_job” gem maintains log by creating a log file “/log/delayed_job.log”

I am sure this article will give you a clear idea about the way to implement “delayed job” in rails. You can share your thoughts with comments if I have missed anything or if you want to know more.

Do you work on or use Ruby on Rails? Let’s Discuss!

Example of Webview Layouts and How to use in Android

clip_image002-176x300

What is WebView class?

The WebView class is a subclass of “android.view” class that facilitates to fetch external URL running in web server and display it in device’s screen. It is specifically useful for displaying dynamic contents from the web server application. However, it will show only the contents, not the features of a fully html based web browser functionality.

In the WebView app, we implemented following steps to display the web content on device and also enabling the app to upload file to the web page contents:

  1. Verify the availability of device’s network connection
  2. Add progress bar logic for on click event of hyper-link in web page
  3. Add ability to upload file from local file storage on device through webview.

The only Requirement is…

External website URL should have UI contents compatible with the android device’s screen resolution.

Example of xml for activity

[sourcecode]
android:orientation="vertical"
android:layout_width="fill_parent"
android:layout_height="fill_parent"
>

android:id="@+id/webview1"
android:layout_width="fill_parent"
android:layout_height="fill_parent"
/>

[/sourcecode]

Example of Main Activity class

[sourcecode]1.MainClass.java
=======================
package com.webviewdemo;
import java.security.KeyManagementException;
import java.security.NoSuchAlgorithmException;
import java.security.SecureRandom;
import javax.net.ssl.HttpsURLConnection;
import javax.net.ssl.SSLContext;
import javax.net.ssl.TrustManager;
import android.app.Activity;
import android.app.AlertDialog;
import android.app.ProgressDialog;
import android.content.Context;
import android.content.DialogInterface;
import android.content.Intent;
import android.graphics.Bitmap;
import android.net.ConnectivityManager;
import android.net.Uri;
import android.net.http.SslError;
import android.os.Bundle;
import android.view.KeyEvent;
import android.view.View;
import android.view.Window;
import android.webkit.SslErrorHandler;
import android.webkit.ValueCallback;
import android.webkit.WebChromeClient;
import android.webkit.WebSettings;
import android.webkit.WebView;
import android.webkit.WebViewClient;
import android.widget.ProgressBar;
import android.widget.Toast;
public class MainClass extends Activity {

WebView webview;
ProgressDialog  progressBar;
ProgressBar progressBar1;
MainClass _activity;
AlertDialog alertDialog;
boolean loadingFinished = true;
boolean redirect = false;
private ValueCallback mUploadMessage;
private final static int FILECHOOSER_RESULTCODE = 1;
/** Called when the activity is first created. */
@Override
public void onCreate(Bundle savedInstanceState) {
super.onCreate(savedInstanceState);
progressBar = null;
this.getWindow().requestFeature(Window.FEATURE_PROGRESS);
_activity = this;
setContentView(R.layout.main );
webview = (WebView) findViewById( R.id.webview1 );
WebSettings settings = webview.getSettings();
settings.setJavaScriptEnabled(true);
settings.setSupportZoom(true);
settings.setBuiltInZoomControls(true);
settings.setCacheMode(WebSettings.LOAD_NO_CACHE);
webview.setScrollBarStyle(WebView.SCROLLBARS_OUTSIDE_OVERLAY);
webview.setWebChromeClient(new WebChromeClient()
{
//The undocumented magic method override
//Eclipse will swear at you if you try to put @Override here
public void openFileChooser(ValueCallback uploadMsg) {
mUploadMessage = uploadMsg;
Intent i = new Intent(Intent.ACTION_GET_CONTENT);
i.addCategory(Intent.CATEGORY_OPENABLE);
i.setType("image/*");
MainClass.this.startActivityForResult(Intent.createChooser(i,"File Chooser"), FILECHOOSER_RESULTCODE);
}
});
if(checkInternetConnection(_activity)==true){
if(savedInstanceState==null)
webview.loadUrl("https://www.andolasoft.com/");
else
webview.loadUrl("https://www.andolasoft.com/");
alertDialog = new AlertDialog.Builder(this).create();
progressBar = ProgressDialog.show(MainClass.this, "Please wait…", "Loading…");
webview.setWebViewClient(new WebViewClient() {
@Override
public boolean shouldOverrideUrlLoading(WebView view, String urlNewString) {
if (!loadingFinished) {
redirect = true;
}
loadingFinished = false;
webview.loadUrl(urlNewString);
return true;
}
public void onReceivedSslError (WebView view, SslErrorHandler handler, SslError error) {
handler.proceed() ;
}
@Override
public void onPageFinished(WebView view, String url) {
if(!redirect){
loadingFinished = true;
}
if(loadingFinished && !redirect){
//HIDE LOADING IT HAS FINISHED
if (progressBar != null && progressBar.isShowing()) {
progressBar.hide();
}
} else{
redirect = false;
}
}
@Override
public void onPageStarted(WebView view, String url, Bitmap favicon) {
super.onPageStarted(view, url, favicon);
loadingFinished = false;
progressBar.show();
}});
}
else{
AlertDialog.Builder builder = new AlertDialog.Builder(_activity);
builder.setMessage("Please check your network connection.")
.setCancelable(false)
.setPositiveButton("OK", new DialogInterface.OnClickListener() {
public void onClick(DialogInterface dialog, int id) {
Intent intent = new Intent(Intent.ACTION_MAIN);
intent.addCategory(Intent.CATEGORY_HOME);
intent.setFlags(Intent.FLAG_ACTIVITY_NEW_TASK);
startActivity(intent);
finish();
}
});

AlertDialog alert = builder.create();
alert.show();
}
}

public static boolean checkInternetConnection(Activity _activity) {
ConnectivityManager conMgr = (ConnectivityManager) _activity.getSystemService(Context.CONNECTIVITY_SERVICE);
if (conMgr.getActiveNetworkInfo() != null
&& conMgr.getActiveNetworkInfo().isAvailable()
&& conMgr.getActiveNetworkInfo().isConnected())
return true;
else
return false;
}
@Override
protected void onActivityResult(int requestCode, int resultCode,
Intent intent) {
if (requestCode == FILECHOOSER_RESULTCODE) {
if (null == mUploadMessage)
return;
Uri result = intent == null || resultCode != RESULT_OK ? null
: intent.getData();
mUploadMessage.onReceiveValue(result);
mUploadMessage = null;

}
}
@Override
public boolean onKeyDown(int keyCode, KeyEvent event) {
if (keyCode == KeyEvent.KEYCODE_BACK){
if(webview.canGoBack()){
webview.goBack();
return true;
}
}
return super.onKeyDown(keyCode, event);
}
}
[/sourcecode]

Example of User’s permission mentioned in androidmanifest.xml

[sourcecode]

[/sourcecode]

WebView is really helpful in creating quick Mobile UI without using complex Views/Layouts of Android. A HTML developer can easily build a web page with dynamic contents using CSS/HTML tags. Generally, we can run everything on WebView i.e., in android browser we can run jQuery, Flash enabled app while replicating the web based platform to mobile based smaller screen.

Benefits:

WebView are useful in following cases:

  • Since the web contents are dynamically updated at server side, the android app will display the updated contents just by fetching from site through WebView.
  • Web apps can be easily integrated to native application through WebView controls.