What’s New In Android L, Windows 8.1 And IOS 8

As all the three major mobile players in smartphone categories  i.e. Apple, Google and Microsoft come up with their latest version of Operating Systems i.e. iOS 8, Android L & Windows 8.1 respectively. Let’s have a look how it is worthy for users to switch over the most-recent OS version based upon the new features.

Android L:-

  • Personalized unlocking features, which make your smartphone or tablet search for familiar Bluetooth’s gadgets, Wi-Fi networks, locations and even voice imprints to deactivate any lock screen protections, letting you jump straight into your phone when it knows you’re nearby. If the device can’t detect any of this metrics, anyone trying to use it will be presented with the standard lock screen.
  • Google is focusing on its stock android keyboard for Android 5.0 Lollipop for adding more personalized and scrapping the individual tiled keys.
  • There is one more exciting feature i.e. “Do Not Disturb mode”, which automatically deactivates all notifications and audio during set times, support for Bluetooth 4.1 and a completely redesigned audio back end with support for USB audio devices.
  • Also Android L is going to introduce 64-bit processor support and  improving battery life with Project Volta. Project Volta includes a new battery historian which will help users work out what a device was doing at any given point in a battery cycle to find out which apps are draining the most power.

Windows 8.1 :–

Microsoft has already rolled out windows 8.1 few months back. Some of the features that were added windows phone 8.1:

  • Cortana, which is very much similar to Siri in iOS device, act as your personal assistant. Cortana notebook features store things that you tell her about yourself and also keep tracks what you like and what you’d like done. It can access apps, set alarms, send messages to specific persons, post a Facebook status, add a tweet, search for something and a lot more.
  • The action center which is finally added, and here you can get all your notifications and other controls such as setting Bluetooth, and Wi-Fi.
  • Another interesting feature that added to windows 8.1 was Quiet Hours. Here You can set what time you want your phone to be “quiet,” shutting out noise or notifications coming from it.

There is some other new features like setting up your personal photos as the background on the said start screen, connects you to free Wi-Fi hotspots near you through Wi-Fi sense, transferring files from the internal memory and SD-card seamless through Storage Sence etc.

iOS 8:-

iOS 8 also launched with lots of new features and here I am going to share few of them:

  • iPhone has new feature “Send Last Location” which allows your iPhone (or iPad) to send its last-known location to Apple when the battery drains to a critical level. If you lost your device, it will help you to find the last location of your device even if it’s battery is completely drained.
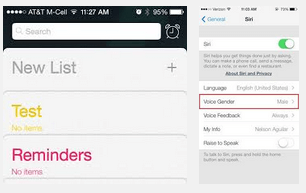
  • You can now include photos when making notes, to-do lists and reminders in Apple’s iOS 8 notes app.
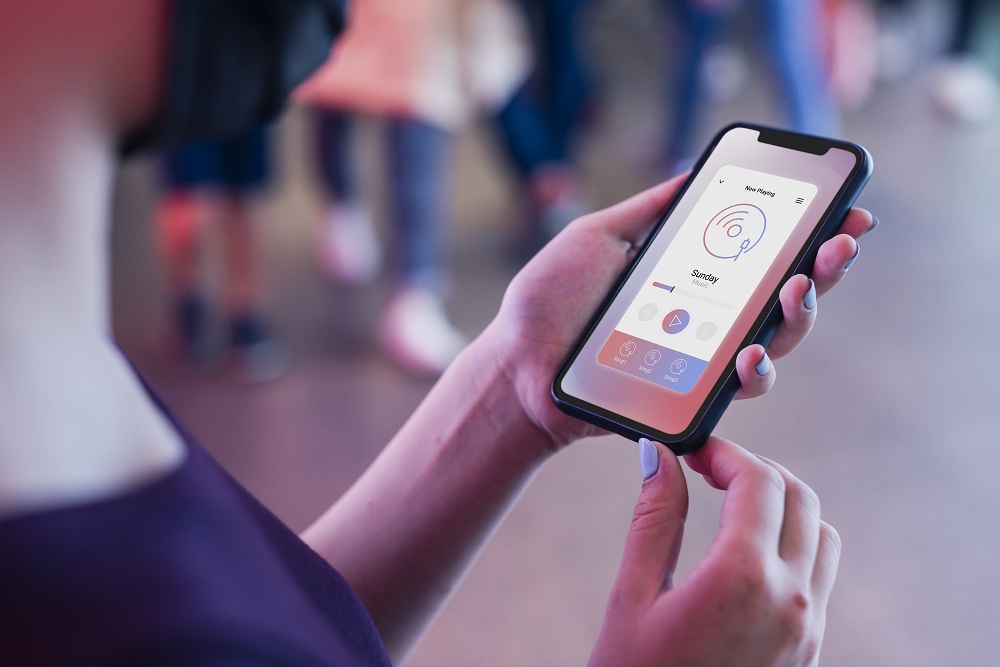
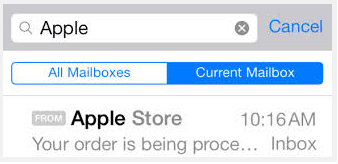
  • Now iPhone can identify the song due to Shazam integration in Siri. If you ask Siri, “What song is playing?”, it will cause her to listen to the ambient sound, using Shazam to identify music.
  • You can notice iOS 8 has new keyboard with a very smooth predictive type features, which suggests three words right above the keyboard.

I hope you liked this post. What you would like to prefer- Android L, iOS 8 or windows 8.1 and why. Please share your answer in the below comment section

Recommended Blog: Useful features of iOS 7

Looking to make your mobile application dreams come true? Contact us today to make it a reality.

How To Enhance Image Processing With Core Image In IOS Apps

Core Image is a powerful framework for image processing and analysis technology designed to provide real-time processing for still and video images. This helps you easily apply filters to images, such as modifying the hue, exposure or vibrant. It uses the GPU or CPU rendering path to process the image data very fast.

Core Image can be chained with multiple filters to an Image or video frame at once by creating custom effects. Core Image provides us more than 90 built-in filters on iOS and over 120 on OS X. You can set up filters by supplying key-value pairs for a filter’s input parameters. You can use the output of one filter as the input of another filter, to create amazing effects.

Here is how the Core Image is related to the iOS operating system

core-image-1024x415

Before going into Core Image, let’s know about the classes used in the Core Image framework:

CIContext:

The CIContext is a class which provides an evaluation context for rendering a CIImage object. CIContext class is used to take advantage of the built-in Core Image filters while processing an image.

CIImage:

The CIImage is a class which represent an image or holds an image data which may be created from a UIImage, from an image file, or from pixel data.

CIFilter:

The CIFilter class produces a CIImage object as output. A filter takes one or more images as input. The filter class has a dictionary that defines the attributes,so the parameters of a CIFilter object are set and retrieved through the use of key-value pairs. This helps us to add some beautiful effect on the input image.

Sample example:

In this example local image path is used in resource file to apply effects.

// 1 Retrieving the localimage.png path from resource bundle

NSString *filePath =
  [[NSBundle mainBundle] pathForResource:@"localimage" ofType:@"png"];
NSURL *fileNameAndPath = [NSURL fileURLWithPath:filePath];

// 2 Converting the normal image to CIImage object by passing the URL of original localimage.png

CIImage *beginImage =
  [CIImage imageWithContentsOfURL:fileNameAndPath];

// 3 Adding the filter SepiaTone effect to the localimage.png

CIFilter *filter = [CIFilter filterWithName:@"CISepiaTone"
                              keysAndValues: kCIInputImageKey, beginImage,
                    @"inputIntensity", @0.8, nil];
CIImage *outputImage = [filter outputImage];

// 4 showing the output image in the UIImageView

IImage *newImage = [UIImage imageWithCIImage:outputImage];
self.imageView.image = newImage;

Note : Here we can change the value of the CIFilter value which is given 0.8 by using a slider which min value is 0 and max value is 1.

Here we have not used the CIContext to perform an CIFilter as said earlier. It helps us to make it easier.

Lets change the above code to include the CIContex:

CIImage *beginImage =
[CIImage imageWithContentsOfURL:fileNameAndPath];
 
// 1
CIContext *context = [CIContext contextWithOptions:nil];
 
CIFilter *filter = [CIFilter filterWithName:@"CISepiaTone"
keysAndValues: kCIInputImageKey, beginImage,
@"inputIntensity", @0.8, nil];
CIImage *outputImage = [filter outputImage];
 
// 2
CGImageRef cgimg =
[context createCGImage:outputImage fromRect:[outputImage extent]];
 
// 3
UIImage *newImage = [UIImage imageWithCGImage:cgimg];
self.imageView.image = newImage;
 
// 4
CGImageRelease(cgimg);

Let’s see what happened here:

Here we set up the CIContext object. The CIContext takes an NSDictionary that specifies options including the color format and whether the context should run on the CPU/GPU. Here the default values are fine and so you passed as nil for that argument.

Here we used an method on the context object to draw a CGImage. Calling this method createCGImage:fromRect: on the context with the supplied CIImage will give us an output as CGImageRef.

Next, we converted the CGImage to UIImage using “imageWithCGImage”.

At last we release the CGImageRef as CGImage. CGImage is a C API which need to free memory even it runs with ARC.

Note: To know about all available filters write the following code and call the method in viewDidLoad / onLaunch. The filters are written on the console log.

-(void)logAllFilters {
NSArray *properties = [CIFilter filterNamesInCategory:
kCICategoryBuiltIn];
NSLog(@"%@", properties);
for (NSString *filterName in properties) {
CIFilter *fltr = [CIFilter filterWithName:filterName];
NSLog(@"%@", [fltr attributes]);
}
}

Like this blog? I’d love to hear about your thoughts on this. Thanks for sharing your comments.

How To Monetize IOS App Through Apple In-App Purchase Integration

What Is In App Purchase?

Apple’s In-App purchase lets you the ability to sell items within your free or paid app which includes premium content, virtual goods, upgrade features and subscriptions. Apple takes 30% of the commission and you receive 70% of the purchase price.

Each purchase is associated with a product type. The product types are:

  • Apple-In-App-Purchase-208x300

    Consumable Products:

Consumables are In-App Purchases that must be purchased each time the user needs that item.

  • Non-Consumable Products:

Non-Consumables are In-App Purchases that only need to be purchased once by the user and are available to all devices registered to a user.

  • Auto-Renewable Subscriptions:

Auto-Renewable Subscriptions allow the user to purchase episodic content or access to dynamic digital content for a set duration time. At the end of each duration, the subscription will renew itself, until a user opts out.

  • Non-Renewable Subscriptions:

Non-Renewing Subscription allow the sale of services with a limited duration. Non-Renewing Subscriptions must be used for In-App Purchases that offer time-based access to static content.

  • Free Subscriptions:

Free Subscriptions are an extension of Auto-Renewable Subscriptions that permit the delivery of free subscription content to Newsstand-enabled applications.

Never miss an update from us. Join 10,000+ marketers and leaders.

The Free Subscription In-App Purchase type is implemented in the same way as an Auto-Renewable Subscription, just without any charges to the user. Free Subscriptions do not have expiration, but the user can turn off the subscription at any time.

You can use any one of the above as best suit to your application.

For example, integrating InApp purchase for Non-consumable type product.

In Non-consumable products type, user has to pay only once. Then the content or items will be available to all the device against that user’s apple ID.

What To Do Before Integrating In App Purchase To Your Application?

  1. Connect to iTunes
  2. Then create an unique App ID for your application and enable in-app purchases for that.
  3. Update the app with created bundle ID and code signing in Xcode with corresponding provisioning profile.
  4. Create the app using the AppID you’ve registered. Then goto Manage Applications in iTunes Connect.
  5. Make sure you have set up the bank details for your app as it is necessary for supporting In-App purchase.
  6. Then Add a new non-consumable product for In-App purchase.
  7. Last step is to create a test user account using Manage Users option in iTunes connect page of your app.

Lets write the code

First include StoreKit Framework into the app.Then write the following code in ViewController.h file

#import <UIKit/UIKit.h>
#import <StoreKit/StoreKit.h>
 
@interface MyViewController : UIViewController
<SKProductsRequestDelegate,SKPaymentTransactionObserver>
 
{
 
}
-(IBAction)PurchaseButtonClicked:(id)sender;
 
- (void) completeTransaction: (SKPaymentTransaction *)transaction;
- (void) restoreTransaction: (SKPaymentTransaction *)transaction;
- (void) failedTransaction: (SKPaymentTransaction *)transaction;
 
@end 
Write the following code in ViewController.m file
-(IBAction)PurchaseButtonClicked:(id)sender {
    SKProductsRequest *request= [[SKProductsRequest alloc]
initWithProductIdentifiers: [NSSet setWithObject: @"your_product_ID"]];
    request.delegate = self;
    [request start];
}
- (void)productsRequest:(SKProductsRequest *)request didReceiveResponse:(SKProductsResponse *)response
{
   [[SKPaymentQueue defaultQueue] addTransactionObserver:self];
 
   NSArray *myProduct = response.products;
   NSLog(@"%@",[[myProduct objectAtIndex:0] productIdentifier]);
 
   //Since only one product, we do not need to choose from the array. Proceed directly to payment.
 
   SKPayment *newPayment = [SKPayment paymentWithProduct:[myProduct objectAtIndex:0]];
   [[SKPaymentQueue defaultQueue] addPayment:newPayment];
 
   [request autorelease];
}
 
- (void)paymentQueue:(SKPaymentQueue *)queue updatedTransactions:(NSArray *)transactions
{
 for (SKPaymentTransaction *transaction in transactions)
   {
      switch (transaction.transactionState)
      {
         case SKPaymentTransactionStatePurchased:
              [self completeTransaction:transaction];
              break;
         case SKPaymentTransactionStateFailed:
              [self failedTransaction:transaction];
              break;
         case SKPaymentTransactionStateRestored:
              [self restoreTransaction:transaction];
         default:
              break;
      }
    }
} 
 
- (void) completeTransaction: (SKPaymentTransaction *)transaction
{
    NSLog(@"Transaction Completed");
    // You can create a method to record the transaction.
    // [self recordTransaction: transaction];
    // You should make the update to your app based on what was purchased and inform user.
    // [self provideContent: transaction.payment.productIdentifier];
    // Finally, remove the transaction from the payment queue.
    [[SKPaymentQueue defaultQueue] finishTransaction: transaction];
}
 
- (void) restoreTransaction: (SKPaymentTransaction *)transaction
{
    NSLog(@"Transaction Restored");
    // You can create a method to record the transaction.
    // [self recordTransaction: transaction];
    // You should make the update to your app based on what was purchased and inform user.
    // [self provideContent: transaction.payment.productIdentifier];
    // Finally, remove the transaction from the payment queue.
    [[SKPaymentQueue defaultQueue] finishTransaction: transaction];
}
 
- (void) failedTransaction: (SKPaymentTransaction *)transaction
{
    [activityIndicator stopAnimating];
    if (transaction.error.code != SKErrorPaymentCancelled)
    {
      // Display an error here.
      UIAlertView *alert = [[UIAlertView alloc] initWithTitle:@"Purchase Unsuccessful"
      message:@"Your purchase failed. Please try again."
      delegate:self
      cancelButtonTitle:@"OK"
      otherButtonTitles:nil];
      [alert show];
      [alert release];
     }
 
    // Finally, remove the transaction from the payment queue.
    [[SKPaymentQueue defaultQueue] finishTransaction: transaction];
}

That’s it, now your app is integrated with the inApp purchase with non-consumable subscription.

Note: Please review Apple Guidelines (https://developer.apple.com/appstore/resources/approval/guidelines.html) before publishing the app to the app store.

Andolasoft has expertise in iOS application development and other iOS integration.

See Also: E-Signature SDK for iOS App Developer

Like this blog? I’d love to hear about your thoughts on this. Thanks for sharing your comments.

Apple’s iBeacon scores over NFC

iBeacon is a new technology developed by Apple for its operating system iOS7. This technology allows mobile apps to detect when an iPhone is near a small wireless sensor called a beacon. The Beacon can transmit Push Notifications to an iPhone and vice versa using Bluetooth Low Energy (BLE).They can also be used by the Android operating system.

iBeacons-iphone-51

Advantages of iBeacon:

  • Compatibility: Most of the mobile phones are compatible with Bluetooth.
  • Range: Range of the iBeacon is upto 50 meters.
  • Low power consumption: It consumes less minuscule amounts of energy and allows device batteries to last longer.

Where we use iBeacon?

  • You can track your locations both indoors and outside
  • Get discounts, coupons, special offers from stores as you just pass by.
  • Provide the right context to determine directions to what you really need – office in a building, store in the mall, nearest exit
  • Allow for mobile-payment platforms to pay automatically when you leave the store

Why iBeacon become NFC competitor?

Here, I have discussed the major reasons why Apple’s iBeacon Might Kill NFC:

  • Range:
    https://itunesconnect.apple.com/WebObjects/iTunesConnect.woa/wo/0.0.9.3.5.2.1.1.3.1.1
    NFC only works in close proximity and its range up to 8 inches, whereas iBeacon’s range is up to 50 meters. NFC-enabled devices require an NFC chip to transmit data, whereas iBeacon requires only iPhone support BLE.
  • Availability:
    BLE is available in almost every smartphone devices on the market, however not every phone comes provided with a NFC chip.
  • Cost-effectiveness:
    iBeacon is a Bluetooth technology which is inbuilt in pretty much 100% of smartphone  devices, so from customer perspective   it’s cost is zero. Whereas we need to buy an additional NFC chip for mobile devices.
  • Affordability:
    iBeacons are slightly more expensive than NFC chips. But, iBeacon is more affordable and its range is up to 50 meters. So, we need one beacon for a 1,700 square feet store and its estimated comes $99 (Estimate is currently offering pre-orders of three beacons for $99). If you would like to use NFC for the same area, you need around 10-cent NFC tags for each product of the store and it would cost you around $100,000 for 1 million product.

Apple has found a smart way to wirelessly transmit data over short distances using BLE. BLE can solve these micro-location data challenges in ways that NFC can’t duplicate. iBeacon is a promising step towards a very important and lucrative industry and coupled with fingerprint technology for privacy and security. The technology is currently used in retail, healthcare industry and education sector.

SEE ALSO: Useful features of iOS 7

Want add to this topic? Comment here.

Useful Features Of IOS 7

iOS 7 is the latest version of Apple’s iOS mobile operating system. It was first announced at WWDC on June 10, 2013. iOS 7 introduces great new features like Control Center, Air Drop for iOS, smarter multitasking and lots more. It also makes the things easier, faster, and more enjoyable.

Here are the best hidden features of iOS 7:

64 bit support

iOS apps can now be compiled for the 64-bit runtime. All system libraries and frameworks are 64-bit ready, meaning that they can be used in both 32-bit and 64-bit apps. When compiled for the 64-bit runtime, apps will run faster because of the availability of extra processor resources in 64-bit mode.

iOS uses the same LP64 model that is used by OS X and other 64-bit UNIX systems, which means fewer problems when porting code.

Better Multi-Tasking

Smarter API is one of the major feature of iOS 7. This new multitasking APIs has the ability to perform app updates in the background at convenient time. Now, when you double-click the home button, all apps appear as big screens. The last app you were in is now front-and-center so swapping between apps is lightning fast. Better yet, closing apps that are not working well now just requires a swipe of the finger up.

Multi-tasking
Email Enhancements

In iOS 7, it is very easy to find emails. You just need to know the persons email ID, name or a keyword and the Mail app will search the email for you. Also You can send an email from inbox to the junk folder in a single click. Just tap the flag in the bottom right corner of the email and choose “move to junk”.

Email

Email Enhancements

In iOS 7, it is very easy to find emails. You just need to know the persons email ID, name or a keyword and the Mail app will search the email for you. Also You can send an email from inbox to the junk folder in a single click. Just tap the flag in the bottom right corner of the email and choose “move to junk”.

Siri-Search

AirDrop

AirDrop technology simplifies data sharing between users of different devices nearby. Data is transferred directly, not via emails, cloud services and alike.

AirDrop

Junk Email

Now you can send an email from your inbox right to the junk folder. Just tap the flag in the bottom right corner of the email and choose “move to junk”.

Junk_Email

Save Money By Using Face Time Audio Calls

iOS 7 adds the ability to have audio only calls using FaceTime Audio. Now, you can make a call over 4G or Wi-Fi without the video component, and the sound quality is fabulous. Just go to the desired contact and press on the phone symbol next to FaceTime. Alternatively, you can search for your contact in the FaceTime app itself.

Audio-call

Looking to make your mobile application dreams come true? Contact us today to make it a reality.

Recommended Reading: How to make Static Framework iOS device independent?

How To Make Static Framework IOS Device Independent?

In our previous post, we had mentioned the steps to create a Static Library or Framework for iOS. Here, we will illustrate the steps to make it device independent, i.e. the library can be used to develop app for all iOS devices, instead of recreating the code for each device.

Step 1: Create an Aggregate Target

  • Click File >> New Target and create a new Aggregate target in Other menu.

  • Name your aggregate target – like ‘Framework’

xcode_image

 Step 2: Adding the Static Library as a Dependent Target

  • Add the static library target to the ‘Target Dependencies’.

framework-image

Step 3: Build the ‘Other’ Platform

  • To build the ‘Other’ platform, use a ‘Run Script’ phase.

  • Add a new ‘Run Script’ build phase to your ‘Aggregate’ target and paste the following code.
set -e
 
set -e
 
set +u
 
# Avoid recursively calling this script.
 
if [[ $SF_MASTER_SCRIPT_RUNNING ]]
 
then
 
   exit 0
 
fi
 
set -u
 
export SF_MASTER_SCRIPT_RUNNING=1


SF_TARGET_NAME=${PROJECT_NAME}
 
SF_EXECUTABLE_PATH="lib${SF_TARGET_NAME}.a"
 
SF_WRAPPER_NAME="${SF_TARGET_NAME}.framework"


# The following conditionals come from
 
# https://github.com/kstenerud/iOS-Universal-Framework


if [[ "$SDK_NAME" =~ ([A-Za-z]+) ]]
 
then
 
   SF_SDK_PLATFORM=${BASH_REMATCH[1]}
 
else
 
   echo "Could not find platform name from SDK_NAME: $SDK_NAME"
 
   exit 1
 
fi


if [[ "$SDK_NAME" =~ ([0-9]+.*$) ]] then
 
   SF_SDK_VERSION=${BASH_REMATCH[1]}
 
else
 
   echo "Could not find sdk version from SDK_NAME: $SDK_NAME"
 
   exit 1
 
fi


if [[ "$SF_SDK_PLATFORM" = "iphoneos" ]]
 
then
 
   SF_OTHER_PLATFORM=iphonesimulator
 
else
 
   SF_OTHER_PLATFORM=iphoneos
 
fi


if [[ "$BUILT_PRODUCTS_DIR" =~ (.*)$SF_SDK_PLATFORM$ ]]
 
then
 
   SF_OTHER_BUILT_PRODUCTS_DIR="${BASH_REMATCH[1]}${SF_OTHER_PLATFORM}"
 
else
 
   echo "Could not find platform name from build products directory: $BUILT_PRODUCTS_DIR"
 
   exit 1
 
fi


# Build the other platform.
 
xcodebuild -project "${PROJECT_FILE_PATH}" -target "${TARGET_NAME}" -configuration "${CONFIGURATION}" -sdk ${SF_OTHER_PLATFORM}${SF_SDK_VERSION} BUILD_DIR="${BUILD_DIR}" OBJROOT="${OBJROOT}" BUILD_ROOT="${BUILD_ROOT}" SYMROOT="${SYMROOT}" $ACTION


# Smash the two static libraries into one fat binary and store it in the .framework
 
lipo -create "${BUILT_PRODUCTS_DIR}/${SF_EXECUTABLE_PATH}" "${SF_OTHER_BUILT_PRODUCTS_DIR}/${SF_EXECUTABLE_PATH}" -output "${BUILT_PRODUCTS_DIR}/${SF_WRAPPER_NAME}/Versions/A/${SF_TARGET_NAME}"


# Copy the binary to the other architecture folder to have a complete framework in both.
 
cp -a "${BUILT_PRODUCTS_DIR}/${SF_WRAPPER_NAME}/Versions/A/${SF_TARGET

Step 4: Build to verify

  • Now  you have set up an environment to build a distributable <project_name>.framework

  • Build the ‘Aggregate’ target

  • Expand the Products group in X-Code, right click the static library and click ‘Show in Finder’

Note: If this doesn’t open Finder to show the static library, then try opening

~/Library/Developer/Xcode/DerivedData/<project name>/Build/Products/Debug-iphonesimulator/.

  • In this folder you will find your <project_name>.framework folder.

You can now share the <project_name>.framework among other iOS app developers.