How To Optimize WordPress Website for Mobile Devices?

In an era where mobile devices are our constant companions, ensuring your WordPress website is mobile-optimized has become a priority for website owners and developers.

With mobile users constituting a substantial portion of web traffic, the seamless functioning and accessibility of your website on smartphones and tablets are pivotal for maintaining user engagement, boosting search engine rankings, and driving overall success.

In this comprehensive guide, we will dive deep into each step required to effectively mobile-optimize your WordPress site, allowing you to tap into the ever-expanding mobile audience with confidence.

Step-by-Step Mobile Optimization Guide

  1. Choose a Responsive Theme

Choose a Responsive Theme

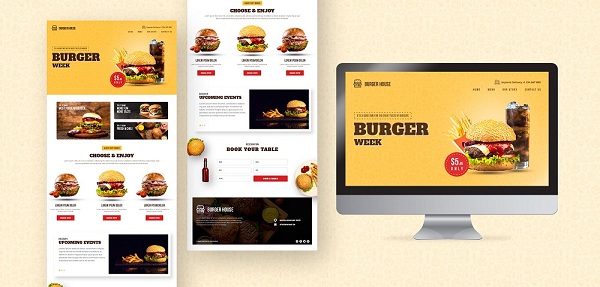
Responsive design lies at the core of mobile optimization. Opt for a WordPress theme that is explicitly labeled as “responsive.”

Such themes are built to adapt automatically to various screen sizes and orientations, ensuring your website’s layout remains coherent and user-friendly across all devices.

Responsive themes eliminate the need for creating separate mobile versions of your site, streamlining your design efforts and providing a consistent user experience.

When selecting a theme, preview it on different devices to ensure that all elements display correctly and intuitively. You can also develop your custom theme by hiring a professional WordPress theme development company.

Top 10 Responsive WordPress Theme

  • Divi
    Divi is a versatile and highly customizable theme that comes with a built-in drag-and-drop builder, making it easy to create unique layouts without coding skills.
  • Astra
    Astra is known for its speed and flexibility. It’s lightweight and offers many customization options to create a visually appealing and responsive site.
  • OceanWP
    OceanWP is a multipurpose theme with a focus on performance and SEO optimization. It provides a range of pre-built templates suitable for various niches.
  • Neve
    Neve is another lightweight theme that’s great for performance. It offers a simple design and compatibility with popular page builders.
  • Hestia
    Hestia is a modern one-page theme that’s perfect for startups and small businesses. It’s compatible with WooCommerce, making it suitable for e-commerce as well.
  • GeneratePress
    GeneratePress is a fast and lightweight theme with a minimalistic design. It’s highly customizable and works well with various page builders.
  • Enfold
    Enfold is a multipurpose theme with a strong focus on design and versatility. It comes with a variety of pre-designed layouts to choose from.
  • Avada
    Avada is one of the best-selling themes on ThemeForest. It offers a wide range of customization options and pre-built templates for different industries.
  • Soledad
    Soledad is a popular choice for blogs and magazines. It offers numerous layout options and styles to create visually appealing content.
  • Salient
    Salient is a visually striking theme with a focus on creative designs. It’s suitable for portfolios, agencies, and other creative websites.
  1. Optimized Images

Optimized Images

Images are essential for visual appeal, but they can significantly impact loading times on mobile devices if not optimized.

Compress and resize images before uploading them to your site to minimize their file size while maintaining visual quality.

Plugins like WP Smush and EWWW Image Optimizer can assist in automating this process.

Alternatively, consider using the “lazy loading” technique, which loads images only when they come into the user’s view, further enhancing performance.

Top 10 Tips to Optimize Images

  • Choose the Right Format:
    Select the appropriate image format based on the type of image. Use JPEG for photographs and images with many colors, PNG for images with transparency or simple graphics, and WebP for modern browsers that support it.
  • Resize Images:
    Resize images to the dimensions they will be displayed on your website. Avoid uploading large images and relying on HTML or CSS to scale them down, as this can slow down loading times.
  • Compress Images:
    Use image compression tools or plugins to reduce the file size while maintaining acceptable quality. Compressed images load faster without sacrificing visual appeal.
  • Optimize for Web:
    When exporting or saving images in image editing software, choose the “Save for Web” option. This ensures unnecessary metadata is stripped and the image is optimized for online use.
  • Use Image Compression Tools:
    Utilize online image compression tools like TinyPNG, ImageOptim, or io to further reduce image file sizes without compromising quality.
  • Lazy Loading:
    Implement lazy loading for images, which loads images as users scroll down the page. This technique prioritizes above-the-fold content, improving initial loading times.
  • Responsive Images:
    Use the srcset attribute to provide different image sizes for different screen resolutions. This ensures that users on various devices receive appropriately sized images, reducing unnecessary data transfer.
  • Use CDN:
    Consider using a Content Delivery Network (CDN) to serve images from servers closer to the user’s location. CDNs improve loading times by reducing latency.
  • Optimize Alt Text:
    Include descriptive and relevant alt text for images. Alt text not only improves accessibility but also helps search engines understand the content of the image.
  • Minimize Decorative Images:
    Reduce the use of decorative images that don’t provide meaningful content. Use CSS for simple design elements, reducing the need for additional image requests.
  1. Streamline Content

Streamline Content

Content plays a vital role in mobile optimization. However, the constraints of smaller screens require strategic content presentation.

Condense lengthy paragraphs, prioritize essential information, and break down content into easily digestible sections.

Utilize subheadings, bullet points, and shorter paragraphs to enhance readability.

Keep in mind that mobile users often have limited time and attention, so ensure your content is scannable and engaging.

Top 10 Tips to Optimize Content For Mobile User

  • Keep it Concise:
    Mobile users have limited attention spans. Write succinctly, conveying your message in fewer words while maintaining clarity and impact.
  • Use Short Paragraphs:
    Break content into short paragraphs to enhance readability. Long blocks of text can be daunting on mobile screens.
  • Use Subheadings:
    Utilize descriptive subheadings to guide users through your content. Subheadings break up the text and make it easier for users to find relevant information.
  • Prioritize Important Information:
    Place the most critical information at the beginning of your content. Mobile users often skim, so ensure that key points are easily accessible.
  • Use Bullet Points and Lists:
    Organize information using bullet points and lists. This format simplifies complex content and makes it easier to digest on mobile devices.
  • Avoid Jargon:
    Write in plain language, avoiding technical jargon that might confuse mobile users. Keep your tone conversational and relatable.
  • Optimize Font Size:
    Choose a font size that is legible on smaller screens. Aim for a font size of around 16px for body text to ensure easy reading.
  • Contrast for Readability:
    Ensure sufficient contrast between text and background to enhance readability, especially in various lighting conditions.
  • Minimize Hyperlinks:
    Reduce the number of hyperlinks in your content. Mobile users might find it challenging to accurately tap on small links.
  • Use Responsive Design:
    Ensure that your website uses responsive design, which automatically adjusts the layout and font size to fit different screen sizes. This guarantees a consistent reading experience across devices.
  1. Implement Mobile-Friendly Fonts

Implement Mobile-Friendly Fonts

Font selection contributes to both aesthetics and readability. Opt for legible fonts that render well on various screen sizes.

Avoid using fonts that are too small, as they can strain users’ eyes and deter them from engaging with your content.

Consider fonts specifically designed for digital interfaces, as they are optimized for both readability and mobile screens.

Test different fonts to find the right balance between style and usability.

Top 10 Tips To Implement Mobile Friendly Fonts

  • Choose Legible Fonts:
    Opt for fonts that are easy to read on smaller screens. Prioritize clarity over elaborate or intricate fonts that may become unclear on mobile devices.
  • Responsive Design:
    Use responsive design techniques to ensure that fonts adjust appropriately to different screen sizes and orientations.
  • Font Size Matters:
    Select an appropriate font size for mobile screens. Aim for a font size of around 16px for body text to maintain readability.
  • Contrast for Readability:
    Ensure there is sufficient contrast between the font colour and the background to enhance legibility, especially in varying lighting conditions.
  • Limit Font Variations:
    Avoid using too many different fonts. Stick to a cohesive font palette that compliments your website’s design.
  • Use Web-Safe Fonts:
    Opt for web-safe fonts that are universally available across devices and browsers. This ensures consistent display regardless of the user’s device.
  • Consider Loading Speed:
    Choose fonts that won’t significantly impact your website’s loading speed. Heavy or complex fonts can slow down mobile browsing.
  • Avoid Tiny Fonts:
    Steer clear of overly small font sizes, as they can strain mobile users’ eyes and discourage reading. Aim for fonts that are comfortably readable.
  • Test on Various Devices:
    Ensure your selected fonts display correctly and legibly on a range of mobile devices and screen sizes to guarantee a consistent user experience.
  • Accessibility Considerations: Keep accessibility in mind. Use fonts that are compatible with screen readers and ensure sufficient contrast for users with visual impairments.
  1. Optimize Pop-Ups

Optimize Pop-Ups

While pop-ups can be effective for capturing user information, intrusive ones can disrupt the mobile user experience.

Ensure that pop-ups do not cover the main content or make it difficult to close them on small screens.

Consider using alternatives such as banners, slide-ins, or timed pop-ups that offer value without hindering the browsing experience.

User experience should always take precedence over aggressive marketing tactics.

Top 10 Tips To Optimize Pop-Ups for Mobile Devices

  • Mobile Responsiveness:
    Ensure that your pop-ups are designed to be responsive, adapting seamlessly to different screen sizes and orientations.
  • Size and Placement:
    Keep pop-up sizes manageable and avoid full-screen pop-ups. Place them strategically so they don’t cover important content or navigation elements.
  • Clear Call to Action (CTA):
    Craft concise and compelling CTAs that clearly communicate the value of the offer or action users should take.
  • Minimalistic Design:
    Opt for simple and clean designs that load quickly on mobile devices. Avoid excessive visuals that could slow down loading times.
  • Easy Close Option:
    Make it effortless for users to close the pop-up. Include a prominent close button that’s easy to tap, enhancing user satisfaction.
  • Delayed Display:
    Implement delayed pop-up triggers to allow users a moment to engage with your content before encountering the pop-up.
  • Exit-Intent Technology:
    Use exit-intent pop-ups that appear when a user is about to leave the page. This provides one last opportunity to engage without disrupting the user’s experience.
  • Frequency Control:
    Limit the frequency of pop-ups to avoid overwhelming users with repetitive messages. Consider showing them only once per session.
  • Testing and Analytics:
    Regularly test your pop-ups on different mobile devices and browsers. Monitor analytics to assess user interaction and optimize performance.
  • Offer Value:
    Ensure your pop-up offers provide genuine value to users. Offering discounts, exclusive content, or useful resources can encourage positive engagement.
  1. Simplify Navigation

Simplify Navigation

Navigation is a cornerstone of user experience, especially on mobile devices. Create a mobile menu that is intuitive, easily accessible, and efficiently organized.

One common approach is to implement a hamburger menu, which condenses navigation options into a collapsible icon, saving valuable screen real estate.

Keep the menu concise by prioritizing essential pages and simplifying navigation paths.

Also, ensure that users can easily return to the homepage from any point within your site.

Top 10 Tips to Optimize Navigation for Mobile Devices

  • Streamline Menu Items:
    Condense your navigation menu to the most essential items. Aim for a concise menu that fits well on smaller screens.
  • Use Hamburger Menu:
    Implement a hamburger icon (three horizontal lines) to house menu items. This icon conserves space and offers a familiar mobile navigation pattern.
  • Prioritize Content: Place the most important menu items at the top of the navigation. Users shouldn’t have to scroll extensively to access critical sections.
  • Avoid Dropdown Menus: Minimize or eliminate dropdown menus as they can be challenging to interact with on mobile devices. Opt for straightforward navigation.
  • Clear Labels: Use concise and descriptive labels for menu items. Users should immediately understand the purpose of each link.
  • Thumb-Friendly Design: Arrange menu items in a way that makes them easily tappable with the thumb. Avoid placing links too close together.
  • Search Bar Visibility: Ensure the search bar is easily accessible for users seeking specific content. Consider a prominent search icon that expands when clicked.
  • Use Icons Sparingly: Implement icons alongside text labels for visual cues. However, avoid overwhelming users with too many icons, which can lead to confusion.
  • Sticky Navigation: Consider a sticky navigation bar that stays fixed at the top of the screen as users scroll. This keeps essential links readily available.
  • Testing and Optimization: Regularly test your mobile navigation across various devices to ensure it’s intuitive and responsive. Analyze user behavior to identify areas for improvement.
  1. Ensure Touch-Friendly Buttons

Ensure Touch-Friendly Buttons

Mobile devices rely on touch interactions, making it crucial to design buttons that are touch-friendly.

Buttons should be adequately sized to accommodate tapping without accidental clicks on nearby elements.

Additionally, ensure there is sufficient spacing between buttons to prevent user frustration.

Using contrasting colors and incorporating visual feedback, such as button highlighting upon touch, enhances the overall user experience.

Test the responsiveness of buttons on various devices to ensure consistent functionality.

Top 10 Tips to Optimize Buttons for Mobile Devices

  • Size and Tapability:
    Ensure buttons are of an adequate size for easy tapping. Aim for a minimum touch target size of around 44×44 pixels to accommodate different finger sizes.
  • Ample Spacing:
    Place buttons with enough space around them to prevent accidental clicks on neighboring elements. This reduces user frustration.
  • Clear Labeling:
    Use concise and descriptive labels on buttons. Users should immediately understand the purpose of the button without ambiguity.
  • Contrast and Visibility:
    Choose button colors that provide good contrast against the background. This ensures visibility and readability, especially in varying lighting conditions.
  • Finger-Friendly Shape:
    Opt for rounded or slightly curved button corners. Sharp corners can be difficult to tap accurately on mobile screens.
  • Consistent Styling:
    Maintain consistent button styling throughout your website. Consistency aids recognition and builds user familiarity.
  • Easy-to-Find Placement:
    Place buttons in easily accessible locations, typically within the user’s natural thumb reach, to enhance ease of interaction.
  • Hierarchy and Priority:
    Differentiate buttons based on their importance. Make primary actions more prominent and easily distinguishable from secondary ones.
  • Loading Speed:
    Ensure button graphics or icons are lightweight to minimize loading times. Slow-loading buttons can negatively impact user experience.
  • Testing and Feedback:
    Regularly test buttons on different devices and screen sizes. Seek user feedback to identify any challenges they might face while interacting with buttons.
  1. Test, Test, Test

Thorough testing is pivotal in mobile optimization.

Regularly evaluate your website on a range of devices, including smartphones and tablets of different screen sizes and orientations.

Testing helps you identify potential issues such as broken elements, misaligned content, or slow loading times that might be detrimental to user experience.

Emulate real-world scenarios by simulating various user interactions and scenarios, including scrolling, tapping, and navigating through your site.

By continually testing and refining, you can provide a seamless experience across diverse devices.

  1. Leverage Accelerated Mobile Pages (AMP)

Leverage Accelerated Mobile Pages

Accelerated Mobile Pages (AMP) is an open-source initiative aimed at creating faster-loading web pages for mobile users.

By implementing AMP, you create stripped-down versions of your pages that load almost instantaneously on mobile devices.

Are you looking for a WordPress developer

Contact Us

AMP significantly improves mobile loading speed, enhances user engagement, and positively impacts search engine rankings.

Many WordPress plugins are available to facilitate the implementation of AMP on your website.

  1. Monitor Performance

Mobile optimization is an ongoing process that requires vigilance. Utilize tools like Google PageSpeed Insights and GTmetrix to assess your site’s performance regularly. These tools provide insights into loading times, performance metrics, and suggestions for improvement.

Analyze your site’s mobile performance data, identifying bottlenecks and areas that need optimization. By addressing these issues promptly, you ensure that your site remains fast, user-friendly, and aligned with modern mobile standards.

FAQs

  1. FAQ: Why is mobile optimization important for my WordPress website?

Answer: Mobile optimization ensures your website provides a seamless and user-friendly experience on smartphones and tablets, improving user engagement and search engine rankings.

  1. FAQ: What is the impact of page load speed on mobile optimization?

Answer: Page load speed greatly affects mobile user experience. Optimize images, use caching plugins, minimize code, and reduce server response time to enhance loading times.

  1. FAQ: Are there plugins specifically for mobile optimization?

Answer: Yes, there are plugins like WPtouch and Jetpack that offer mobile optimization features such as responsive design, mobile themes, and performance enhancements.

  1. FAQ: Should I use a separate mobile site or responsive design?

Answer: Responsive design is recommended as it maintains a consistent experience across all devices, eliminating the need for managing multiple sites.

  1. FAQ: How can I test my WordPress site’s mobile optimization?

Answer: Use tools like Google’s Mobile-Friendly Test and PageSpeed Insights to evaluate your site’s mobile performance. Additionally, test your site on actual devices to ensure a smooth experience.

Final Thoughts

Mobile optimization is more than a trend – it’s a necessity for any website aiming to provide a satisfying user experience.

By following these step-by-step guidelines, you’ll be well-equipped to not only meet the expectations of your mobile audience but also boost your site’s visibility, engagement, and overall success.

As mobile technology continues to evolve, your commitment to mobile optimization will be instrumental in keeping your WordPress site ahead of the curve and accessible to users no matter where they are or what device they’re using.

What Makes Flutter the Best Cross-Platform for Mobile App Development ?

Mobile app development is rapidly evolving, tech companies around the world are releasing disruptive cross-platform technologies making it easier and efficient to craft stunning mobile apps.

Flutter app development is one such cross-platform technology that has taken the industry by storm.

Flutter, created by Google, is an open-source UI software development toolkit that allows developers to create native apps for mobile, web, and desktop from a single codebase.

This means that with Flutter, developers can build stunning and high-performance apps for iOS, Android, and more, using a single codebase. This ability greatly streamlines the development process and enhances consistency across platforms.

An Introduction to the Widget-Based Flutter Architecture

An Introduction to the Widget-Based Flutter Architecture

(Image source: https://www.devopsschool.com/ )

  1. Widget-Based Architecture:

At the heart of Flutter development architecture is its widget-based approach. In Flutter, everything is a widget – from the smallest UI elements like buttons and text to entire complex layouts.

This includes both the visual components that users see and the structural components that define the app’s behaviour.

This concept of encapsulating different parts of an app’s UI and functionality as widgets enables Flutter app developers to simplify the development process and promotes code reusability.

  • Stateless Widgets:

Stateless widgets are immutable, meaning they don’t change over time or in response to user interactions.

They represent the static elements of an app’s user interface, like icons, text labels, and images.

Since these widgets do not have internal state, they can be thought of as pure functions that take input and return UI elements based on that input.

  • Stateful Widgets:

Stateful widgets, on the other hand, are mutable and can change their appearance or behaviour over time.

These widgets are used to manage dynamic user interactions, such as updating the display when a user taps a button or enters data into a text field.

Stateful widgets maintain a “state” object that can be updated, triggering the widget tree to rebuild and reflect the changes.

  1. Widget Tree and Element Tree:

The widget-based architecture forms a hierarchical structure known as the “Widget Tree.”

The Widget Tree represents the arrangement of widgets within the app’s user interface. It defines how widgets are nested within each other and establishes the visual hierarchy of the app.

When the app is run, it takes the Widget Tree and converts it into an “Element Tree.” Elements are an optimized representation of widgets and form the basis for rendering.

Flutter’s rendering engine then uses the Element Tree to efficiently paint the UI on the screen.

  1. Reconciliation and “Hot Reload”:

One of the standout features of Flutter’s architecture is its reconciliation process.

When changes are made to the Widget Tree – for example, when a user interacts with an element – it efficiently calculates the difference between the previous and updated trees.

This process is known as “reconciliation” or “diffing,” and it ensures that only the necessary parts of the UI are updated, optimizing performance.

Moreover, it’s “Hot Reload” feature is closely tied to its architecture.

Hot Reload allows Flutter app developers to make changes to the code and instantly see the results in the app without restarting it.

This rapid iteration cycle enhances productivity and expedites the development process.

  1. Platform Channels and Native Integration:

While the platform aims to provide a consistent experience across platforms, it also acknowledges the need for platform-specific features and capabilities. To achieve this, Flutter incorporates “platform channels.”

These channels allow the code to communicate with native code written in languages like Java (for Android) and Swift (for iOS).

This way, developers can access native device functionalities and seamlessly integrate platform-specific features while still maintaining the majority of the codebase.

What is Flutter Used For?

What is Flutter Used For

(Image credit: https://fivedottwelve.com/ )

  1. Mobile App Development:

Flutter is most renowned for mobile app development. Developers can create high-quality, visually appealing, and performant apps for both iOS and Android using a single codebase.

This significantly reduces development time and resources while maintaining a consistent user experience across platforms.

  1. Web App Development:

With the introduction of the platform for web, developers can build interactive and dynamic Flutter web applications using the same codebase as their mobile apps.

This provides a seamless experience for users across different devices and platforms.

  1. Desktop App Development:

Its adaptability extends to desktop platforms as well. Developers can use the platform to create native desktop applications for Windows, macOS, and Linux.

This enables the development of cross-platform desktop apps with a unified codebase.

  1. Progressive Web Apps (PWAs):

The mobile app development platform enables the creation of Progressive Web Apps, which are web applications that offer an app-like experience to users.

PWAs can be installed on users’ devices and provide offline access, push notifications, and other native-like features.

  1. Embedded Systems:

Its lightweight nature and versatile architecture make it suitable for developing applications for embedded systems, such as IoT devices and smart appliances.

  1. MVPs and Prototypes:

For startups and businesses aiming to validate their ideas quickly, Flutter rapid development capabilities and Hot Reload feature are beneficial for building minimum viable products (MVPs) and prototypes.

  1. Cross-Platform Solutions:

Companies looking to launch their apps on multiple platforms simultaneously benefit from Flutter cross-platform app development features.

This not only reduces development time but also maintains a consistent app experience across various devices.

  1. Enterprise Applications:

It can be used to develop enterprise-level applications, such as CRM systems, project management tools, and internal communication platforms.

Its performance, customization options, and cross-platform capabilities cater well to the needs of modern businesses.

  1. Gaming and Interactive Apps:

Although it is not primarily designed for heavy gaming, it can still be used to create lightweight games and interactive applications with simple animations and graphics.

  1. Educational Apps:

The cross platform app development platfom’s user-friendly UI capabilities make it suitable for developing educational apps, interactive learning platforms, and e-learning applications that engage users through dynamic content.

  1. Social Media Apps:

The flexibility and customizable UI components of Flutter make it a good choice for creating visually appealing social media apps with features like news feeds, user profiles, and real-time updates.

What are the Drawbacks of Flutter App Development?

What are the Drawbacks of Flutter App Development

(Image source: https://www.systango.com/)

  1. Large App Size:

Flutter mobile apps can have a larger file size compared to native apps due to the inclusion of the Flutter engine and various widgets.

This might result in longer download times, particularly for users on slower connections.

  1. Limited Native Functionality:

While the mobile app development platform provides a wide range of pre-built widgets, there might be cases where you need to access platform-specific features or interact with native APIs.

Although the platform channels enable communication with native code, it can introduce complexity and require additional development effort.

  1. Learning Curve:

If your development team is not already familiar with Dart (Flutter’s programming language) or the widget-based architecture, there might be a learning curve involved in getting up to speed with Flutter’s concepts and best practices.

  1. Less Mature Ecosystem:

While the ecosystem is growing rapidly, it might not yet have as many third-party libraries, plugins, and tools available as more established frameworks.

This can potentially lead to challenges if you’re looking for specific functionalities that aren’t readily available.

  1. Limited Access to Native Design Patterns:

It has its own design language known as “Material Design” for Android and “Cupertino” for iOS.

While these design patterns provide a consistent look and feel across platforms, they might not fully align with the native design guidelines of each platform, which could be a concern for some applications.

  1. Platform-Dependent Bugs:

Since it renders its own UI components, there might be cases where platform-specific bugs or inconsistencies arise.

This could result in certain issues not present in native applications.

  1. SEO Challenges:

While ‘Flutter for web’ allows you to create web applications, the SEO (search engine optimization) capabilities might not be as strong as those of traditional web frameworks. This could affect the discoverability of your web app.

  1. Limited Access to Low-Level APIs:

For applications requiring deep integration with low-level hardware features or specialized libraries, Its abstraction might limit access to certain APIs or functionalities.

  1. Continuous Updates:

The rapid evolution of Flutter app development means that you need to keep up with frequent updates and changes to the framework.

While updates often bring improvements, they can also introduce compatibility issues with existing code.

  1. Not Ideal for Intensive 3D or Graphics Applications:

It’s important to carefully assess these drawbacks against the benefits and requirements of your project.

In many cases, the advantages of the hybrid app development platform might outweigh these challenges, but it’s crucial to make an informed decision based on your project’s unique needs and constraints.

Top 10 Apps Developed Using Flutter

  • Google Ads:
    Google Ads is an advertising platform used by businesses to promote their products and services. Google itself recognizes the potential and has developed parts of the Google Ads app using Flutter.
  • Alibaba:
    The Alibaba Group, a global e-commerce giant, used Flutter to create the Xianyu app. This app is designed for online shopping, showcasing its versatility in the e-commerce domain.
  • Reflectly:
    Reflectly is a popular mindfulness and journaling app. It utilizes its capabilities to provide an intuitive and visually pleasing user interface for users to journal their thoughts and emotions.
  • Hamilton Musical:
    The official app for the hit Broadway musical “Hamilton” was developed using Flutter. It demonstrates how it can be used to create immersive and interactive experiences for users.
  • Dream11:
    Dream11 is a well-known fantasy sports app that allows users to create virtual teams and compete in real sports leagues. The app’s dynamic and responsive UI is powered by Flutter.
  • PostMuse:
    PostMuse is a social media app that enables users to create and share visually appealing posts on various platforms. The app’s design and animations are a testament to its capabilities.
  • Hookle:
    Hookle is a social media app designed for entrepreneurs and small business owners to manage their social media presence. It combines features like posting, scheduling, and analytics in a Flutter-powered interface.
  • Cryptograph:
    Cryptograph is a cryptocurrency tracking app that provides users with real-time updates and data on various cryptocurrencies. Its performance is utilized to display dynamic graphs and charts.
  • NuBank:
    NuBank, a popular fintech company in Brazil, uses Flutter to build parts of their mobile app. The app offers digital banking services to its users and showcases its capabilities in the finance sector.

What Makes Flutter The Best Mobile App Development Platform for Business Owners?

  1. Faster Time-to-Market:

Developing with Flutter significantly reduces the time required to build and launch apps on multiple platforms.

With a single codebase for iOS, Android, and potentially more, you can simultaneously target a wider audience and expedite your time-to-market.

  1. Cost-Efficiency:

Maintaining separate development teams for different platforms can be costly.

Its cross-platform mobile app development approach streamlines development, thereby reducing labour and operational expenses, making it an economically smart choice for businesses.

  1. Consistent Branding:

Flutter ensures a consistent user experience across various platforms.

Your app’s branding, design, and features remain cohesive, reinforcing your brand identity and offering a seamless experience to users.

  1. High-Quality User Experience:

Its widgets and customizable UI components enable Flutter developers to create visually appealing and engaging user interfaces.

This enhances the overall user experience, which is essential for customer satisfaction and retention.

  1. Rapid Development and Iteration:

The Hot Reload feature allows developers to instantly view code changes in the app, speeding up debugging, testing, and refining the app’s features. This rapid iteration cycle supports quick adjustments to meet changing business needs.

  1. Wider Audience Reach:

By creating apps for iOS and Android simultaneously, you maximize your audience reach. This is especially advantageous for startups and businesses aiming to expand their user base quickly.

  1. Engaging User Interfaces:

With Flutter, you can create captivating animations and dynamic interfaces that capture users’ attention, fostering user engagement and encouraging longer app usage.

  1. Responsive Customer Support:

Due to its active community, Flutter benefits from continuous updates, bug fixes, and a vast repository of resources.

This provides a reliable support network for businesses during and after app development.

  1. Adaptable for Various App Types:

Flutter is not restricted to a specific type of app. Whether you’re building e-commerce platforms, social networking apps, utilities, or more complex applications, its versatility allows it to cater to your business’s needs.

  1. Flexibility for Future Growth:

As your business evolves, you might want to expand your app’s functionality or target new platforms. Its adaptability allows you to scale your app to meet future demands.

Top Trends in Flutter App development to follow in 2023

  • Increasing Popularity:
    Flutter’s popularity has been on the rise since its introduction, with a growing number of developers and companies adopting it for app development due to its advantages in cross-platform development.
  • Active Community:
    It benefits from a vibrant and active community of developers, contributing to its growth through open-source projects, plugins, and helpful resources.
  • Growing Number of Apps:
    The number of apps developed using the cross-platform technology has been increasing steadily across various domains, including e-commerce, social networking, finance, and more.
  • Integration with Web and Desktop:
    The addition of web, desktop platforms has expanded its use cases, making it more versatile for creating multi-platform applications.
  • Strong Google Support:
    Google’s continued backing and investment in Flutter development indicate its commitment to the framework’s long-term growth.
  • Third-Party Packages:
    The ecosystem has seen the development of a wide range of third-party packages, aiding developers with pre-built solutions for common functionalities and components.
  • Enterprise Adoption:
    Larger enterprises and businesses have started to recognize the benefits of Flutter, leading to its adoption in various industries and sectors.
  • Performance Improvements:
    The team consistently works on improving performance, with each update bringing optimizations that enhance app responsiveness and speed.
  • Cross-Platform Dominance:
    The convenience of building for multiple platforms from a single codebase continues to drive its popularity, especially for startups and businesses looking to minimize development costs and time.

Top 5 Flutter App Development Companies

Andolasoft:

Andolasoft is a leading Flutter app development company that offers web, mobile, cross-platform and hybrid app development services.

With expertise in various technologies, Andolasoft focuses on delivering end-to-end solutions to businesses of different sizes.

They provide a comprehensive range of services starting from app conceptualization to design, development and post-deployment marketing services.

Comprehensive Flutter Development Services Offered by Andolasoft

  • Custom App Development
  • API Document and Integration
  • Flutter App Consulting
  • Support and Maintenance
  • Migration and API Integration
  • MVP Development
  • Flutter App Debugging and Testing
  • UI/UX Design

Droids on Roids:

Droids on Roids is a mobile app development company known for its expertise in building innovative and user-centric applications.

They specialize in both iOS and Android app development, including Flutter.

The company has a team of skilled developers, designers, and product managers who work together to create high-quality mobile experiences.

CreateThrive:

CreateThrive is a digital product agency that offers a wide range of services, including mobile app development using Flutter.

They emphasize a user-centered approach, focusing on understanding the client’s needs and delivering solutions that align with business goals.

CreateThrive aims to create applications that drive growth and success.

Merixstudio:

Merixstudio is a software development company specializing in web and mobile app development, design, and consulting services.

While primarily focused on web technologies, Merixstudio also offers Flutter app development to create cross-platform solutions that provide a consistent experience across different devices.

Somnio Software:

Somnio Software is a development agency that provides various services, including mobile app development using technologies like Flutter.

Are you looking for a Flutter developer

Contact Us

They aim to build applications that are user-friendly, innovative, and tailored to meet the needs of their clients’ businesses.

Their expertise extends to both UI/UX design and backend development.

Top Things to Consider Before Hiring a Flutter App Development Company

  1. Expertise in Flutter:

Verify the company’s expertise in Flutter development. Look for a team that has experience working with the framework, understands its nuances, and can effectively leverage its features to create high-quality apps.

  1. Portfolio and Case Studies:

Review the company’s portfolio and case studies. This will give you insight into their previous projects, the industries they’ve worked in, and the types of apps they’ve developed using Flutter.

  1. Client Reviews and References:

Seek out client reviews and testimonials. Ask the company for references you can contact to learn about their experience working with the development team, communication, project management, and overall satisfaction.

  1. Technical Proficiency:

Assess the technical skills of the development team. They should be capable of handling your app’s requirements, including any complex functionalities, integrations, and customization needs.

  1. Communication and Collaboration:

Effective communication is key to a successful partnership. Ensure that the company communicates clearly, understands your project’s goals, and collaborates effectively with your team.

  1. Quality Assurance Practices:

Ask about the company’s quality assurance practices. A robust testing process ensures that your app is bug-free, stable, and provides a seamless user experience.

  1. Design Capabilities:

Design is a crucial aspect of your app, so evaluate the company’s design capabilities. They should be able to create visually appealing and user-friendly interfaces that align with your brand.

  1. Support and Maintenance:

Discuss post-launch support and maintenance. A reliable development partner should offer ongoing support, updates, and fixes to ensure your app remains functional and up to date.

  1. Project Flexibility:

Consider how flexible the company is in accommodating changes or additions to the project scope. Projects can evolve, so having a development partner that can adapt to your needs is valuable.

  1. Cost and Budget:

While cost is a consideration, focus on the value the company provides rather than solely on the lowest price. Aim to strike a balance between quality and budget.

  1. Non-Disclosure Agreement (NDA):

If your app idea involves proprietary information, ensure the company is willing to sign a non-disclosure agreement to protect your intellectual property.

  1. Legal and Contractual Details:

Carefully review the contract terms, including ownership of the source code, payment schedules, project milestones, and any warranties provided.

  1. Transparent Pricing:

Seek a company that provides transparent pricing, including a breakdown of costs for different development stages and any additional charges that might arise.

Conclusion

In a world where mobile app development is pivotal for business success, Flutter stands out as a game-changing framework.

Its single codebase, exceptional UI capabilities, and wide-ranging platform support make it an ideal choice for businesses looking to create high-performance, visually appealing apps.

Despite a few limitations, the benefits that Flutter offers undoubtedly position it as one of the best cross-platform mobile app development platforms available today.

FAQs

Q: Is Flutter suitable for complex app development?

A: Absolutely! Flutter’s flexibility and rich widget library make it a strong candidate for developing complex and feature-rich applications.

Q: Can I use Flutter for web and desktop app development?

A: Yes, Flutter has extensions that allow you to develop for the web and desktop platforms alongside mobile.

Q: What is the difference between Flutter and other frameworks like React Native?

A: While both Flutter and React Native are popular for cross-platform app development, Flutter provides a more consistent UI and allows for faster development with its “Hot Reload” feature.

Q: Are Flutter apps slower since they are compiled to native code?

A: No, Flutter apps are compiled to highly efficient native ARM code, which ensures excellent performance comparable to natively developed apps.

Q: Is Flutter a good choice for startups with limited resources?

A: Yes, Flutter can be an excellent choice for startups as it allows them to build apps for multiple platforms with a smaller development team, thus saving resources.

How to Develop an App for Internet of Things (IoT)

IoT (Internet of Things) is a medium of connection and communication that helps to connect one device with another through the internet. Besides smartphones, computers, and laptops, we can use it in other smart devices.

Also, read “how IoT creates an impact on mobile app development

Both businesses and individuals are showing their interest in IoT applications to take advantage of the latest technology and the number is growing every day.

As the demand is growing day by day, developers and companies are building applications that are compatible with various types of devices with IoT systems and servers.

The main objective of Internet Of Things technology is to clarify the data, analyze it, and create technology that will be faster and more useful for the user.

Why Develop a Custom Internet of Things application?

The Internet of Things market is huge, the annual growth rate of IoT is more than 30%, and this figure is increasing every time.

As a result, big marketing giants such as Apple, Google, Microsoft and Facebook, and more are investing heavily in IoT technology-based applications and solutions.

“The total installed base of Internet of Things (IoT) connected devices worldwide is projected to amount to 30.9 billion units by 2025, a sharp jump from the 13.8 billion units that are expected in 2021.”

How to Develop an App for the Internet of Things

Our Products
orangescrum
Wakeupsales

We transform your ideas into engaging Web and Mobile Apps

andolasoft

Conclusion

The future of mobile app development is a little challenging to enter in the digital space. Internet Of Things has brought smart and unique business solutions which connect multiple devices seamlessly and securely.

It is an advanced technology and keeps growing globally. More and more companies are trying to jump and secure their positions in verticals like retail or healthcare.

Internet Of Things has great potential to provide solutions within a short time.

We at Andolasoft agree that IoT application development is a promising way to take your business to the next level.

Over the last couple of years, we have developed some IoT applications for our customers and in-house products.

If you are planning to develop a new IoT application for yourself or want to add new features to your existing one then get in touch with us today. We have experienced developers to help you…

Android Architecture Patterns and Their Differences

Android Architecture Patterns can help you create mobile apps with fewer bugs, better maintainability and testable code. These include Layered Architecture, Model-View-Controller, Data-Table-Fragment, Single-Page Applications, and Microscope. They focus on different areas of an app, from how to structure your app to how you should handle user interactions with it.

What is Architecture?

If you are building an application in an organized manner with some set of rules, describe proper functionalities and implement it with proper protocols, then it is called an Architecture.

Role of Architecture

Let us say if we are not using any architecture and we are writing our code in a class/activity/ fragment in an unorganized manner then the problems we will face are-

  • The number of lines of code will increase that it will become complex to understand.
  • It decreases readability and increases the number of bugs. Thus, it is difficult to test and reduces the quality of the product.

So, to provide clear data flow which will increase robustness, scalability, bug resistant, increase readability, easy to modify and increase productivity and provide a quality app. Thus, we should use proper architecture, suitable to work in a team.

But why does your app need good architecture?

A simple answer is that everything should be organized in a proper way. So does your Android project. If not, the following problems sound familiar to you: All of your codes are not covered by Unit Tests.

  • It is difficult to debug a class because it contains a huge number of functions.
  • You are unable to keep track of the logic inside that huge class.
  • Another developer finds it so difficult to maintain and add new features to your work.

So, if you are going to build a high-quality app, you should care about architecture.

Never miss an update from us. Join 10,000+ marketers and leaders.

What does your app get from a proper architecture?

  • Simplicity: Separate and define a clear single role for each component in your app. A class is not going to be a multi-tasking component. You will find it easy to know what it does and what is inside it. It advocates the Keep It Stupid Simple (KISS).
  • Testability: Before we can apply Unit Tests, we have to write testable codes.
  • Low-cost maintenance: It is easy to add, and remove features. Especially, it helps us to keep track of important logic parts.

The When & How?

Several upcoming questions maybe appear in your head.

  1. So, what is the best architecture pattern for my Android apps?
  2. And how can I apply that pattern in the most effective way?
    • There is no single candidate that suits all of your Android projects because the design pattern is abstract and its implementation depends on specific requirements.
    • Fortunately, the more we understand about it, the more effectively and properly we apply them.
    • You can use different architectures across different apps. Even, in one complex project, each module has its own structure.

Another question?

So, if I have never used any architecture in my Android apps yet. So, what should I do?

Just pick up one of them. Read about it, try to apply it. After that, you will become familiar with it and have your own best practices.

Developers out there are talking about these following popular patterns:

  • MVC ( Model — View — Controller)
  • MVP ( Model — View — Presenter)
  • MVVM (Model — View — View Model)

Some principles for good Architecture in Android

To get good architecture there are some basic concepts we should follow. They are:-

  • Separation of concern: Component should do what it is required. Shown in the diagram.

Architecture Pattern

This we can achieve by Architecture pattern.

  • No Hard dependency: It should be fixed if every component should work on some limited amount of dependency. All dependencies should be provided from outside. Tips: Use Dependency Injections.
  • Manage lifecycle and data persistence: It can be achieved by Architecture Component.

MVC:

It is a Model-View-Controller. The most commonly used architecture. These are the three components used in MVC.

  • Model– It is business logic and Data State. Getting and manipulating the data, communicates with the controller, interacts with the database, sometimes update the views.
  • View– What we see. User Interface consists of HTML/CSS/XML. It communicates with the controller and sometimes interacts with the model. It passed some dynamic views through the controller.
  • Controller– It is Activity/Fragment. It communicates with view and model. It takes the user input from view/REST services. Process request Get data from the model and passes to the view.

Advantages

  • It keeps business logic separate in the model.
  • Support asynchronous techniques
  • The modification does not affect the entire model
  • Faster development process

Disadvantages

  • Due to large code controller is unmanageable.
  • Hinders the Unit testing
  • Increased Complexity

MVC

MVP:

It as Model-View-Presenter. For the phase of developing time or for the phase of developers it is vital to divide the architecture into layers. It breaks the dependency on what we have on view.

  • Model– It is business logic and Data State. Getting and manipulating the data, communicates with the presenter, interacts with the database. It doesn’t interact with the view.
  • View – Consists of UI, activity, and fragment. It interacts with the presenter.
  • Presenter– It presents the data from the model. Control all the behavior that want to display from the app. It drives the view. It tells view what to do. Any interaction between the model and the view is handled by the presenter. Saves the data back to the model.

Advantages

  • It makes view dumb so that you can swap the view easily.
  • Reusable of View and Presenter
  • Code is more readable and maintainable
  • Easy testing as business logic separated from UI

Disadvantages

  • Tight coupling between View and Presenter
  • Huge amount of interfaces for interaction between layers.
  • The code size is quite excessive.

MVP

MVVM:

It is a Model-View-View Model. It losses the tight coupling between each component and reduces the glue classes. Works on the concept of observables. Children don’t have reference to the parent, they only have reference by observables.

  • Model– It has business logic, local and remote data source and repository. Repository: communicate with local or remote data sources according to the request from View Model.
  • View– Only user interaction i.e.XML, no business logic. Direct send user action to view model but does not directly get a response. To get a response view observes some data which View Model exposes.
  • View Model– Most of the user interface logic center it here. It is a bridge between a view and a business logic. It does not have any clue which view has to use it. As it does not have a direct reference to the view. Thus, good in testing and has loose coupling. But still, it needs to update the UI this interaction done by observables. When data changes observable notifies.

Advantages

  • No tight coupling between the view and view model
  • No interfaces between view and model.
  • Easy to unit testing and code is event-driven.

Disadvantages

  • You have to create observables for each UI component.
  • The code size is quite excessive.

MVVM

Difference between MVC, MVP & MVVM Design patterns

MVC (Model View Controller)

  • One of the oldest software architecture
  • UI (View) and data-access mechanism (Model) are tightly coupled.
  • Controller and View exist with the one-to-many relationship. One Controller can select a different View based upon required operation.
  • The View has no knowledge about the Controller.
  • Difficult to make changes and modify the app features as the code layers are tightly coupled.
  • User Inputs are handled by the Controller.
  • Ideal for small scale projects only.
  • Limited support to Unit testing.
  • This architecture has a high dependency on Android APIs.
  • It does not follow the modular and single responsibility principle.

MVP (Model View Presenter)

  • Developed as the second iteration of software architecture which is advance from MVC.
  • It resolves the problem of having a dependent View by using Presenter as a communication channel between Model and View.
  • The one-to-one relationship exists between Presenter and View as one Presenter class manages one View at a time.
  • The View has references to the Presenter.
  • Code layers are loosely coupled and thus it is easy to carry out modifications/changes in the application code.
  • The View is the entry point to the Application
  • Ideal for simple and complex applications.
  • Easy to carry out Unit testing but a tight bond of View and Presenter can make it slightly difficult.
  • It has a low dependency on the Android APIs.
  • Follows modular and single responsibility principle

MVVM (Model View View Model)

  • Industry-recognized architecture pattern for applications.
  • This architecture pattern is more event-driven as it uses data binding and thus makes easy separation of core business logic from the View.
  • Multiple View can be mapped with a single View Model and thus, the one-to-many relationship exists between View and View Model.
  • The View has references to the View Model
  • Easy to make changes in the application. However, if data binding logic is too complex, it will be a little harder to debug the application.
  • The View takes the input from the user and acts as the entry point of the application.
  • Not ideal for small scale projects.
  • Unit testability is highest in this architecture.
  • Has low or no dependency on the Android APIs.
  • Follows modular and single responsibility principle.

Never miss an update from us. Join 10,000+ marketers and leaders.

Conclusion

When it comes to Android, both MVP and MVVM offer better modular architecture than MVC. Though, they also tend to add more complexity to your app.

In simpler applications which involves two or more screens, MVC can work fine in Android. Whereas in more complex cases where your application needs to be developed considering to add more features in future, MVVM with data binding will make you write lesser code.

Android architecture describes how a mobile app should be structured internally. By understanding the pros and cons of different patterns, you can make your app more maintainable and scalable.

Although the app market is still in its infancy, the number of successful mobile apps is growing exponentially. It’s no surprise then that the number of new mobile app development patterns are emerging at an equally rapid rate.

So, which architectural design pattern are you going to consider for your mobile application?

Key Difference Between ReactJS And React Native

ReactJS and React Native are two leading JavaScript frameworks that allow users to build mobile user interfaces (MUI). They both provide developers with an opportunity to quickly prototype mobile apps and manage complexity as projects grow in scope. Both ReactJS and React Native are used to create native-like apps. However, there are certain differences between the two. Let me explain one by one

What is ReactJS?

React.JS often referred to as React or ReactJS is a JavaScript library responsible for building a hierarchy of UI components or in other words, responsible for the rendering of UI components. It provides support for both front-end and server-side.

Advantages of ReactJS

  1. Easy to learn and use: ReactJS is much easier to learn and use. Any developer who comes from a JavaScript background can easily understand and start creating web apps using react.
  2. Creating dynamic web applications becomes easier: To create a dynamic web application specifically with HTML was tricky, which requires complex coding, but ReactJS solved that issue and makes it easier. It provides less coding and gives more functionality.
  3. Reusable components: ReactJS web application is made up of multiple components, and each component has its logic and controls. These components can be reused wherever needed. The reusable code helps to make your apps easier to develop and maintain.
  4. Performance enhancement: ReactJS improves performance due to virtual DOM. The React Virtual DOM exists entirely in memory and is a representation of the web browser’s DOM. Due to this, when we write a react component, we do not write directly to the DOM. Instead, we are writing virtual components that will turn into the DOM, leading to smoother and faster performance.
  5. The support of handy tools: ReactJS supports a handy set of tools which make the task of the developers understandable and easier.

What is React Native?

React Native is an open-source JavaScript framework used for developing a mobile application for iOS, Android, and Windows. It uses only JavaScript to build a cross-platform mobile app. React Native is the same as react, but it uses native components instead of using web components as building blocks. It targets mobile platforms rather than the browser.

Facebook developed the React Native in 2013 for its internal project Hackathon. In March 2015, Facebook announced that React Native is open and available on GitHub.

Advantages of React Native

There are several advantages of React Native for building mobile applications. Some of them are given below:

  1. Cross-Platform Usage: It provides the facility of “Learn once write everywhere.” It works for both platform Android as well as iOS devices.
  2. Class Performance: The code written in React Native is compiled into native code, which enables it for both operating systems as well as it functions in the same way on both the platforms.
  3. JavaScript: JavaScript knowledge is used to build native mobile apps.
  4. Community: The large community of ReactJS and React Native helps us to find any answer we require.
  5. Hot Reloading: Making a few changes in the code of your app will be immediately visible during development. If the business logic is changed, its reflection is live reloaded on screen.
  6. Improving with Time: Some features of iOS and Android are still not supported, and the community is always inventing the best practices.
  7. Native Components: We will need to write some platform specific code if we want to create native functionality, which is not designed yet.
  8. Existence is Uncertain: As Facebook develops this framework, its presence is uncertain since it keeps all the rights to kill off the project anytime. As the popularity of React Native rises, it is unlikely to happen.

Disadvantages of React Native

  1. React Native is still new and immature: React Native is a newbie in Android and iOS programming languages and is still in its improvement stage, which can have a negative impact on the apps.
  2. Learning is tough: React Native is not easy to learn, especially for a fresher in the app development field.
  3. Lacks the Security Robustness: React Native is a JavaScript library and open-source framework, which creates a gap in the security robustness. When you are creating banking and financial apps where data is highly confidential, experts advise not to choose React Native.
  4. Takes More Time to Initialize: React Native takes a lot of time for initializing the runtime even for the hi-tech gadgets and devices.

ReactJS vs React Native

ReactJS

React Native

ReactJS initial release was in 2013. React Native initial release was in 2015.
Used for developing web applications. Used for developing mobile applications.
Can be executed on all platforms. Not platform independent. It takes more effort to be executed on all platforms.
Uses React-router for navigating web pages. Built-in navigator library for navigating mobile applications.
Uses HTML tags. Does not use HTML tags.
Use code components, which saves a lot of valuable time. Reuse React Native UI components and modules which allow hybrid apps to render natively.
Provides high security. Provides low security in comparison to ReactJS.
The Virtual DOM renders the browser code. Native uses its API to render code for mobile applications.

Which is better, React or React native?

Both ReactJS and React Native are important pillars for app and web development, and due to their flexible functionalities and an evolving Eco-system of libraries, they are gaining momentum with each passing day.

While ReactJS is basically a JavaScript library and React Native is the entire framework, the former is the heart of the latter, and compliments each other.

If ReactJS is optimal for creating apps with high functionality and complex calculations, then React Native is ideal to give a native feeling to your mobile apps.

Conclusion

React is a framework for building applications using JavaScript. React Native is an entire platform allowing you to build native, cross-platform mobile apps, and React.JS is a JavaScript library you use for constructing a high performing UI layer.

React.JS is the heart of React Native, and it embodies all react principles and syntax, so the learning curve is easy. The platform is what gave rise to their technical differences. Like the browser code in React is rendered through Virtual DOM while React Native uses Native API’s to render components on mobile.

So both the framework has huge market demand for web and mobile application development. We have also expertise in developing application in react and react native. If you have any quarries on these two framework then please book a free consultation or if you are looking to develop application on these two framework then you are in the right place. Contact us now

An Introduction To BuildContext In Flutter and It’s Importance?

BuildContext is the object that stores information about the current build. It provides information such as the minimum and maximum supported Flutter version, the device’s screen size and pixel density, the currently active theme, and more.

The BuildContext is the set of inputs that Flutter uses to create an instance of a widget. It includes properties on the Android and iOS platforms, as well as properties related to the current device and environment.

It can be used to customize the behavior and appearance of your widget, but it’s important to understand how it works in order to avoid any issues.

For instance, you can use BuildContext.host () to get a string that specifies the current app’s host name. You can also use BuildContext.local (context).emulator so you can set up an emulator for testing your app on different devices without needing to change settings in Android Studio every time you want to switch emulators.

Flutter is one of the hottest technologies for cross-platform mobile development. It has been described as a new contender in the app development industry, competing with traditional frameworks like React Native and Xamarin.

Flutter builds on Google’s own Dart programming language and provides a library of scalable, customizable UI widgets to help developers build beautiful native interfaces that run across all platforms. It has been designed to help developers build high-quality, natively compiled apps that run on both Android and iOS from one codebase.

Never miss an update from us. Join 10,000+ marketers and leaders.

What is a BuildContext?

The BuildContext is a locator that is used to point the location of the widget in the widget tree.

In Flutter we have to create widgets through the build method & we have to pass the BuildContext as an argument to the build method.

Each BuildContext is different for every widget. Each widget you create has its own BuildContext and they can locate themselves in the widget tree or reach out to the nearest widget.

This is how we create a widget

[code language=”css”]
Widget build (BuildContext context)=> MyAwesomeWidget();
[/code]

Flutter widget tree

Everything in Flutter is a widget. Whether it is a container, providers, text, button, image etc. everything is a widget, whether it reflects the UI in the app or not.

The UI or display in Flutter comprises stacks of widgets popularly called a widget tree. Each component is responsible for a small unit of the entire UI.

Flutter widget tree

The above image is an example of a widget tree in Flutter. We can observe that every widget has its own place in the widget tree i.e. the Button widget is under column widget.

Widgets are only visible to its BuildContext or to its parent’s BuildContext. That means we can locate the parent widget from the child widget. For the above image tree structure we can get Scaffold from Container by going up:

[code language=”css”]
context.ancestorWidgetOfExactType(Scaffold)
[/code]

You can also locate a child widget from a parent widget and for that, we use Inherited Widgets.

There are three main trees in Flutter:

  1. Widget
  2. Element
  3. Render

Widget

Widgets are immutable, they represent the structure for RenderObjects Fluorescence is optimized, which can easily create and destroy widgets without any significant performance implications.

The same can’t be said for RenderObjects.

Element

In the middle of Widgets and RenderObjects sits elements. These act as the glue between the immutable widget layer and the mutable render layer.

As the configuration of a widget changes (for example, the user calls the set state that triggers a rebuild), the element notices incoming changes and says to the corresponding render object,

“Hey! Please update. ”

Render

RenderObjects are what the visual pieces on the screen correspond to. Their purpose is to define areas on the screen regarding their spatial dimensions. They are referenced by the element. As a consequence we are dealing with another (third) tree here: the RenderObjects together form a tree which is called Render Tree whose root node is a RenderView (being a variant of a RenderObject). The RenderObject, on the other hand, are mutable objects that do the heavy lifting of turning the configuration supplied from widgets into pixels users can see and interact with on the screen.

Unlike widgets that are cheap and can safely be created and destroyed without any significant performance implications, the same cannot be said for RenderObjects.

For this reason, whenever the configuration of a widget changes, the framework looks at the change and updates the associated RenderObject instead of creating a new one each time.

Conclusion

Understanding BuildContext is very crucial to develop applications in Flutter. This improves our knowledge on how Flutter works and helps to build apps confidently.

BuildContext is a facade that provides a consistent API for implementing custom layouts and animations. The code is platform-specific, but the abstraction weaves some of the underlying platform-specific logic out of sight. BuildContext also helps reduce the need to know about the underlying platform details when implementing custom layouts and animations.

I’ve worked with the team at Andolasoft on multiple websites. They are professional, responsive, & easy to work with. I’ve had great experiences & would recommend their services to anyone.

Ruthie Miller, Sr. Mktg. Specialist

Salesforce, Houston, Texas

LEARN MORE

Flutter is an open-source mobile app SDK that is used to make a high-quality app with a beautiful and consistent user experience. Unlike native mobile development, Flutter does not require that an app has a single, complete codebase but instead lets you mix and match code for different platforms. It also provides a rich set of pre-built widgets and allows for shared state.

The BuildContext is the context in which the Flutter app is running and is used for determining where to find resources and strings. It can be thought of as the environment in which the app is being used. Flutter provides an abstract class called BuildContext that handles the loading of resources, without requiring the developer to use hardcoded paths. This abstraction is one of the things that makes flutter so easy to use.

Flutter provides a set of high-level classes to help flutter developers build reactive user interfaces. Are you looking to develop an application in flutter framework? Let’s discuss