The Importance Of Mobile Quality Assurance

Mobile phones are being designed for the needs of urban warriors who want to do everything on the go. The mobile ecosystem has gone beyond the boundaries of telephony.

It records activities, provides event alerts, keeps users in touch with their personal lives and assists in business processes like closing transactions and completing payments. These advanced smartphone capabilities are giving rise to novel ways which addresses the needs of customers, employers and partners.

Mobile Application Marketplaces are becoming very popular day by day, and many companies are facilitating users to download various app. Websites are also being built as responsive for better browsing experience on various handheld devices.

Challenges of Mobile Application Testing :

Now-a-days, people are accessing the Internet and digital content in general more and more frequently from mobile rather than a traditional device. Mobile devices are built on a variety of operating systems that include multiple versions of iOS, Android, Windows, BlackBerry, Symbian, Bada and Brew, etc. Many years ago, the importance of Mobile Quality Assurance became apparent to the mobile development community.

Never miss an update from us. Join 10,000+ marketers and leaders.

Mobile Quality Assurance has needful key focus areas such as “Functionality”, “Performance”, “Usability”, “Automation”, “Security”, “Compatibility (Responsiveness)”, “Interface”, “Services” and “Device Proliferation”.

Mobile QA testing is nothing but a process by which mobile devices are being tested for its functionality, usability and consistency for better performance.

Mobile Application testing is categorized into two phases; such as “hardware or Device Testing” and “Software Testing”. Now this process is maximizing to support iPhone, Android, Windows Mobile, Symbian, Blackberry, tablets, including other operating systems with minimizing the testing cycle up to 50% as well.

As more and more mobile apps are coming out as well as Smartphones and it might be finding too many challenges or risks like variety of mobile devices, diversity in Mobile Platforms/OS, Mobile network operators and Scripting.

So, Mobile QA Testing is becoming very necessary part of Mobile Application Development Ecosystem.

Summary:

It is inescapable that your business will adopt mobile technologies to improve efficiency and become a regular business.

However, in a fast-changing mobile environment, application testing must be done in days instead of weeks, to ensure that your business remains agile, productivity is increased, time, money and customer satisfaction are not impacted.

I hope you liked this post. You must get a clear idea about the real challenges in mobile application testing. I would like to know your invaluable suggestion on this topic.

Recommended Blog: Andolasoft launched service on QA Automation
Grow Your Business For Your Mobile App With Google Analytics

In this digital era, information or data plays pivotal role in the process of development. The more information you have, more precise and accurate decision you can take. And this is also applies to mobile apps.

As per report comes from Portio “1.2 billion people worldwide were using mobile apps at the end of 2012. This is forecast to grow at a 29.8 percent each year, to reach 4.4 billion users by the end of 2017.” This simply indicates industry’s future growth potential; but to stand out this industry is not an easy job. Good news is that Google has its own free analytics tool that helps you to find out insight details of your mobile app which can be your vital part of our app development process.

In June 2012, Google introduced beta version of mobile app analytics ; but now it becomes the part of Universal Analytics. Today our purpose is to educate those developers or users who are not familiar with this influential API(Application Program Interface)

How To Setup Google Analytics for Mobile App?

Step 1:

Set up a new app property in your analytics accounts.
First login into your google analytic profile. Here you get two options:

  • Option One: You can create new account for your mobile app. For this go to admin section, then create new accounts from the account tab and choose “mobile app” tab. Now just provide details like Account name, App name, Industry category and time zone and you will get your tracking code. This option is more suitable if you want to see your analytic data of your mobile apps only.
  • Option Two: Here you can create a new property from your existing account. For this simply go to account where you want to add your new property and then select “Create new property” tab under property section and rest is similar to option one.This option is more suitable if you want to see analytic data of your web application as well as corresponding mobile application.

Step 2:

Download the Google Analytics SDK for Android or iOS from the same account screen that provides the tracking ID. Suggest to take help of mobile developer to implement tracking via SDK.

Never miss an update from us. Join 10,000+ marketers and leaders.

Once you setup your analytic for mobile app you can analyze your data through lots of cool features and out of them I have listed few features here:

  • Enhance your customer base by knowing who utilizes your app, on what platform, where they come from and what they looking for from Traffic Source report and Google play integration.Note: If you link your Google Analytics account to Google Play then your android apps will be automatically recognized in Google Analytic; but you have to associate each application separately with an analytic account.
  • Event tracking, Flow visualization, and Real time reporting helps you to identify scope of improvement for better customer engagement. With in-built crash and exception reporting, you can prioritize the issues which are impacting your visitors, helping you to serve better user experience. More you engage your visitor, better chance to achieve your objective.
  • Every single application has certain goals such as purchase, leads, signup or simply spending time on app. This helps you to setup and track those goals.
  • Google Analytics is now available on Admob. So you can get full analytic data either from Google Analytics or from Analyze tab of Admob account.

Recently, Google also released official Google Analytic app for iphone user (https://itunes.apple.com/app/google-analytics/id881599038). In future we may review this app for you.

See Also : Tips to increase your app download through App Store Optimization(ASO)

Andolasoft has been successfully delivered lots of iOS and Android app for his worldwide customer. You can check out our portfolio page. I would love to hear how you are using, or plan to use, this powerful Google API.

How To Monetize IOS App Through Apple In-App Purchase Integration

What Is In App Purchase?

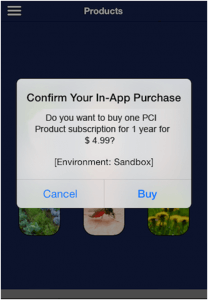
Apple’s In-App purchase lets you the ability to sell items within your free or paid app which includes premium content, virtual goods, upgrade features and subscriptions. Apple takes 30% of the commission and you receive 70% of the purchase price.

Each purchase is associated with a product type. The product types are:

  • Apple-In-App-Purchase-208x300

    Consumable Products:

Consumables are In-App Purchases that must be purchased each time the user needs that item.

  • Non-Consumable Products:

Non-Consumables are In-App Purchases that only need to be purchased once by the user and are available to all devices registered to a user.

  • Auto-Renewable Subscriptions:

Auto-Renewable Subscriptions allow the user to purchase episodic content or access to dynamic digital content for a set duration time. At the end of each duration, the subscription will renew itself, until a user opts out.

  • Non-Renewable Subscriptions:

Non-Renewing Subscription allow the sale of services with a limited duration. Non-Renewing Subscriptions must be used for In-App Purchases that offer time-based access to static content.

  • Free Subscriptions:

Free Subscriptions are an extension of Auto-Renewable Subscriptions that permit the delivery of free subscription content to Newsstand-enabled applications.

Never miss an update from us. Join 10,000+ marketers and leaders.

The Free Subscription In-App Purchase type is implemented in the same way as an Auto-Renewable Subscription, just without any charges to the user. Free Subscriptions do not have expiration, but the user can turn off the subscription at any time.

You can use any one of the above as best suit to your application.

For example, integrating InApp purchase for Non-consumable type product.

In Non-consumable products type, user has to pay only once. Then the content or items will be available to all the device against that user’s apple ID.

What To Do Before Integrating In App Purchase To Your Application?

  1. Connect to iTunes
  2. Then create an unique App ID for your application and enable in-app purchases for that.
  3. Update the app with created bundle ID and code signing in Xcode with corresponding provisioning profile.
  4. Create the app using the AppID you’ve registered. Then goto Manage Applications in iTunes Connect.
  5. Make sure you have set up the bank details for your app as it is necessary for supporting In-App purchase.
  6. Then Add a new non-consumable product for In-App purchase.
  7. Last step is to create a test user account using Manage Users option in iTunes connect page of your app.

Lets write the code

First include StoreKit Framework into the app.Then write the following code in ViewController.h file

#import <UIKit/UIKit.h>
#import <StoreKit/StoreKit.h>
 
@interface MyViewController : UIViewController
<SKProductsRequestDelegate,SKPaymentTransactionObserver>
 
{
 
}
-(IBAction)PurchaseButtonClicked:(id)sender;
 
- (void) completeTransaction: (SKPaymentTransaction *)transaction;
- (void) restoreTransaction: (SKPaymentTransaction *)transaction;
- (void) failedTransaction: (SKPaymentTransaction *)transaction;
 
@end 
Write the following code in ViewController.m file
-(IBAction)PurchaseButtonClicked:(id)sender {
    SKProductsRequest *request= [[SKProductsRequest alloc]
initWithProductIdentifiers: [NSSet setWithObject: @"your_product_ID"]];
    request.delegate = self;
    [request start];
}
- (void)productsRequest:(SKProductsRequest *)request didReceiveResponse:(SKProductsResponse *)response
{
   [[SKPaymentQueue defaultQueue] addTransactionObserver:self];
 
   NSArray *myProduct = response.products;
   NSLog(@"%@",[[myProduct objectAtIndex:0] productIdentifier]);
 
   //Since only one product, we do not need to choose from the array. Proceed directly to payment.
 
   SKPayment *newPayment = [SKPayment paymentWithProduct:[myProduct objectAtIndex:0]];
   [[SKPaymentQueue defaultQueue] addPayment:newPayment];
 
   [request autorelease];
}
 
- (void)paymentQueue:(SKPaymentQueue *)queue updatedTransactions:(NSArray *)transactions
{
 for (SKPaymentTransaction *transaction in transactions)
   {
      switch (transaction.transactionState)
      {
         case SKPaymentTransactionStatePurchased:
              [self completeTransaction:transaction];
              break;
         case SKPaymentTransactionStateFailed:
              [self failedTransaction:transaction];
              break;
         case SKPaymentTransactionStateRestored:
              [self restoreTransaction:transaction];
         default:
              break;
      }
    }
} 
 
- (void) completeTransaction: (SKPaymentTransaction *)transaction
{
    NSLog(@"Transaction Completed");
    // You can create a method to record the transaction.
    // [self recordTransaction: transaction];
    // You should make the update to your app based on what was purchased and inform user.
    // [self provideContent: transaction.payment.productIdentifier];
    // Finally, remove the transaction from the payment queue.
    [[SKPaymentQueue defaultQueue] finishTransaction: transaction];
}
 
- (void) restoreTransaction: (SKPaymentTransaction *)transaction
{
    NSLog(@"Transaction Restored");
    // You can create a method to record the transaction.
    // [self recordTransaction: transaction];
    // You should make the update to your app based on what was purchased and inform user.
    // [self provideContent: transaction.payment.productIdentifier];
    // Finally, remove the transaction from the payment queue.
    [[SKPaymentQueue defaultQueue] finishTransaction: transaction];
}
 
- (void) failedTransaction: (SKPaymentTransaction *)transaction
{
    [activityIndicator stopAnimating];
    if (transaction.error.code != SKErrorPaymentCancelled)
    {
      // Display an error here.
      UIAlertView *alert = [[UIAlertView alloc] initWithTitle:@"Purchase Unsuccessful"
      message:@"Your purchase failed. Please try again."
      delegate:self
      cancelButtonTitle:@"OK"
      otherButtonTitles:nil];
      [alert show];
      [alert release];
     }
 
    // Finally, remove the transaction from the payment queue.
    [[SKPaymentQueue defaultQueue] finishTransaction: transaction];
}

That’s it, now your app is integrated with the inApp purchase with non-consumable subscription.

Note: Please review Apple Guidelines (https://developer.apple.com/appstore/resources/approval/guidelines.html) before publishing the app to the app store.

Andolasoft has expertise in iOS application development and other iOS integration.

See Also: E-Signature SDK for iOS App Developer

Like this blog? I’d love to hear about your thoughts on this. Thanks for sharing your comments.

Useful Features Of IOS 7

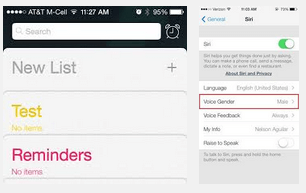
iOS 7 is the latest version of Apple’s iOS mobile operating system. It was first announced at WWDC on June 10, 2013. iOS 7 introduces great new features like Control Center, Air Drop for iOS, smarter multitasking and lots more. It also makes the things easier, faster, and more enjoyable.

Here are the best hidden features of iOS 7:

64 bit support

iOS apps can now be compiled for the 64-bit runtime. All system libraries and frameworks are 64-bit ready, meaning that they can be used in both 32-bit and 64-bit apps. When compiled for the 64-bit runtime, apps will run faster because of the availability of extra processor resources in 64-bit mode.

iOS uses the same LP64 model that is used by OS X and other 64-bit UNIX systems, which means fewer problems when porting code.

Better Multi-Tasking

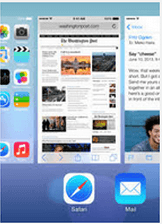
Smarter API is one of the major feature of iOS 7. This new multitasking APIs has the ability to perform app updates in the background at convenient time. Now, when you double-click the home button, all apps appear as big screens. The last app you were in is now front-and-center so swapping between apps is lightning fast. Better yet, closing apps that are not working well now just requires a swipe of the finger up.

Multi-tasking
Email Enhancements

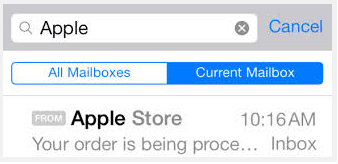
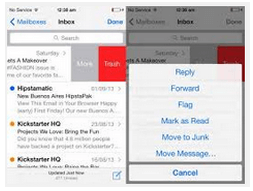
In iOS 7, it is very easy to find emails. You just need to know the persons email ID, name or a keyword and the Mail app will search the email for you. Also You can send an email from inbox to the junk folder in a single click. Just tap the flag in the bottom right corner of the email and choose “move to junk”.

Email

Email Enhancements

In iOS 7, it is very easy to find emails. You just need to know the persons email ID, name or a keyword and the Mail app will search the email for you. Also You can send an email from inbox to the junk folder in a single click. Just tap the flag in the bottom right corner of the email and choose “move to junk”.

Siri-Search

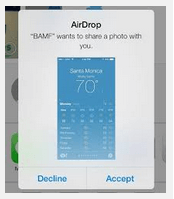
AirDrop

AirDrop technology simplifies data sharing between users of different devices nearby. Data is transferred directly, not via emails, cloud services and alike.

AirDrop

Junk Email

Now you can send an email from your inbox right to the junk folder. Just tap the flag in the bottom right corner of the email and choose “move to junk”.

Junk_Email

Save Money By Using Face Time Audio Calls

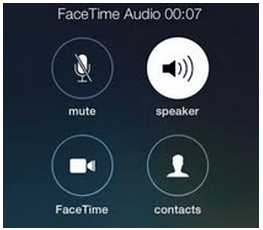
iOS 7 adds the ability to have audio only calls using FaceTime Audio. Now, you can make a call over 4G or Wi-Fi without the video component, and the sound quality is fabulous. Just go to the desired contact and press on the phone symbol next to FaceTime. Alternatively, you can search for your contact in the FaceTime app itself.

Audio-call

Looking to make your mobile application dreams come true? Contact us today to make it a reality.

Recommended Reading: How to make Static Framework iOS device independent?

How To Create A Static Library Or Framework For IOS?

A static library is a package of classes, functions, definitions and resources, which can be packed together and easily shared among projects. This facilitates reuse of code easier as you will have your own set of classes and utility functions.

Here are the steps to create your static library or framework

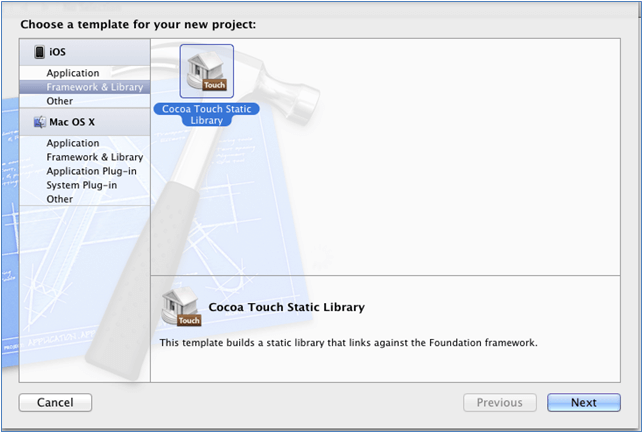
Step 1 : Create A New ‘Cocoa Touch Static Library’ Project

  • Choose template as Cocoa Touch Static Library.
  • Start with create new project >> iOS >> Framework & Library >> Cocoa Touch Static Library

choose_template_for_project

Note: The name you entered in product field will be the name of your framework.
Example:  ‘MyCompany’ will generate ‘MyCompany.framework’

Step 2: Create The Primary Framework Header (Recommended)

Usually, framework header is imported this way – <MyCompany/MyCompany.h>

  • Create an ‘.h’ file – ‘MyCompany.h
  • If X-Code creates it for you, just delete the ‘.m’ file and import the inner classes used in ‘.h’ file
  • If you import only ‘MyCompany.h’ (#import <MyCompany/MyCompany.h>) then the rest of the files need not be imported
#import <Foundation/Foundation.h>
  • Now, add your new sources
  • Make the header ‘Public’

Public headers are copied to the .framework and can be imported using the framework

  • Select the header in the project explorer, then expand the Utilities pane (Cmd+Option+0) to modify the scope of header.
  • In the ‘Target Membership’ group select the checkbox next to the ‘.h’ file.
  • Then, change the scope of the header from ‘Project’ to ‘Public’.

You might have to uncheck and check the box to get the dropdown list. This will ensure that the header is copied to the correct location in the copy headers phase.

Step 3: Update The Public Headers Location

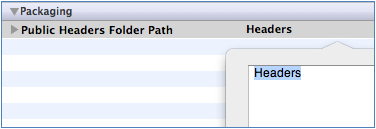
  • To avoid copying private headers to the framework check that the public headers are copied to a separate directory, e.g. $(PROJECT_NAME)Headers.
  • Select the project in the file explorer >> select the targets >> ‘Build Settings’ tab.
  • Set ‘Public Headers Folder Path’ to ‘$(PROJECT_NAME)Headers’ for all configurations by searching the ‘Public Headers Folder Path’. This folder must be unique if you are working with multiple Frameworks.

headers_xcode


Step 4: Setup ‘Build Settings’

"Dead Code Stripping" => No (for all settings)
"Strip Debug Symbols During Copy" => No (for all settings)
"Strip Style" => Non-Global Symbols (for all settings)

Step 5: Make Sure That Framework Is Used As Dependent Target

  • Generate the basic skeleton of the framework in the static library target. Also include a simple post-build script.
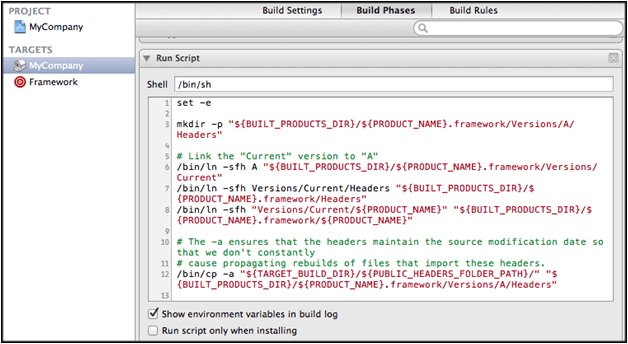
  • Select your target in the file navigator and click the ‘Build Phases’ tab
  • Then, click ‘Add Build Phase’ >> ‘Add Run Script’ and paste the following script in the source portion of the run script build phase.
set–e
mkdir -p "${BUILT_PRODUCTS_DIR}/${PRODUCT_NAME}.framework/Versions/A/Headers"
# Link the "Current" version to "A"
/bin/ln -sfh A "${BUILT_PRODUCTS_DIR}/${PRODUCT_NAME}.framework/Versions/Current"
/bin/ln -sfh Versions/Current/Headers "${BUILT_PRODUCTS_DIR}/${PRODUCT_NAME}.framework/Headers"
/bin/ln -sfh "Versions/Current/${PRODUCT_NAME}" "${BUILT_PRODUCTS_DIR}/${PRODUCT_NAME}.framework/${PRODUCT_NAME}"
# The -a ensures that the headers maintain the source modification date so that we don't constantly
# cause propagating rebuilds of files that import these headers.
/bin/cp -a "${TARGET_BUILD_DIR}/${PUBLIC_HEADERS_FOLDER_PATH}/" "${BUILT_PRODUCTS_DIR}/${PRODUCT_NAME}.framework/Versions/A/Headers"
mycompany_xcode
  • Build your project

The build products directory is usually in-
(~/Library/Developer/Xcode/DerivedData/<ProjectName>-<gibberish>/Build/Products/…)

You will find the ‘libMyCompany.a’ static library, a headers folder, and a ‘MyComapny.framework’ folder which contains the basic skeleton of your framework.

build_product_directory

SEE ALSO: How to make Static Framework iOS device independent?

I hope you enjoyed this topic, if you have any questions or comments please share below!

Sweet Journey | New IOS App From Andolasoft

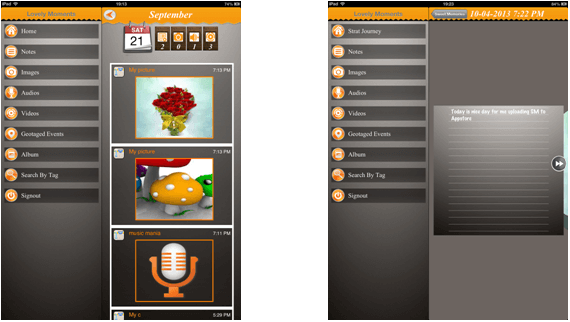
We are excited to announce that ‘Sweet Journey’ – a diary app is now in App Store. Deployed last week, got overwhelming responses with over 100 downloads around the world. It is a personal diary on the go. You could use it as a journal or photo album to keep your memories safe. Capture photos, videos and take notes, all in one app.

Download ‘Sweet Journey’ from App-Store

sweetjourney_logo

Journals and diaries are great to use, but it is vulnerable to threats like damage, lost. So, we came-up with an unique app idea to make note taking easier. If you like to carry around a journal and scribble notes, why not capture that on your iPhone or iPad. It would be easier, faster and insightful. You could do more than just writing notes and taking photos.

What You Can Do With Sweet Journey

  • Create notes with date and time
  • Capture snaps and videos with tags and timestamp
  • Record voices with tags and timestamp
  • Save photos with Geo-tag to see in map view, based on location
  • Store memories in one gallery and sort as per day, month and year

Here’s What We Did:

  • Designed the application logo, user interfaces (UI/UX) and animation effects
  • Developed the app in native language i.e. Objective-C and Cocoa Touch framework
  • Devised the application process and flow from navigation to monetization
  • Implemented Tapku SDK
  • Used iCarousel library for paged and scroll view
  • Deployed the app to App Store within 3 weeks since the initiation of project

So, go ahead; download the app and see how ‘SweetJourney’ can help memories last forever. Feel free to write reviews in iTunes.

Auditnet_appstore1


SJ_sc_small