How to Play HLS Videos on Android

Playing videos/audios is a popular activity on Android devices. Its framework provides MediaPlayer API as a quick integration to play media files with minimal effort.

What is HLS

HTTP Live Streaming (HLS) is an HTTP-based media streaming communications protocol implemented by Apple Inc. It’s just like MPEG-DASH which works by splitting the whole stream into a sequence of small HTTP-based file downloads, with each download loading one short block of an overall potentially unbounded transport stream.

How HLS Works

HLS works just like all robust streaming technologies. You can create multiple files for distribution to the player, which can adaptively change streams to enhance the playback experience. No streaming server is required for it, as it is an HTTP-based technology. Hence, all the switching logic resides on the player.

To distribute a video to the clients, the source needs to be encoded into multiple files at different data rates and then divided into short chunks (usually between 5-10 seconds long). Then, the files are loaded onto an HTTP server along with a text-based manifest file with an “.M3U8” extension.

Introduction to ExoPlayer

ExoPlayer is an app level media player API for Android, providing an alternative to Android’s default Media Player API from both Local Devices and the internet streams. Compared to Android’s Media Player, it’s easier to personalize; Supports features not compatible with Android Media Player API, such as HLS, DASH & Smooth Streaming Adaptive Playbacks.

To integrate the ExoPlayer into the Android app, you need to add the following dependency in your project’s build.gradle file.


[code language=”php”]
compile ‘com.google.android.exoplayer:exoplayer:rX.X.X’
[/code]

Here’s the code for Streaming the HLS video in Exoplayer

XML

[code language=”html”]
<com.google.android.exoplayer.AspectRatioFrameLayout android:id="@+id/exoplayer_frame" android:layout_width="match_parent" android:layout_height="match_parent" android:layout_gravity="center">

<SurfaceView android:id="@+id/surface_view_exoplayer" android:layout_width="match_parent" android:layout_height="match_parent" android:layout_gravity="center"/>

<View android:id="@+id/view_temp" android:layout_width="match_parent" android:layout_height="match_parent" android:background="@android:color/black"/>

<com.google.android.exoplayer.text.SubtitleLayout android:id="@+id/subtitles_exoplayer" android:layout_width="match_parent" android:layout_height="match_parent"/>

</com.google.android.exoplayer.AspectRatioFrameLayout>
[/code]

Java

[code language=”php”]
if (player == null) {

exoplayer_player = new DemoPlayer(getRendererBuilder(THE HLS VIDEO URL));

exoplayer_player .addListener(this);

exoplayer_player .setCaptionListener(this);

exoplayer_player .setMetadataListener(this);

exoplayer_player .seekTo(playerPosition);

playerNeedsPrepare = true;

mediaController.setMediaPlayer(exoplayer_player .getPlayerControl());

mediaController.setEnabled(true);

exoplayer_eventLogger = new EventLogger();

exoplayer_eventLogger .startSession();

exoplayer_player .addListener(eventLogger);

exoplayer_player .setInfoListener(eventLogger);

exoplayer_player .setInternalErrorListener(eventLogger);

exoplayer_debugViewHelper = new DebugTextViewHelper(player, debugTextView);

exoplayer_debugViewHelper .start();

}

exoplayer_player .setSurface(surfaceView.getHolder().getSurface());

exoplayer_player .setPlayWhenReady(playWhenReady);
[/code]

This is a Override method which handles the video resizing while streaming video in the player. It also handles the video size while the user changing the orientation of the device.

[code language=”html”]
@Override
public void onVideoSizeChanged(int video_width, int video_height, int video_unappliedRotationDegrees,float video_pixelWidthHeightRatio)

{
surfaceView_exoplayer.setVideoWidthHeightRatio(
video_height == 0 ? 1 : (video_width * video_pixelWidthAspectRatio) / video_height);
}
[/code]

Conclusion

●     ExoPlayer supports Dynamic Adaptive Streaming over HTTP (DASH) and Smooth Streaming which              aren’t supported by the default Android Media Player.
●     It supports advanced HLS features, such as correct handling of #EXT-X-DISCONTINUITY tags.
●     It’s highly customizable, which will suit your case.
●     It easily updates the player along with your application.

References: Github, Android Developers 

Are you having problems in HLS in Android devices? Share your pain points with me at info@andolasoft.com, we would love to help!
How To Develop A Custom WordPress Plugin “Hello World!”

Plugins act as add-ons & additional functionalities to a website without touching the core files, facilitating to install future updates without losing any of the customization.

During the development phase, you may not find appropriate functionalities matching your requirements and you can opt for Custom Plugins.

Let’s start with the basics first.

Points To Note:

    • Some knowledge in basic installation & setup of WordPress, to develop custom Plugins is necessary.
    • Always use the latest WordPress version available.
    • Coding knowledge for PHP is required.
    • The Plugin needs to be tested in a clean WordPress setup.
    • An Editor of your choice might be required.

Never miss an update from us. Join 10,000+ marketers and leaders.

Steps:

  • Enable debug mode for bug tracking. You can do so by adding ‘define(‘WP_DEBUG’, true)’ to the ‘wp-config.php’ file.
  • Use wp_enqueue_style() and wp_enqueue_script() to add style sheets and scripts to a Plugin; This prevents scripts   from being loaded multiple times.
  • All the Plugins will be there in the wp-content > plugins folder.
  • Create a folder andola-hello-world inside the plugins folder.
  • Note: Keep the name unique, so that it doesn’t conflict with other Plugins used in the website.
  • Create a readme.txt file, add the Plugin documentation details and any other version-changes list.

Hello World

=== Andola Hello World ===

Contributors: Jyo

Website: andolasoft.com

Tags: hello world

Requires at least: 2.7

Stable tag: 1.0

Plugin guide:

  • Next step is to create a file named andolasoft-hello-world.php where we can write our Plugin functionality code. For example:

[code language=”html”]
/*
Plugin Name: Andola-Hello-World
Plugin URI: http://andolasoft..com/
Description: A hello world plugin used for training purpose.
Version: 1.0
Author: Ashish Mohapatra
Author URI: https://www.andolasoft.com
License: GPL
*/
//Hooks a function to a filter action, ‘the_content’ being the action, ‘hello_world’ the function.
add_filter(‘the_content’,’hello_world’);
//Callback function
functionhello_world($content)
{
//Return the content
return$content . "<b> Hello World </b>";
}
?>
[/code]

  • The comments section inside the PHP tags is mandatory.
  • The code above will append ‘Hello World’ in the body using the magic of WordPress hooks.

Almost There.

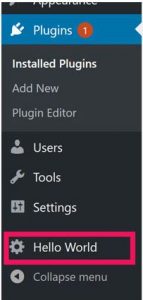
Your Plugin is now ready. You should see “Hello World” appended to the end of the content, when you open a post page in your browser.

Have you created any Custom Plugins before? I would love to hear your ideas & experiences at “info@andolasoft.com“.

Also, appreciate if you can leave your suggestions/feedback below.

CakePHP: Cross-Site Request Forgery (CSRF) Test

Cross-site request forgery (CSRF), also known as one-click attack or session riding is a type of malicious exploit of a website where unauthorized commands are transmitted from a user that the website trusts. Unlike cross-site scripting (XSS), which exploits the trust a user has for a particular site, CSRF exploits the trust that a site has in a user’s browser.

How It Works?

There are various techniques used for CSRF attacks. Let’s take the example of changing an email address of a logged-in user, by using a form with the required fields to change.

Ex:

[code language=”html”]
&amp;lt;form name="myform" action="http://myweb.com/profile" method="POST"&amp;gt;
&amp;lt;input name="email" type="text" value="xyz@gmail.com" /&amp;gt;
&amp;lt;input name="name" type="text" value="john" /&amp;gt;
&amp;lt;input type="submit" value="Save"/&amp;gt;
&amp;lt;/form&amp;gt;
[/code]

Here the victim has to submit the form.

Alternately:

[code language=”html”]
&amp;lt;body onload="document.forms[0].submit()"&amp;gt;
&amp;lt;form name="myform" action="http://myweb.com/profile" method="POST"&amp;gt;
&amp;lt;input name="email" type="hidden" value="xyz@gmail.com"/&amp;gt;
&amp;lt;input type="hidden" name="name" value="john"/&amp;gt;
&amp;lt;input type="submit" value="Save"/&amp;gt;
&amp;lt;/form&amp;gt;
&amp;lt;/body&amp;gt;
[/code]

Here, the form gets automatically submitted when loaded in the browser. The attacker can now change the authenticated users of “myweb.com” email address easily.

Note: it is not easy for attackers to use ajax call to perform the above operation since most of the modern browsers have same-origin policy restrictions.

How To Prevent Such Attacks:

Let’s take the same example as above & prevent the CSRF attack.

Here are the Steps to be followed:

Step#1:

Generate a unique token (256 char string) for each session, i.e. for every user login to the system, there should be a unique token associated. Store the token in the session.

[code language=”html”]
if(!isset($_SESSION[‘CSRFTOKEN’])){
$tokn = $this-&amp;gt;Format-&amp;gt;genRandomStringCustom(25);
$_SESSION[‘CSRFTOKEN’] = $tokn;
}
[/code]

For CakePHP, do this in App Controller.

Step#2:

Add this token to every form while doing any operations such as saving your profile information like email, password, first name or the last name. For this follow the below guidelines:

Take profile.ctp for our example and add the below code to profile.ctp:

Add a hidden field to the form.

Example:

[code language=”html”]
&amp;lt;form id=”formId” method="POST" action="http://myweb.com/profile"&amp;gt;
&amp;lt;input id=”csrftoken” type="hidden" value=” ” name=”csrftoken" /&amp;gt;
…..

&amp;lt;input value="Save" type="button" onclick=”addCsrfToken(‘formId’)”/&amp;gt;
&amp;lt;/form&amp;gt;
[/code]

Set the ”csrftokenl” value at the run when you submit the form.

[code language=”html”]
&amp;lt;script&amp;gt;
function addCsrfToken(formid){
$(‘.csrftoken).val(‘&amp;lt;?php echo $_SESSION[‘CSRFTOKEN’]; ?&amp;gt;’);
$(‘#’+formid).submit();
}
&amp;lt;/script&amp;gt;
[/code]

Step#3:

Check the csrf token in the respective controller & action for every successful operation.

Let’s take the user’s controller and profile action:

[code language=”html”]
UsersController.php

function profile(){

if($_SESSION[‘CSRFTOKEN’] === “requested token from the form”){ //$this-&amp;gt;data[‘csrftoken’];
//perform the rest of the operation here
}else{
//unauthorized access, do not save anything
}
}
[/code]

Over To You, Now!

These kind of one-click attacks are quickly becoming the new modes of Cyber attacks. It would be nice if you can share your experiences related to the same at info@andolasoft.com.

Let’s make the web a safer place for everyone!

Material Design in Android

What is Material Design?

It’s a comprehensive guide for visual, motion and interaction designs across platforms and devices, with introduction of new features like Material Theme, New Widgets, Custom Shadows, Vector Drawables & Custom Animations.

Android included support for Material Design from Android 5.0 (API Level 21) on wards.

Material Design Color Customization:

We use 5 primary attributes for customization.

  • colorPrimaryDarkthe darkest primary color of the app; mainly applies to notification bar background.
  • colorPrimarythe primary color of the app; applied as toolbar background.
  • textColorPrimarythe primary color of text; applied to toolbar title.
  • windowBackgrounddefault background color of the app.
  • navigationBarColorthe background color of footer navigation bar

Adding the Toolbar/AppBar (Actionbar):

It’s pretty easy. All you have to do is, create a separate layout for the toolbar & include it in other layouts wherever you want it to be displayed.

  • Create an xml file named xml under res ⇒ layout & add android.support.v7.widget.Toolbar element. This creates the toolbar with specific height & theme.

toolbar.xml

[code language=”html”]
<?xml version="1.0" encoding="utf-8"?>
<android.support.v7.widget.Toolbar xmlns:android="http://schemas.android.com/apk/res/android" xmlns:local="http://schemas.android.com/apk/res-auto" android:id="@+id/nav_toolbar" android:layout_width="match_parent" android:layout_height="wrap_content" android:minHeight="?attr/actionBarSize" android:background="?attr/colorPrimary" local:theme="@style/ThemeOverlay.AppCompat.Dark.ActionBar" local:popupTheme="@style/ThemeOverlay.AppCompat.Light" />
[/code]

Implementation of RecyclerView:

It introduces an additional level of abstraction between theRecyclerView.Adapter & RecyclerView.LayoutManager; To detect data set changes in batches during a layout calculation. This helps with performance because all view bindings happen at the same time & unnecessary bindings are avoided.

TheRecyclerView widgets is part of the v7 Support Libraries. To use the widgets in your project, add these Gradle dependencies to your app’s module:

[code language=”html”]
dependencies {
compile ‘com.android.support:recyclerview-v7:21.0.+’
}
[/code]

Creating Cards:

CardView extends theFrameLayout class & lets you show information inside cards that have a consistent look across the platform. To create a card with a shadow, use the card_view: cardElevation attribute.

Use these properties to customize the appearance of the CardView widget:

  • card_view:cardCornerRadius attribute, to set the corner radius in your layouts.
  • setRadius method, to set the corner radius in your code,
  • card_view:cardBackgroundColor attribute, to set the background color of a card.

To use the widgets in your project, add these Gradle dependencies to your app’s module:

[code language=”html”]
dependencies {
compile ‘com.android.support:cardview-v7:21.0.+’
}
[/code]

Reference: appdevwiki.com, android-arsenal.com

Conclusion
There are many more advantages of Material Design over its predecessor, flat design. I hope this article gives you some idea & helps you to integrate Material Design in your Android Application.

Do you have anything interesting to tell about Android’s Material Design? Write to me at “info@andolasoft.com“. I would love to hear from you.

CakePHP: How To Have Consistent SMTP Connection

It’s necessary to configure an SMTP server that will take care of your email deliveries while setting up a mail client. The process is easy – just add the right SMTP parameters to the settings of your email software & you’re good to go.

SMTP server has a limit for number of requests in a time interval & a max limit for sending emails per connection, which varies as per different service providers.

  • While creating the object of Cake Email utility, we have to pass “persistent = true”.

[code language=”html”]
$Email = new CakeEmail();
$Email->config(array(‘persistent’ => true));
[/code]

  • Change the below file for persistent connection changes.

[code language=”html”]
lib\Cake\Network\Email\SmtpTransport.php
public function send(CakeEmail $email) {
$this->_cakeEmail = $email;

if(!$this->_config[‘persistent’] || !$this->_socket){
$this->_connect();
$this->_auth();
}
$this->_sendRcpt();
$this->_sendData();
if(!$this->_config[‘persistent’]){
$this->_disconnect();
}
return $this->_content;
}
[/code]

  • Add this function in the CakeEmail file.

[code language=”html”]
lib\Cake\Network\Email\CakeEmail.php
public function disconnect() {
$this->transportClass()->disconnect();
}

lib\Cake\Network\Email\SmtpTransport.php
public function disconnect(){
$this->_disconnect();
}
[/code]

  • Disconnect the connection, after emails are sent.

[code language=”html”]
$Email->disconnect();
[/code]

Remember that using a standard SMTP (the one associated to free email providers like Yahoo, Hotmail or Gmail) doesn’t ensure delivery of all your messages, especially if you have a long list of recipients. 

Hope  this article helped configuring an SMTP connection.

Andolasoft has the experience in CakePHP Framework & application development. Planning something on CakePHP? Convert your idea into app. Talk to us Today!


SQL Injection (SQLi): How To Fix It In Ruby On Rails

What is SQL Injection Vulnerability?

SQL injection is vulnerability where an attacker can manipulate some value used in an unsafe way inside a SQL query. The bug allows SQL injection through dynamic finder methods, leading to data leaks, data loss & other unpleasant outcomes.

Let’s consider the following code to get customer information by email:

[code language=”html”]
Customer.where("email = #{user_data}").first
[/code]

Since the attacker has full control over ‘user_data’, they can insert whatever they like in the ‘where query’. For example:

[code language=”html”]
user_data = “email@somedomain.com; DROP TABLE customers;”
[/code]

The above ‘user_data’ with ‘where query’ will be executed separately as two SQL commands in the database, like this:

[code language=”html”]
SELECT * FORM customers WHERE email=’someone@example.com; DROP TABLE customers;–‘
[/code]

This results in complete data loss from customers table. Apart from data loss, the attackers can get useful information from your database using SQL injection.

Never miss an update from us. Join 10,000+ marketers and leaders.

Here is a sample code where User is being searched by the username:

[code language=”html”]
User.where("username = #{user_data}").first
[/code]

The attacker inserts the following text as ‘user_data’:

[code language=”html”]
user_data = "” or admin=’t’–"
[/code]

The above ‘user_data’ with ‘where query’ works like this:

  • The first part of the ‘user_data’ ‘# returns empty result set as the username is blank.
  • The second part, admin=’t’ fetches admin information from the table.
  • The last part — is a SQL comment to cancel all further command execution.

With this, all information about the admin is now in the attacker’s hands which might lead to serious problems.

Preventing SQL Injection Vulnerability

The best way to find out if an application is vulnerable to injection is to check whether the entire use of interpreters clearly segregates not-to-be trusted data from the command/query. In SQL calls, all the variables should bind with the prepared statements and stored procedures, whereas the dynamic queries should be avoided to prevent SQL vulnerabilities.

ActiveRecord & some other ORMs have all the facilities for parameterising queries. Here are some of the frequently used unsafe queries and safer ways to fix them:

Single Parameter Queries

# Unsafe Query

[code language=”html”]
Post.where("post_title = ‘#{post_title}’")
Post.where("post_title = ‘%{post_title}’" % { post_title: post_title })
[/code]

# Safe Query

[code language=”html”]
Post.where(post_title: post_title)
Post.where("post_title = ?", post_title)
Post.where("post_title = :post_title", post_title: post_title)
[/code]

Compounding Queries

# Unsafe Query

[code language=”html”]
def unsafe_query
query = []
query &amp;amp;amp;amp;amp;amp;amp;amp;amp;amp;amp;amp;amp;amp;amp;lt;&amp;amp;amp;amp;amp;amp;amp;amp;amp;amp;amp;amp;amp;amp;amp;lt; "post_title = #{post_title}" if condition1
query &amp;amp;amp;amp;amp;amp;amp;amp;amp;amp;amp;amp;amp;amp;amp;lt;&amp;amp;amp;amp;amp;amp;amp;amp;amp;amp;amp;amp;amp;amp;amp;lt; "author = #{author}" if condition2
Post.where(query.join(‘ and ‘))
end
[/code]

# Safe Query

[code language=”html”]
def safe_query
Post.all.tap do |query|
query.where(post_title: post_title) if condition1
query.where(author: author) if condition2
end
end
[/code]

Like Query

# Unsafe Query

[code language=”html”]
Post.where("post_title LIKE ‘%#{post_title}%’")
[/code]

# Safe Query

[code language=”html”]
Post.where("post_title LIKE ?", "%#{post_title}%")
[/code]

Conclusion

From the above mentioned Unsafe vs Safe illustrations, it’s clear that if there is a surrounding quote to the query, it’s vulnerable to SQL Injection. Thanks to clever methods, this is hardly a problem in most Rails applications now-a-days. However, this is a very common but devastating attack in the world of web apps.

Hence, it’s important to understand the problem & fix it as described above.

If you’re worried about the security of your Ruby on Rails App, we would be happy to help you. If you’re planning to start something new on RoR, get in touch with us. We’ll convert your ideas into app.