How To Use Service Oriented Architecture In IOS Swift

Talking about software and application architecture is always fascinating. In order to run smoothly, everyone needs to follow certain processes and principles. It’s always good to have clean, reusable, and bug-free code, and Service Oriented Architecture plays a crucial role in implementing that.

Service-oriented architecture makes our life easier by structuring the interaction between the high-level and lower-level implementations while keeping our code reusable and structured.

So now the question arises, what exactly service oriented architecture (SOA) is?

What is Service Oriented Architecture?

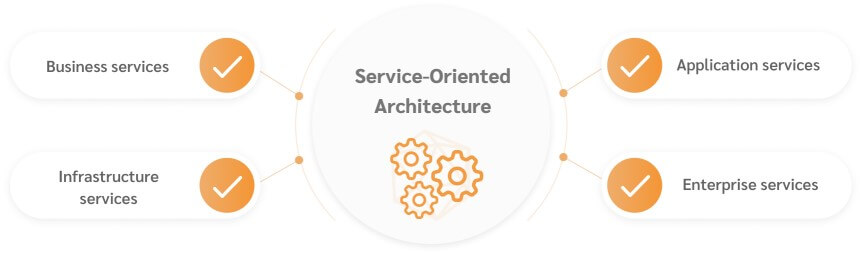
Service Oriented Architecture is an architecture pattern that consolidates functionalities and business logic in such a way that services can be injected into view controllers for use. This process easily and cleanly separates the front end user interface and the back end programming and business logic.

Service Oriented Architecture(Source – orientsoftware.com)

Why Service Oriented Architecture

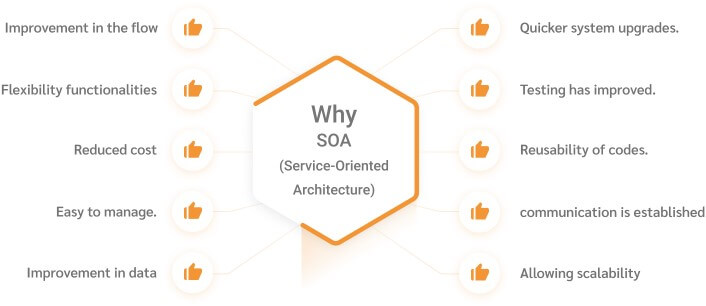
Let’s take a look at a few benefits of Service-Oriented Architecture. The most important benefit is managing business changes quickly and supporting newer channels of customer interaction,

  • Improvement in the flow of information.
  • Flexibility in the functionalities.
  • Reduced cost in the developmental cycle.
  • Easy to manage.
  • Improvement in data confidentiality and hence more reliability.
  • Quicker system upgrades.
  • Testing has improved.
  • Re-usability of codes.
  • A standard form of communication is established.
  • Allowing scalability to meet the needs of clients.

Why Service Oriented Architecture(Source – orientsoftware.com)

There are many patterns which can be used on the iOS development like MVC, MVVM, MVP, or VIPER. These architectural patterns handle only the higher level (UI) of our application. But soon after, we also need to implement the network managers, API clients, data sources, persistence containers, and so on.

In the following folder structure and piece of code we can view, how to implement a service-oriented architecture (SOA) in our iOS app development.

Are you looking for a iOS developer

Contact Us

Folder Structure

  • Classes
    • DataAccessLayer
    • PresentationLayer
    • WebAccessLayer
    • BusinessLayer
  1. The DataAccessLayer folder contains the persistence layer folders
    1. DBHelper
    2. CoreDataManager
    3. CoreDataObject
  2. PresentationLayer folder contains the user interface layer folders
    1. ViewControllers
    2. CustomCells
    3. CustomViews
  3. WebAccessLayer folder contains the
    1. APIManager
  4. BusinessLayer folder contains the business logic
    1. BusinessLogic
    2. BusinessObj

Sample Code

1. DBHelper

[code language=”css”]
func insertSportsToLocalDB(arrSports:NSMutableArray) ->Void {
}
[/code]

2. CoreDataManager

[code language=”css”]
funcfetchPrivacySettingData() ->Array<Any> {
do {
# fetch result from local db
} catchlet error asNSError {
# handle the sql exception
}
return results!
}
[/code]

3. CoreDataObject

[code language=”css”]
extensionCourts {

@nonobjc public class funcfetchRequest() ->NSFetchRequest<Courts> {
returnNSFetchRequest<Courts>(entityName: "Courts");
}

@NSManaged public varvenue_id: String?


}
[/code]

4. ViewControllers

[code language=”css”]
funcserviceCallToSaveGame() ->Void {
#show activity indicator
#prepare the service call request
letparams = ["user_id" : UserDefaults.standard.object(forKey: STRING_CONSTANT.KEY_USERID)]
#call the api manager web service call method
APIManager.sharedInstance.serviceCallRelatedToVenue(url: _API_PATH.kCreatePOI
param: params)(
#hide the indicator

}
}
[/code]

5. CustomCells

[code language=”css”]
a. CustomCells contains listview of user interface
[/code]

6. CustomViews

[code language=”css”]
funcdesignCustomListPopUp(withDataarrLists: Array<Any>) ->Void {

}
[/code]

7. APIManager

[code language=”css”]
funcserviceCallToGetProfile(withPathpath:String, withDataparam:[String:Any], withCompletionHandler completion:@escaping (AnyObject?) ->Void){

Alamofire.request(requestURL, method: .post, parameters: param, encoding: URLEncoding.methodDependent, headers: nil).responseJSON { (responseJson) in
}

}
[/code]

Advantages of Service-Oriented Architecture (SOA)

1. Reliability

With small and independent services in the SOA, it becomes easier to test and debug the applications instead of debugging the massive code chunks, which makes this highly reliable.

2. Location Independence

Services are located through the service registry and can be accessed through Uniform Resource Locator (URL), therefore they can change their location over time without interrupting consumer experience on the system while making SOA location independent.

3. Scalability

As SOA enables services to run across multiple platforms, programming languages and services, that is, services of the service-oriented architecture operate on different servers within an environment, which increases its scalability.

Never miss an update from us. Join 10,000+ marketers and leaders.

4. Platform Independence

Service-Oriented Architecture permits the development of the complex application by integrating different services opted from different sources that make it independent of the platform.

5. Loosely Coupled

The loose coupling concept in SOA is inspired by the object-oriented design paradigm that reduces coupling between classes to cherish an environment where classes can be changed without breaking the existing relationship. SOA highly encourages the development of independent services to enhance the efficiency of the software application.

6. Re-usability

An application based on SOA is developed by accumulating small, self-contained and loosely coupled functionality services. It allows the re-usability of the services in multiple applications independently without interacting with other services.

7. Agility

Instead of rewriting and reintegrating each new development project, developers are able to build applications from reusable components or services, increasing SOA’s agility as a result of the ability to quickly respond to new business requirements.

8. Easy Maintenance

The above process should give you a good idea of how to implement a Service Oriented Architecture in iOS Swift. Service Oriented Architectures handle business processes easily and make software code more reusable and bug-free.

Conclusion:

Service Oriented Architecture handles the business process easily and makes the software codes clean, reusable and bug free.  SOA implementation in iOS Swift is interesting. I hope the above process must help you to get a clear picture of implementation.

At Andolasoft we have a team dedicated iOS app developer who has long expertise in implementation of SOA. Our developers can help you in all your mobile app development issues. So don’t hesitate to communicate with them. Book a free consultation to access them directly.

How To Draw Smooth Lines In IOS Apps?

One of the most common issues in drawing apps is that the polylines appears jagged when drawn quickly. Such flaws create unfavorable impact on the application as well developers. Apps developed for IPhone, which is one of the premium devices in the world; must encompass all the development aspects, may it be a major bug as in Apple Map or as simple as jagged polylines in drawing apps.

Drawing lines are one of the most common features in iOS apps. It can be used for numerous purposes such as putting a signature in PDFs and images, drawing line graphs, preparing presentations with sketches and many more. Most of the iOS applications generate jaggy lines when drawn quickly. On the other hand, smooth lines facilitate uses with the convenience to draw quickly and without affecting the practicality of the application.

Below are the steps to follow how to draw smooth lines in iOS apps.

1. Add UIImage View

First of all we need to add UIImageView to a UIView.

[sourcecode]SmoothLineViewController.h:
@property (nonatomic, readwrite, retain) IBOutlet UIImageView *imageView;
Then we’ll @synthesize this property in SmoothLineViewController.m:
@synthesize imageView=imageView_;
[/sourcecode]

Finally, we’ll use the Interface Builder to add the UIImageView component to SmoothLineViewControllerr.xib

2. Handling Touches

Now we are ready to write code for handle touches and draw polylines. We’ll need to declare the following member variables in the header:

[sourcecode]CGPoint previousPoint;
NSMutableArray *drawnPoints;
UIImage *cleanImage;
add the method to the class:
/** This method draws a line to an image and returns the resulting image */
– (UIImage *)drawLineFromPoint:(CGPoint)from_Point toPoint:(CGPoint)to_Point image:(UIImage *)image
{
CGSize sizeOf_Screen = self.view.frame.size;
UIGraphicsBeginImageContext(sizeOf_Screen);
CGContextRef current_Context = UIGraphicsGetCurrentContext();
[image drawInRect:CGRectMake(0, 0, sizeOf_Screen.width, sizeOf_Screen.height)];

CGContextSetLineCap(current_Context, kCGLineCapRound);
CGContextSetLineWidth(current_Context, 1.0);
CGContextSetRGBStrokeColor(current_Context, 1, 0, 0, 1);
CGContextBeginPath(current_Context);
CGContextMoveToPoint(current_Context, from_Point.x, from_Point.y);
CGContextAddLineToPoint(current_Context, to_Point.x, to_Point.y);
CGContextStrokePath(current_Context);

UIImage *rect = UIGraphicsGetImageFromCurrentImageContext();
UIGraphicsEndImageContext();
return rect;
}
drawLineFromPoint:to_Point:image is a simple utility method that draws a line over a UIImage and returns the resulting UIImage.
Now UIResponder‘s touch handling methods will be overridden:
– (void)touchesBegan:(NSSet *)_touches withEvent:(UIEvent *)_event
{
// retrieve the touch point
UITouch *_touch = [_touches anyObject];
CGPoint current_Point = [_touch locationInView:self.view];

// Its record the touch points to use as input to our line smoothing algorithm
drawn_Points = [[NSMutableArray arrayWithObject:[NSValue valueWithCGPoint:current_Point]] retain];

previous_Point = current_Point;

// we need to save the unmodified image to replace the jagged polylines with the smooth polylines
clean_Image = [imageView_.image retain];
}

– (void)touchesMoved:(NSSet *)_touches withEvent:(UIEvent *)_event
{

UITouch *_touch = [_touches anyObject];
CGPoint current_Point = [_touch locationInView:self.view];

[drawnPoints addObject:[NSValue valueWithCGPoint:current_Point]];

imageView_.image = [self drawLineFromPoint:previous_Point toPoint:current_Point image:imageView_.image];

previous_Point = current_Point;
}
[/sourcecode]

3. Simply Polyline

We need to find a similar polyline, but with fewer vertices. This is necessary because we cannot interpolate between vertices to generate a nice smooth polyline if they are placed too close to each other. I use the “Ramer–Douglas–Peucker” algorithm for this. Alternatively, Lang’s simplification algorithm or any other polyline simplification algorithms would work.
We’ll begin by adding the following utility method:

[sourcecode]/** Draws a path to an image and returns the resulting image */
– (UIImage *)drawPathWithPoints:(NSArray *)points image:(UIImage *)image
{
CGSize screenSize = self.view.frame.size;
UIGraphicsBeginImageContext(screenSize);
CGContextRef currentContext = UIGraphicsGetCurrentContext();
[image drawInRect:CGRectMake(0, 0, screenSize.width, screenSize.height)];

CGContextSetLineCap(currentContext, kCGLineCapRound);
CGContextSetLineWidth(currentContext, 1.0);
CGContextSetRGBStrokeColor(currentContext, 0, 0, 1, 1);
CGContextBeginPath(currentContext);

int count = [points count];
CGPoint point = [[points objectAtIndex:0] CGPointValue];
CGContextMoveToPoint(currentContext, point.x, point.y);
for(int i = 1; i < count; i++) {
point = [[points objectAtIndex:i] CGPointValue];
CGContextAddLineToPoint(currentContext, point.x, point.y);
}
CGContextStrokePath(currentContext);

UIImage *ret = UIGraphicsGetImageFromCurrentImageContext();
UIGraphicsEndImageContext();
return ret;
}
[/sourcecode]

drawPathWithPoints:image is similar to our line drawing method above, except it draws a polyline, given an array of vertices.
We’ll also add an Objective-C implementation of Wikipedia’s pseudo code for the Ramer–Douglas–Peucker algorithm:

[sourcecode]- (NSArray *)douglasPeucker:(NSArray *)points epsilon:(float)epsilon
{
int count = [points count];
if(count < 3) {
return points;
}

//Find the point with the maximum distance
float dmax = 0;
int index = 0;
for(int i = 1; i < count – 1; i++) {
CGPoint point = [[points objectAtIndex:i] CGPointValue];
CGPoint lineA = [[points objectAtIndex:0] CGPointValue];
CGPoint lineB = [[points objectAtIndex:count – 1] CGPointValue];
float d = [self perpendicularDistance:point lineA:lineA lineB:lineB];
if(d > dmax) {
index = i;
dmax = d;
}
}

//If max distance is greater than epsilon, recursively simplify
NSArray *resultList;
if(dmax > epsilon) {
NSArray *recResults1 = [self douglasPeucker:[points subarrayWithRange:NSMakeRange(0, index + 1)] epsilon:epsilon];

NSArray *recResults2 = [self douglasPeucker:[points subarrayWithRange:NSMakeRange(index, count – index)] epsilon:epsilon];

NSMutableArray *tmpList = [NSMutableArray arrayWithArray:recResults1];
[tmpList removeLastObject];
[tmpList addObjectsFromArray:recResults2];
resultList = tmpList;
} else {
resultList = [NSArray arrayWithObjects:[points objectAtIndex:0],
[points objectAtIndex:count – 1],nil];
}

return resultList;
}

– (float)perpendicularDistance:(CGPoint)point lineA:(CGPoint)lineA lineB:(CGPoint)lineB
{
CGPoint v1 = CGPointMake(lineB.x – lineA.x, lineB.y – lineA.y);
CGPoint v2 = CGPointMake(point.x – lineA.x, point.y – lineA.y);
float lenV1 = sqrt(v1.x * v1.x + v1.y * v1.y);
float lenV2 = sqrt(v2.x * v2.x + v2.y * v2.y);
float angle = acos((v1.x * v2.x + v1.y * v2.y) / (lenV1 * lenV2));
return sin(angle) * lenV2;
}
[/sourcecode]

CGPoint v1 = CGPointMake(lineB.x – lineA.x, lineB.y – lineA.y);
If you have difficulty for understanding the code above, refer to Wikipedia’s explanation and pseudo code of the algorithm. Now we’ll also override UIResponder‘stouchesEnded:withEvent method to add post-processing instructions for our polyline:

[sourcecode]- (void)touchesEnded:(NSSet *)touches withEvent:(UIEvent *)event
{
NSArray *generalizedPoints = [self douglasPeucker:drawnPoints epsilon:2];
imageView_.image = [self drawPathWithPoints:generalizedPoints image:cleanImage];
[drawnPoints release];
[cleanImage release];
}
[/sourcecode]

The method computes a simplified polyline, using our recorded touch points, drawn Points, as the input to Ramer–Douglas–Peucker algorithm, and replaces the jaggy polyline with the simplified polyline.

Also Read; How To Use Service Oriented Architecture In IOS Swift

If you try running the app now, you would see your polylines being replaced by more jaggy polylines. That’s expected.

4. Smooth Polyline

Now that we have a simplified polyline, we are ready to interpolate the points between the vertices for a nice smooth curve. Add the following method to the class:

[sourcecode]- (NSArray *)catmullRomSpline:(NSArray *)points segments:(int)segments
{
int count = [points count];
if(count < 4) {
return points;
}

float b[segments][4];
{
// precompute interpolation parameters
float t = 0.0f;
float dt = 1.0f/(float)segments;
for (int i = 0; i < segments; i++, t+=dt) {
float tt = t*t;
float ttt = tt * t;
b[i][0] = 0.5f * (-ttt + 2.0f*tt – t);
b[i][1] = 0.5f * (3.0f*ttt -5.0f*tt +2.0f);
b[i][2] = 0.5f * (-3.0f*ttt + 4.0f*tt + t);
b[i][3] = 0.5f * (ttt – tt);
}
}

NSMutableArray *resultArray = [NSMutableArray array];

{
int i = 0; // first control point
[resultArray addObject:[points objectAtIndex:0]];
for (int j = 1; j < segments; j++) {
CGPoint pointI = [[points objectAtIndex:i] CGPointValue];
CGPoint pointIp1 = [[points objectAtIndex:(i + 1)] CGPointValue];
CGPoint pointIp2 = [[points objectAtIndex:(i + 2)] CGPointValue];
float px = (b[j][0]+b[j][1])*pointI.x + b[j][2]*pointIp1.x + b[j][3]*pointIp2.x;
float py = (b[j][0]+b[j][1])*pointI.y + b[j][2]*pointIp1.y + b[j][3]*pointIp2.y;
[resultArray addObject:[NSValue valueWithCGPoint:CGPointMake(px, py)]];
}
}

for (int i = 1; i < count-2; i++) {
// the first interpolated point is always the original control point
[resultArray addObject:[points objectAtIndex:i]];
for (int j = 1; j < segments; j++) {
CGPoint pointIm1 = [[points objectAtIndex:(i – 1)] CGPointValue];
CGPoint pointI = [[points objectAtIndex:i] CGPointValue];
CGPoint pointIp1 = [[points objectAtIndex:(i + 1)] CGPointValue];
CGPoint pointIp2 = [[points objectAtIndex:(i + 2)] CGPointValue];
float px = b[j][0]*pointIm1.x + b[j][1]*pointI.x + b[j][2]*pointIp1.x + b[j][3]*pointIp2.x;
float py = b[j][0]*pointIm1.y + b[j][1]*pointI.y + b[j][2]*pointIp1.y + b[j][3]*pointIp2.y;
[resultArray addObject:[NSValue valueWithCGPoint:CGPointMake(px, py)]];
}
}

{
int i = count-2; // second to last control point
[resultArray addObject:[points objectAtIndex:i]];
for (int j = 1; j < segments; j++) {
CGPoint pointIm1 = [[points objectAtIndex:(i – 1)] CGPointValue];
CGPoint pointI = [[points objectAtIndex:i] CGPointValue];
CGPoint pointIp1 = [[points objectAtIndex:(i + 1)] CGPointValue];
float px = b[j][0]*pointIm1.x + b[j][1]*pointI.x + (b[j][2]+b[j][3])*pointIp1.x;
float py = b[j][0]*pointIm1.y + b[j][1]*pointI.y + (b[j][2]+b[j][3])*pointIp1.y;
[resultArray addObject:[NSValue valueWithCGPoint:CGPointMake(px, py)]];
}
}
// the very last interpolated point is the last control point
[resultArray addObject:[points objectAtIndex:(count – 1)]];

return resultArray;
}
[/sourcecode]

All credits go to supersg559 for the implementation Catmull-Rom Spline algorithm above. I merely modified it to use NSArrays instead of C-arrays. A good explanation of the algorithm can be found on “The Code Project”.
Finally, modify touchesEnded:withEvent: to use this algorithm:

[sourcecode]- (void)touchesEnded:(NSSet *)touches withEvent:(UIEvent *)event
{
NSArray *generalizedPoints = [self douglasPeucker:drawnPoints epsilon:2];
NSArray *splinePoints = [self catmullRomSpline:generalizedPoints segments:4];
imageView_.image = [self drawPathWithPoints:splinePoints image:cleanImage];
[drawnPoints release];
[cleanImage release];
}
[/sourcecode]

That’s it. You’re done!

It would facilitate them to put fine-looking signatures, draw beautiful sketches and make impressive presentations.

Have something to add to this topic? Share it in the comments.

At Andolasoft we have a team dedicated iOS app developer who has long expertise in implementation of Service Oriented Architecture. Our developers can help you in all your mobile app development issues. So don’t hesitate to communicate with them. Book a free consultation to access them directly.