In the ever-evolving world of mobile app development, creating an iOS app that not only functions flawlessly but must also provide an exceptional user experience.
Users have come to expect intuitive and aesthetically pleasing interfaces, making design principles a fundamental aspect of iOS app development.
In this blog post, we will explore the key design principles that can help developers create user-friendly iOS apps that users love to interact with.
-
Simplicity is Key
“Simplicity is the ultimate sophistication.” – Leonardo da Vinci
When it comes to app design, simplicity reigns supreme. Users should be able to navigate your app with ease, and clutter-free interfaces are more inviting.
Avoid overwhelming users with excessive features and elements. Keep the user interface clean, uncluttered, and intuitive.
Every screen should have a clear purpose, and the app’s functionality should be readily apparent.
-
Consistency for a Familiar Experience
Consistency is the backbone of good design. Users should feel at home when using your app. Maintain a consistent design language throughout the app, including color schemes, typography, and layout.
Use standard navigation patterns like tab bars, navigation bars, and modal views to provide a familiar and intuitive user experience.
-
Intuitive Navigation
Navigation is a critical aspect of an app’s design. Users should never feel lost or confused when moving through your app.
Implement clear and logical navigation paths, and ensure that users can easily return to previous screens.
iOS provides well-established navigation components, so make sure to use them effectively.
-
Feedback and Responsiveness
Users need feedback to understand their actions’ outcomes. Implement immediate and meaningful feedback mechanisms, such as animations, tooltips, or progress indicators.
This helps users understand the system’s response to their interactions and reduces uncertainty.
-
Accessibility for All
Accessibility is not just a design principle; it’s a legal requirement and a moral obligation. Make your app accessible to everyone, including users with disabilities.
Use accessible design elements, provide alternative text for images, and support VoiceOver for visually impaired users.
-
Touch Targets and Usability
Design touch targets (buttons, links, etc.) with an appropriate size to accommodate different screen sizes and finger sizes.
A minimum tap target size of 44 x 44 points is recommended.
Ensure that the app’s elements are spaced adequately to prevent accidental taps and enhance usability.
-
Loading and Performance Optimization
Users expect apps to be responsive and fast. Optimize loading times and overall iOS app performance.
Minimize unnecessary animations and use lazy loading for content. A snappy and efficient app is more likely to retain users.
-
Error Handling and Clarity
Errors are bound to happen. When they do, your app’s error messages should be clear and helpful.
Guide users on how to resolve issues and avoid using technical jargon in error messages. Keep user frustration to a minimum.
-
Orientation and Layout
Ensure that your app works seamlessly in both portrait and landscape orientations.
Design responsive layouts that adapt to different screen sizes and orientations, providing a consistent experience in all situations.
-
User Testing and Iteration
Finally, no design is perfect from the get-go. Conduct user testing and gather feedback to identify pain points and areas for improvement.
Regularly iterate on your app’s design based on user feedback, evolving it to meet changing user expectations.
Top Technologies Used to Develop iOS Apps
Developing apps requires a specific set of technologies and tools to ensure compatibility with Apple’s ecosystem.
Here are some of the top technologies and tools commonly used in app development:
- Swift:
Swift programming is the preferred language for iOS app development. It’s known for its speed, safety, and readability, making it an excellent choice for building apps. - Objective-C:
While Swift is the modern choice, Objective-C is still used for maintaining and updating legacy apps. It’s also helpful for integrating older codebases with new Swift projects. - Xcode:
Xcode is Apple’s integrated development environment (IDE) for iOS app development. It provides tools for coding, debugging, testing, and deploying apps. It’s essential for any iOS developer. - UIKit:
UIKit framework provides the building blocks for creating user interfaces in apps. It includes components like buttons, labels, views, and controllers. - SwiftUI:
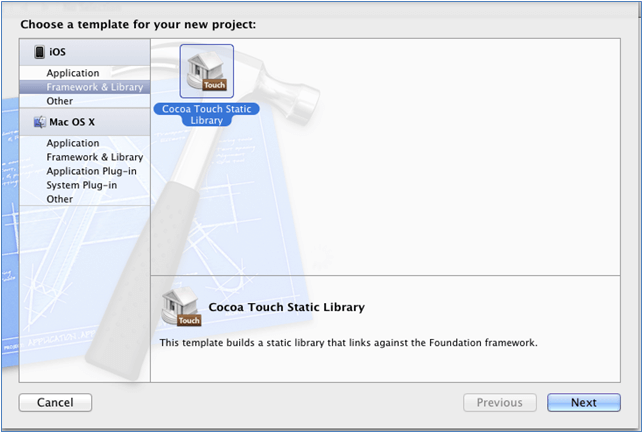
SwiftUI framework simplifies the process of creating user interfaces in Swift. It offers a more declarative and interactive approach to UI design. - Cocoa Touch:
Cocoa Touch framework extends the Cocoa framework for macOS to iOS. It provides libraries for developing iOS-specific features like multi-touch gestures and UI elements. - Core Data:
Core Data is a framework for managing the model layer of an app. It’s used for data storage, retrieval, and management, making it crucial for database-driven apps. - Core Animation:
Core Animation allows developers to create smooth animations and transitions in apps. It’s essential for creating visually appealing user interfaces. - ARKit:
Apple’s augmented reality ARKit framework, which enables developers to create immersive AR experiences within iOS apps. - Core Location:
Core Location is used for integrating location-based services, such as GPS, into apps. It’s essential for apps that rely on location data. - Firebase:
Firebase is a mobile and web application development platform provided by Google. It offers a range of services, including real-time database, authentication, cloud storage, and analytics, which can be integrated into iOS apps. - CocoaPods and Carthage:
These are dependency managers for iOS development. They allow developers to easily add third-party libraries and frameworks to their projects. - TestFlight:
TestFlight is Apple’s beta testing platform that allows developers to distribute pre-release versions of their apps to testers for feedback and testing. - GitHub:
While not exclusive to iOS development, GitHub is a popular version control platform where developers can collaborate, manage code repositories, and track changes in their projects. - Swift Package Manager:
Swift Package Manager is a dependency management tool integrated into Swift that allows developers to easily add and manage dependencies within their projects. - In-App Purchase and StoreKit:
For monetization, iOS developers often use In-App Purchase and StoreKit to enable users to buy digital products, subscriptions, or services within their apps.
These technologies and tools form the foundation for iOS app development. The choice of which to use depends on project requirements, the specific features you want to implement, and your personal preferences as a developer.
Now, let’s explore the top things to consider when choosing an iPhone app development company.
Top Things to Consider When Choosing a iOS App Development Company
Choosing the right development company is a critical decision for your project’s success. Here are the top things to consider when selecting an iOS app development company:
-
Experience and Expertise:
Look for a company with a proven track record in iOS app development. Check their portfolio and client testimonials to gauge their experience.
-
Technical Proficiency:
Ensure the company’s developers are proficient in Swift and Objective-C, the primary programming languages for app development.
Verify their knowledge of frameworks and tools, including Xcode, UIKit, and Core Data.
-
Portfolio and References:
Review their portfolio to assess the quality and diversity of their previous iOS apps. Contact their past clients for references and feedback on their work.
-
Design Capabilities:
Good design is crucial for apps. Assess their design skills, including user interface (UI) and user experience (UX) design capabilities.
-
Development Process:
Inquire about their development process. A well-defined and transparent process ensures better project management and on-time delivery.
-
Project Management:
Understand how they manage projects. Effective communication and project management tools are essential for keeping you updated on progress.
-
Team Composition:
Learn about the team working on your project, including the roles of developers, designers, QA testers, and project managers. Ensure they have a well-rounded team.
-
Communication:
Effective communication is vital for a successful partnership. Ensure they are responsive and can communicate in your preferred language and time zone.
-
Client Reviews and Testimonials:
Read client reviews and testimonials to get insights into their clients’ experiences and satisfaction with their services.
-
Transparency and Pricing:
Understand their pricing structure and payment terms. A transparent pricing model is essential to avoid unexpected costs.
-
Maintenance and Support:
Inquire about their post-launch support and maintenance services. A good company should provide ongoing support and updates.
-
Security and Data Privacy:
Ensure that the company follows best practices for app security and data privacy, especially if your app deals with sensitive user data.
-
App Store Submission Experience:
Ask about their experience with submitting apps to the Apple App Store. Familiarity with the submission process can prevent delays and rejections.
-
NDA and Intellectual Property:
Discuss non-disclosure agreements (NDAs) and intellectual property rights to protect your app idea and its assets.
-
Scalability:
Consider the company’s ability to scale with your project if it grows. Ensure they have the resources and flexibility to accommodate your needs.
-
Location:
Decide whether you prefer a local, offshore, or remote development team based on your project’s requirements and your comfort level with remote collaboration.
-
Compliance and Regulations:
If your app involves specific industries or regulations (e.g., healthcare, finance), check if the company has experience complying with relevant standards and regulations.
-
Post-Launch Services:
Beyond development, evaluate their ability to help you market and maintain the app post-launch, including user acquisition and updates.
By carefully considering these factors, you can choose an iOS app development company that aligns with your project’s goals and ensures a successful partnership.
What are the Top Strategies to Monetize iOS Apps
Monetizing iOS apps can be achieved through various strategies, depending on your app’s nature and target audience. Here are some top strategies to consider when monetizing iOS apps:
- Paid Apps:
Users purchase your app from the App Store for a one-time fee. This model is straightforward but requires a compelling value proposition to justify the cost. - In-App Purchases (IAPs):
Offer additional content, features, or virtual goods within your app that users can buy. This model works well for freemium apps where the initial download is free. - Subscriptions:
Provide access to premium content, services, or features on a recurring basis. Subscriptions can be monthly, yearly, or at other intervals. This model can create a steady revenue stream. - Freemium Model:
Offer a basic version of your app for free and upsell premium features or content. This model encourages users to try the app before committing to a purchase. - Ads:
Implement advertisements within your app, such as banner ads, interstitials, or rewarded video ads. You can earn revenue based on ad impressions, clicks, or user interactions. - Affiliate Marketing:
Promote affiliate products or services within your app and earn a commission for each sale or action generated through your app’s referrals. - Sponsorships and Partnerships:
Partner with other companies or brands to promote their products or services within your app in exchange for sponsorship or affiliate fees. - Sell Data or Insights:
If your app collects valuable user data (while complying with privacy regulations), consider selling aggregated and anonymized data or insights to interested parties, such as marketers or researchers. - Crowdfunding:
Use platforms like Patreon or Kickstarter to secure financial support from your app’s most dedicated users. In return, offer exclusive content or benefits. - E-commerce Integration:
If your app has a shopping or marketplace component, earn a commission on sales made through your platform. - Merchandise and Physical Goods:
Sell branded merchandise, physical products, or services related to your app’s content or theme. - Cross-Promotion:
Promote your other apps or products within your existing apps to increase visibility and user engagement across your portfolio. - Event Ticketing:
If your app is related to events or entertainment, you can sell event tickets or access through your platform and earn a commission on sales. - Donations:
Allow users to make voluntary donations to support your app. Some users may appreciate the opportunity to contribute to a free or ad-free experience. - Licensing Content:
If you produce valuable content (e.g., images, music, videos), licence it to other apps or platforms for a fee. - Pay-Per-Use:
Charge users for specific actions or transactions within the app, such as advanced analytics, document conversions, or premium support. - White-Labelling:
Offer a white-label version of your app to other businesses or organizations, allowing them to customize and use it for their purposes. - Limited-Time Sales and Discounts:
Occasionally offer discounts or sales on in-app purchases or subscriptions to encourage more purchases during specific periods. - Referral Programs:
Reward users for referring friends or other users to download and use your app. - Educational Content:
If your app offers educational or training content, create premium courses or materials for which users can pay.
Successful monetization often involves a combination of these strategies. Consider your app’s target audience, niche, and unique features when deciding which monetization methods are most suitable.
Additionally, continuously analyze user feedback and adapt your monetization strategy to meet changing market trends and user preferences.
FAQs
- What is the typical iOS app development process?
The iOS app development process involves concept and planning, design, development, testing, deployment, and ongoing maintenance and updates.
- How long does it take to develop an iOS app?
The development timeline varies depending on the complexity of the app and the team’s experience. Simple apps may take a few months, while more complex projects can take a year or more.
- How can I publish my iOS app on the Apple App Store?
To publish your iOS app on the App Store, you’ll need to create an Apple Developer account, adhere to Apple’s guidelines, and submit your app for review.
Conclusion
Mastering these design principles in iOS app development is essential for creating user-friendly experiences that stand out in the crowded app market.
By prioritizing simplicity, consistency, and usability while keeping accessibility and performance in mind, you can build iOS apps that users will enjoy and recommend to others.
Remember, good design is an ongoing process, so stay committed to refining your app’s design to meet evolving user needs and expectations.
