iOS app development is the most rapidly evolving technology with new trends popping up every year. More and more companies are developing new and disruptive apps that are taking the market by storm.
The impact of artificial intelligence and machine learning has paved a new direction for iOS app development, the iOS app development has moved into a new renaissance.
According to recent statistics published by grandviewresearch the global mobile app development market has reached nearly $240 billion in 2023 which is growing at the rate of 13%.
iOS developers need to keep themselves updated with the latest development trends to deliver modern apps to their customers. Business owners should also be aware of the latest development trends so that they can ideate the right app for their business.
Top 8 iOS App Development Statistics and Trends
- Number of iOS App Store Apps:
As of September 2023, the Apple App Store hosted over 2.24 million apps. - iOS App Revenue:
In 2023, iOS app revenue reached approximately $86 billion, and it is projected to grow in the coming years. - iOS App Downloads:
In 2023, the total number of iOS app downloads surpassed $142 billion. - Swift Programming Language Adoption:
Swift, Apple’s programming language for iOS app development, has gained significant popularity since its introduction in 2014. As of September 2022, it was the 10th most popular programming language globally. - ARKit Adoption:
ARKit, Apple’s augmented reality framework, has been embraced by developers to create AR experiences. By 2023, more than 5,000 apps on the App Store were using ARKit. - iOS App Update Frequency:
On average, iOS apps are updated every 30 to 45 days to improve performance, fix bugs, and introduce new features. - User Retention Rate:
The average mobile app retention rate for iOS apps after 90 days is approximately 21%, indicating the challenges in retaining users over time. - In-App Purchases:
As of 2022, in-app purchases accounted for over 50% of all mobile app revenue, indicating the importance of monetization strategies within iOS apps.
We have researched the top iOS development trends and have prepared this list. Read on to learn the new technology trend in iOS development that you can implement in 2023.
Augmented Reality (AR) and Mixed Reality (MR)
AR and MR technologies will continue to redefine user experiences in 2023. These technologies blend digital elements with the physical environment, enhancing interactions and engagement.
From AR-based gaming experiences to AR-powered shopping and navigation apps, the possibilities are limitless.
iOS app developers will leverage ARKit and other frameworks to create captivating and interactive apps that bridge the gap between the real and virtual realms.
AI and Machine Learning
AI and ML are two rapidly developing technologies that are transforming the way humans interact with technology.
Because AI and ML are more accessible and affordable for developers, it makes it easier for them to include advanced AI driven features such as personal assistants, chat bots, image recognition, etc into iOS apps.
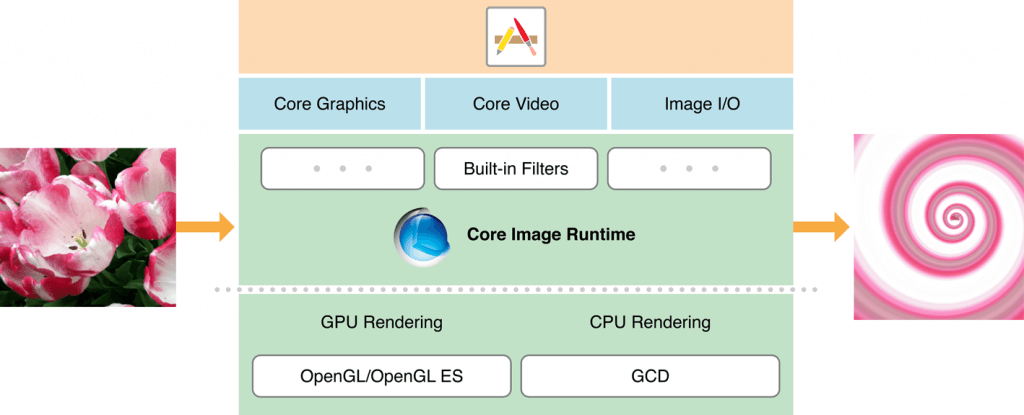
2023 is the year of AI-based programs. We can expect to see more AI-based apps being developed for enterprises. Apple has a Core ML framework that enables developers to integrate machine learning models into iOS apps.
Never miss an update from us. Join 10,000+ marketers and leaders.
This framework enables developers to add AI-driven features such as image recognition and natural language processing. These features can also help improve the user experience and user engagement.
Privacy and User Consent Features
In response to Apple’s push for user privacy, iOS app developers will implement features like App Tracking Transparency (ATT) to seek user consent before collecting and using personal data.
This trend will reinforce user trust and encourage developers to adopt more transparent data practices. Apps that prioritize user privacy will likely enjoy increased user loyalty and retention.
IoT (Internet of Things)
IoT or Internet of Things is all about connecting physical objects such as home appliances, automobiles, and other electronic devices to a central computer system for intra-communication. It creates a more wholesome connected space enabling them to communicate with each other as well as transfer data.
IoT provides consumers the ability to remotely control their smart home devices though iPhones. Consumers can remotely operate devices such as lights, security systems, thermostats, vehicles, etc.
In 2022 usage of IoT devices increased by 18% which amounts to a total of approximately 14 billion.
Apps For Wearables
The popularity of smartwatches, fitness trackers and other wearable devices is rapidly growing. It is estimated that between 2023 to 2030 wearable technology will grow by 14%.
Wearable devices such as fitness trackers and smartwatches let users track their heart rate, get weather notification, view and send messages, play music and much more. These apps can enable users to get fast access to important information and functions.
Mobile Wallets
Mobile wallet is the one of the newest types of apps for iOS app development. It is quickly becoming popular for their ease of use and rewards such as loyalty points, wallet coins, with credit and debit functions.
Mobile-first countries such as India and China are fueling the growth of mobile wallets. These countries have truly revolutionised the way customers use mobile wallets because of their high smartphone penetration rate.
Mobile wallets also enable banks to reach a wider customer base. It is forecasted that by 2026 the number of mobile wallet users will exceed over 5 billion global users. Some of the most popular mobile wallets services are PayPal, ApplePay, GooglePay and AmazonPay who are taking the market by storm.
Chatbots
Chatbots have been in the trend for a while. Many businesses, especially customer support teams already employ chatbots to increase customer satisfaction and retention.
Online businesses use chatbots as virtual assistants who provide helpful information to customer queries. Moreover, chatbots can provide curated information on common queries.
A recent article on AI found that nearly 40% of consumers prefer to interact with businesses through chatbots and customer support if it can address their queries promptly and accurately.
Are you looking for a iOS developer
Businesses have also invested heavily on chatbots as an alternative way to interact with customers which not only saves them time and money but also reduces human errors and resource utilisation.
Today, chatbots have become highly effective and are able to provide information in a more human way.
Cloud Integration
Both developers and end-users are increasingly using cloud platforms to develop apps and services. Cloud services are quickly becoming the norm for storing files and documents. The trend will only continue to increase in 2023 and 2024.
Some commonly used cloud-apps available today are GoogleDrive, DropBox and Microsoft Office 365.
Cloud integration brings with it several other benefits such as file sharing, file security, flexibility, disaster recovery etc. which can be easily implemented and integrated while developing cloud-based apps.
Cloud integration is an essential part of any iphone application. It can solve different problems, such as:
Swift UI
SwiftUI is a modern and declarative framework for building user interfaces for various Apple platforms. It was introduced in 2019 and since then SwiftUI has only grown in popularity in developing intuitive and use-engaging interfaces for iphone devices.
The SwiftUI framework provides simple syntax for building user interfaces which makes it easier for developers to understand and use.
SwiftUI’s straightforward approach makes it easier to predict and debug the layout of the user interface which also makes it a great development technology for building both complex and dynamic user interfaces. Developers can take advantage of the SwiftUI to create truly native apps for Apple’s devices.
Camera-Focused Apps
The demand for camera-focused apps have skyrocketed in recent years. Mobile phone cameras are getting more and more powerful with each iteration.
2023 has witnessed an increase in usage of AI-driven camera apps for photography, video conferencing, remote communication and collaboration. It is also an important factor in encouraging more social media shares.
Apps like Instagram, Facebook, video reels leverage the camera to enable users to create stunning images and videos to be shared with their users thereby reaching a wider customer base.
5G Integration
The widespread adoption of 5G networks will transform the iOS app development landscape in 2023. With lightning-fast speeds and minimal latency, 5G integration will unlock new possibilities for app developers.
Expect apps to load faster, deliver smoother streaming experiences, and facilitate real-time data processing. This technology will be particularly beneficial for apps that rely on augmented reality (AR), virtual reality (VR), and immersive gaming experiences.
Conclusion
The iphone development trends keep evolving in the market, today’s developers are quickly adopting these latest trends to develop more and more engaging apps for the users.
Moreover with the increasing awareness of these trends among customers, the demand for modern apps is getting higher making it paramount for iOS developers to keep up with the latest development trends.
Frequently Asked Question
- What are the potential impacts of Apple’s new hardware and software updates on iOS app development in 2023?
Potential impact of Apple’s new hardware and software updates on iOS app development in 2023 includes improved performance and capabilities. This will require developers to optimize apps for new devices and software features. It may also introduce new opportunities for AR/VR integration and machine learning applications, shaping future app development trends.
- What are the key factors to consider for iOS app developers targeting Gen Z and younger demographics in 2023?
Key factors for iOS app developers targeting Gen Z and younger demographics in 2023 would involve creating personalized and interactive experiences. Developers will leverage social media integration, prioritize short-form content, and address privacy concerns. Inclusive design and sustainability values will also resonate with this tech-savvy generation.
- What are the top user experience (UX) trends to consider in iOS app development for 2023?
Top user experience (UX) trends for iOS app development in 2023 will revolve around voice-based interfaces, multi-device experiences, gesture-based interactions, dark mode support, and AI-driven personalized content. Developers must prioritize intuitive navigation and optimize app performance to enhance overall user satisfaction.
- How will app monetization strategies evolve for iOS developers in 2023?
App monetization strategies for iOS developers in 2023 may shift towards subscription-based models, in-app purchases, and ad-supported free apps. Developers may also explore NFTs and tokenization for unique app features or digital goods, as well as user data privacy as a premium offering.
- Will blockchain technology find applications in iOS app development trends in 2023?
While blockchain technology shows potential in enhancing security and decentralization, its direct application in iOS app development trends in 2023 remains uncertain. However, it could influence secure payment systems, digital identity verification, and token-based loyalty programs, depending on regulatory and adoption factors.
