How To Monetize IOS App Through Apple In-App Purchase Integration

What Is In App Purchase?

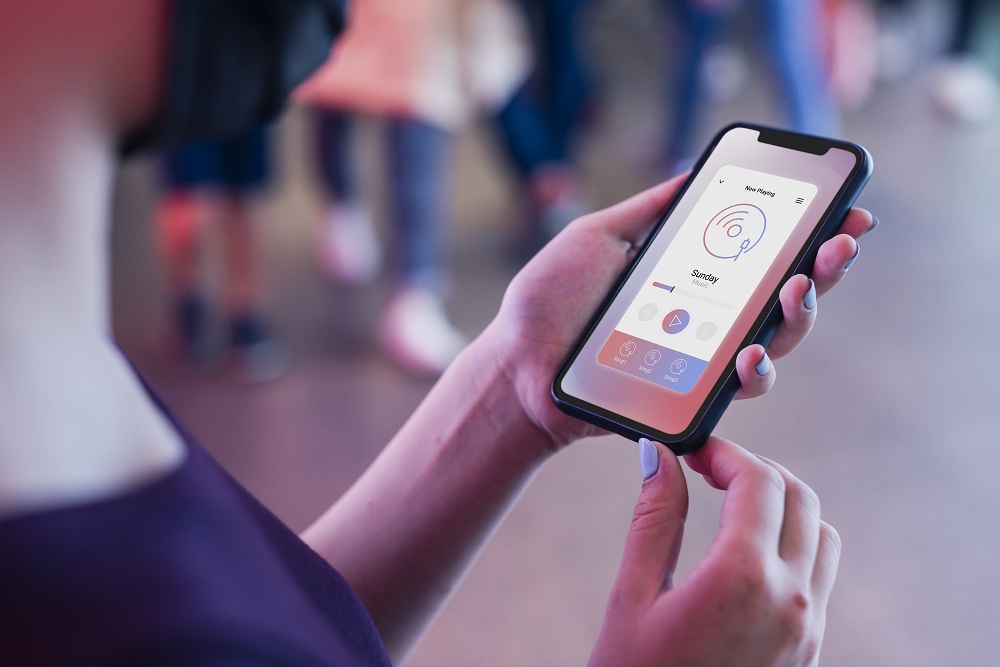
Apple’s In-App purchase lets you the ability to sell items within your free or paid app which includes premium content, virtual goods, upgrade features and subscriptions. Apple takes 30% of the commission and you receive 70% of the purchase price.

Each purchase is associated with a product type. The product types are:

  • Apple-In-App-Purchase-208x300

    Consumable Products:

Consumables are In-App Purchases that must be purchased each time the user needs that item.

  • Non-Consumable Products:

Non-Consumables are In-App Purchases that only need to be purchased once by the user and are available to all devices registered to a user.

  • Auto-Renewable Subscriptions:

Auto-Renewable Subscriptions allow the user to purchase episodic content or access to dynamic digital content for a set duration time. At the end of each duration, the subscription will renew itself, until a user opts out.

  • Non-Renewable Subscriptions:

Non-Renewing Subscription allow the sale of services with a limited duration. Non-Renewing Subscriptions must be used for In-App Purchases that offer time-based access to static content.

  • Free Subscriptions:

Free Subscriptions are an extension of Auto-Renewable Subscriptions that permit the delivery of free subscription content to Newsstand-enabled applications.

Never miss an update from us. Join 10,000+ marketers and leaders.

The Free Subscription In-App Purchase type is implemented in the same way as an Auto-Renewable Subscription, just without any charges to the user. Free Subscriptions do not have expiration, but the user can turn off the subscription at any time.

You can use any one of the above as best suit to your application.

For example, integrating InApp purchase for Non-consumable type product.

In Non-consumable products type, user has to pay only once. Then the content or items will be available to all the device against that user’s apple ID.

What To Do Before Integrating In App Purchase To Your Application?

  1. Connect to iTunes
  2. Then create an unique App ID for your application and enable in-app purchases for that.
  3. Update the app with created bundle ID and code signing in Xcode with corresponding provisioning profile.
  4. Create the app using the AppID you’ve registered. Then goto Manage Applications in iTunes Connect.
  5. Make sure you have set up the bank details for your app as it is necessary for supporting In-App purchase.
  6. Then Add a new non-consumable product for In-App purchase.
  7. Last step is to create a test user account using Manage Users option in iTunes connect page of your app.

Lets write the code

First include StoreKit Framework into the app.Then write the following code in ViewController.h file

#import <UIKit/UIKit.h>
#import <StoreKit/StoreKit.h>
 
@interface MyViewController : UIViewController
<SKProductsRequestDelegate,SKPaymentTransactionObserver>
 
{
 
}
-(IBAction)PurchaseButtonClicked:(id)sender;
 
- (void) completeTransaction: (SKPaymentTransaction *)transaction;
- (void) restoreTransaction: (SKPaymentTransaction *)transaction;
- (void) failedTransaction: (SKPaymentTransaction *)transaction;
 
@end 
Write the following code in ViewController.m file
-(IBAction)PurchaseButtonClicked:(id)sender {
    SKProductsRequest *request= [[SKProductsRequest alloc]
initWithProductIdentifiers: [NSSet setWithObject: @"your_product_ID"]];
    request.delegate = self;
    [request start];
}
- (void)productsRequest:(SKProductsRequest *)request didReceiveResponse:(SKProductsResponse *)response
{
   [[SKPaymentQueue defaultQueue] addTransactionObserver:self];
 
   NSArray *myProduct = response.products;
   NSLog(@"%@",[[myProduct objectAtIndex:0] productIdentifier]);
 
   //Since only one product, we do not need to choose from the array. Proceed directly to payment.
 
   SKPayment *newPayment = [SKPayment paymentWithProduct:[myProduct objectAtIndex:0]];
   [[SKPaymentQueue defaultQueue] addPayment:newPayment];
 
   [request autorelease];
}
 
- (void)paymentQueue:(SKPaymentQueue *)queue updatedTransactions:(NSArray *)transactions
{
 for (SKPaymentTransaction *transaction in transactions)
   {
      switch (transaction.transactionState)
      {
         case SKPaymentTransactionStatePurchased:
              [self completeTransaction:transaction];
              break;
         case SKPaymentTransactionStateFailed:
              [self failedTransaction:transaction];
              break;
         case SKPaymentTransactionStateRestored:
              [self restoreTransaction:transaction];
         default:
              break;
      }
    }
} 
 
- (void) completeTransaction: (SKPaymentTransaction *)transaction
{
    NSLog(@"Transaction Completed");
    // You can create a method to record the transaction.
    // [self recordTransaction: transaction];
    // You should make the update to your app based on what was purchased and inform user.
    // [self provideContent: transaction.payment.productIdentifier];
    // Finally, remove the transaction from the payment queue.
    [[SKPaymentQueue defaultQueue] finishTransaction: transaction];
}
 
- (void) restoreTransaction: (SKPaymentTransaction *)transaction
{
    NSLog(@"Transaction Restored");
    // You can create a method to record the transaction.
    // [self recordTransaction: transaction];
    // You should make the update to your app based on what was purchased and inform user.
    // [self provideContent: transaction.payment.productIdentifier];
    // Finally, remove the transaction from the payment queue.
    [[SKPaymentQueue defaultQueue] finishTransaction: transaction];
}
 
- (void) failedTransaction: (SKPaymentTransaction *)transaction
{
    [activityIndicator stopAnimating];
    if (transaction.error.code != SKErrorPaymentCancelled)
    {
      // Display an error here.
      UIAlertView *alert = [[UIAlertView alloc] initWithTitle:@"Purchase Unsuccessful"
      message:@"Your purchase failed. Please try again."
      delegate:self
      cancelButtonTitle:@"OK"
      otherButtonTitles:nil];
      [alert show];
      [alert release];
     }
 
    // Finally, remove the transaction from the payment queue.
    [[SKPaymentQueue defaultQueue] finishTransaction: transaction];
}

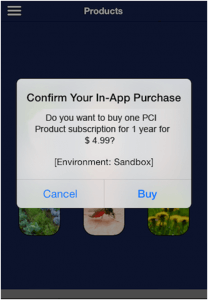
That’s it, now your app is integrated with the inApp purchase with non-consumable subscription.

Note: Please review Apple Guidelines (https://developer.apple.com/appstore/resources/approval/guidelines.html) before publishing the app to the app store.

Andolasoft has expertise in iOS application development and other iOS integration.

See Also: E-Signature SDK for iOS App Developer

Like this blog? I’d love to hear about your thoughts on this. Thanks for sharing your comments.

How To Create A Static Library Or Framework For IOS?

A static library is a package of classes, functions, definitions and resources, which can be packed together and easily shared among projects. This facilitates reuse of code easier as you will have your own set of classes and utility functions.

Here are the steps to create your static library or framework

Step 1 : Create A New ‘Cocoa Touch Static Library’ Project

  • Choose template as Cocoa Touch Static Library.
  • Start with create new project >> iOS >> Framework & Library >> Cocoa Touch Static Library

choose_template_for_project

Note: The name you entered in product field will be the name of your framework.
Example:  ‘MyCompany’ will generate ‘MyCompany.framework’

Step 2: Create The Primary Framework Header (Recommended)

Usually, framework header is imported this way – <MyCompany/MyCompany.h>

  • Create an ‘.h’ file – ‘MyCompany.h
  • If X-Code creates it for you, just delete the ‘.m’ file and import the inner classes used in ‘.h’ file
  • If you import only ‘MyCompany.h’ (#import <MyCompany/MyCompany.h>) then the rest of the files need not be imported
#import <Foundation/Foundation.h>
  • Now, add your new sources
  • Make the header ‘Public’

Public headers are copied to the .framework and can be imported using the framework

  • Select the header in the project explorer, then expand the Utilities pane (Cmd+Option+0) to modify the scope of header.
  • In the ‘Target Membership’ group select the checkbox next to the ‘.h’ file.
  • Then, change the scope of the header from ‘Project’ to ‘Public’.

You might have to uncheck and check the box to get the dropdown list. This will ensure that the header is copied to the correct location in the copy headers phase.

Step 3: Update The Public Headers Location

  • To avoid copying private headers to the framework check that the public headers are copied to a separate directory, e.g. $(PROJECT_NAME)Headers.
  • Select the project in the file explorer >> select the targets >> ‘Build Settings’ tab.
  • Set ‘Public Headers Folder Path’ to ‘$(PROJECT_NAME)Headers’ for all configurations by searching the ‘Public Headers Folder Path’. This folder must be unique if you are working with multiple Frameworks.

headers_xcode


Step 4: Setup ‘Build Settings’

"Dead Code Stripping" => No (for all settings)
"Strip Debug Symbols During Copy" => No (for all settings)
"Strip Style" => Non-Global Symbols (for all settings)

Step 5: Make Sure That Framework Is Used As Dependent Target

  • Generate the basic skeleton of the framework in the static library target. Also include a simple post-build script.
  • Select your target in the file navigator and click the ‘Build Phases’ tab
  • Then, click ‘Add Build Phase’ >> ‘Add Run Script’ and paste the following script in the source portion of the run script build phase.
set–e
mkdir -p "${BUILT_PRODUCTS_DIR}/${PRODUCT_NAME}.framework/Versions/A/Headers"
# Link the "Current" version to "A"
/bin/ln -sfh A "${BUILT_PRODUCTS_DIR}/${PRODUCT_NAME}.framework/Versions/Current"
/bin/ln -sfh Versions/Current/Headers "${BUILT_PRODUCTS_DIR}/${PRODUCT_NAME}.framework/Headers"
/bin/ln -sfh "Versions/Current/${PRODUCT_NAME}" "${BUILT_PRODUCTS_DIR}/${PRODUCT_NAME}.framework/${PRODUCT_NAME}"
# The -a ensures that the headers maintain the source modification date so that we don't constantly
# cause propagating rebuilds of files that import these headers.
/bin/cp -a "${TARGET_BUILD_DIR}/${PUBLIC_HEADERS_FOLDER_PATH}/" "${BUILT_PRODUCTS_DIR}/${PRODUCT_NAME}.framework/Versions/A/Headers"
mycompany_xcode
  • Build your project

The build products directory is usually in-
(~/Library/Developer/Xcode/DerivedData/<ProjectName>-<gibberish>/Build/Products/…)

You will find the ‘libMyCompany.a’ static library, a headers folder, and a ‘MyComapny.framework’ folder which contains the basic skeleton of your framework.

build_product_directory

SEE ALSO: How to make Static Framework iOS device independent?

I hope you enjoyed this topic, if you have any questions or comments please share below!

How To Create A Gridview With ‘UICollectionView’ In IOS6 & Above

What Is ‘UICollectionView’?

‘UICollectionView’ is a class introduced in iOS 6 SDK. It helps developers in creating grid view to handle ordered collection of data items using customizable layouts. ‘Collection view’, available in this class is like ‘UItableview’ which supports multiple column layouts.

Getting Started:

Create new ‘.h‘ and ‘.m‘ files to display the images.

In ‘ShowImagesViewController.h

#import <UIKit/UIKit.h>
@interface ShowImagesViewController :UICollectionViewController
{
NSArray *allImages;
}
@property (nonatomic, retain) NSArray *allImages;
@end

In ‘ShowImagesViewController.m

#import "ShowImagesViewController.h"
@implementation ShowImagesViewController
@synthesize allImages;
- (void)viewDidLoad
{
[superviewDidLoad];
allImages = [NSArrayarrayWithObjects:@"pizza.jpeg",
@"sides_img.png", @"sandwich_img.png", @"pizza_img.png",
@"pasta_img.png", @"drinks_img.png", @"pizza.jpeg",
@"sides_img.png", @"sandwich_img.png", @"pizza_img.png",
@"pasta_img.png", @"drinks_img.png", nil];
}
 
- (void)didReceiveMemoryWarning
{
[superdidReceiveMemoryWarning];
// Dispose of any resources that can be recreated.
}
- (BOOL)shouldAutorotateToInterfaceOrientation:
(UIInterfaceOrientation)interfaceOrientation
{
return YES;
}
- (NSInteger)collectionView:(UICollectionView *)collectionViewnumberOfItemsInSection:(NSInteger)section
{
returnrecipeImages.count;
}
- (UICollectionViewCell *)collectionView:(UICollectionView *)collectionViewcellForItemAtIndexPath:(NSIndexPath *)indexPath
{
staticNSString *identifier = @"Cell";
UICollectionViewCell *cell = [collectionView
dequeueReusableCellWithReuseIdentifier:identifier
forIndexPath:indexPath];
 
UIImageView *allImageView = (UIImageView *)[cell viewWithTag:100];
allImageView.image = [UIImageimageNamed:[allImagesobjectAtIndex:indexPath.row]];
return cell;
}
- (void)collectionView:(UICollectionView *)collectionViewdidSelectItemAtIndexPath:(NSIndexPath *)indexPath{
}
@end

Example of Grid layout using ‘UICollectionViewController

uicollectionview

Conclusion:

‘UICollectionViewController’ creates ‘Grid’/’Tile’ layout much faster and offers intuitive user interface in iOS 6 devices.

How We Turned A Great Idea Into IOS App – The Inside Story

Sandra M, an Occupational Therapist (OT) in the USA, came-up with the original idea and approached us to put it into iPhone app development as well as iPad app development. Here, the therapists share their expertise through the app thereby mentoring new parents through shared interventions.

The ‘LittleSteps’ iOS app is now in App Store. In a short span of time, hundreds of downloads have been done across the USA, Germany, Australia, India, Philippines, UK, China, Ireland, Portugal, Greece, Israel, South Africa, New Zealand, Chile, Egypt, Germany and Canada.

icon_lS

The ‘LittleSteps’ App is aimed to collaborate and share OT interventions to address developmental delay in the areas of fine motor, gross motor, feeding, sensory integration, visual motor, behavior, language development and social skills for children below 3 yrs. With the free version a user can share interventions applied to other users. However, the paid version allows OT to store customer data in the device itself.

For Occupation Therapists, it provides a platform to share knowledge and take care of certain condition during baby’s growth. For parents, it acts as a companion that makes them knowledgeable on baby care.

Being one of the best iPhone App Development Companies, we came-up with the right solutions that turned Sandra’s idea into a working iOS app. We included numerous functionalities and integrations that made it engaging and simple for the users. We used Orangescrum, the project collaboration tool to keep-up with the development process.

See What Users Are Saying About The App?

  • “Very informative! Great app to download!”
  • “OMG, this is an exceptionally amazing app that has transformed the way we approach raising our babies. A must for all parents”

Here’s What We Did:

  • Designed the application logo, the user interfaces (UI/UX)
  • Developed the app in native language i.e. Objective-C and Cocoa Touch framework
  • Devised the application process and flow from navigation to monetization
  • Introduced the feature of In-app purchase for premium users
  • Introduced push notification feature to share texts instantly
  • Tested the app’s performance with AppFlight SDK
  • Deployed the app to Apple App Store within 9 weeks since the initiation of project

In addition to above mentioned functionalities, we have introduced numerous other features that make it a state-of-the-art application.

So, go ahead; download the app and see how ‘LittleSteps’ can help you and your baby. Feel free to write reviews in iTunes.

ios_mobile


LS_screenshot

Auditnet® Is Now Available On Mobile (iPhone/iPad/Android)

We are delighted to announce that AuditNet® is now available on Mobile both iPhone/iPad and Android. With this app, now the existing users can enjoy browsing and downloading the same rich content what they see on web app, also a new user will be able to register to the site. Now advertisers will get traffic from both web and mobile application.  For last 12 weeks a dedicated team from Andolasoft (Mobile App Developers, UI Developers, Ruby On Rails developers and QA team) worked diligently to make it available on the app stores right on time. AndolaSoft team worked on UX/UI design, app development, testing, and deployment of app to the respective apps store.

Looking into current surge of iPhone, iPad and Android devices worldwide, AuditNet® started looking for a way to provide access to the audit templates to its mobile users to target rise in subscriptions. Hence, Andolasoft proposed a cost effective solution by developing a mobile app using Cross Platform technology – PhoneGap, on top of Ruby on Rails framework, enabling to run on both iOS and Android platform. The back-end uses RESTful API hosted on AWS for smoother performance.


Auditnet_mobile_image

Auditnet_appstore1Auditnet_googleplay


About Auditnet:

AuditNet® serves the global audit community as the primary communication resource with an online digital network where auditors share resources, tools, and experience including audit work programs and other audit documentation. In 2009 AuditNet® launched Web-based training for fraud detection and prevention, IT audit, data analysis, audit software tools and techniques, enabling auditors to learn essential skills anywhere at any time. As a NASBA approved CPE sponsor AuditNet® now offers low-cost high-quality training for auditors and financial professionals, providing convenience while eliminating the need for travel.

Visit www.auditnet.org to know more.

About AndolaSoft:

Based in Silicon Valley, Andolasoft is a Web and Mobile app Development Company. Here, we do web applications using Ruby on Rails, PHP and CakePHP. We’ve expertize on Mobile App Development involving as iPhone, iPad, Android, PhoneGap andSencha.
With a team of 200+ expert developers, we deliver cutting-edge solutions within budget and on schedule. We have happy customers from across the USA, UK, Australia, Canada, Singapore, Switzerland and Brazil.

Visit andolasoft.com to know more

How Do I Implement Localization In IOS Apps?

We know that, all the apps in the Apple App Store are English-speaking, i.e. the menu, information, settings and everything else is in English. However, the apps become almost useless for the consumers from non native English speaking countries. Hence, it becomes essential for the developers to release apps with multiple language support. This is where internationalization and localization comes in handy which facilitates the iOS application developers to support numerous native languages that greatly increase the global user experience.

What Exactly Is Internationalization And Localization?

  • Internationalization and localization means adapting the software product to different languages, regional differences and technical requirements of a targeted market.
  • Internationalization is the process of designing a software application, so that it can be adapted to various languages and regions without engineering changes.
  • Localization is the process of accommodating internationalized software product for a specific region or language by adding locale-specific components and translating text.

Here Is An Example To Help You Grasp The Concept:

Let’s say there is an iPhone/iPad application made for Brazilian client and he needs to localize that product to Portuguese language so that every users of Brazil can use it.

Each and every application must contain some hardcoded strings. We need to pull all of these hardcoded strings into a separate file so that we can localize them.

To do this, create a “.strings” file in the Xcode to contain all of the strings that your project needs. Then the hardcoded strings should be replaced with a function call to look up the appropriate string from the “.strings” file based on the current language.

For example:

To create a “.string” file, follow below mentioned steps

  • Select the Project group in Xcode, and navigate to File >>New >>New File.
  • Choose iOS >>Resource >>Strings File, and click Next, as shown in the below snapshot.
  • Name the new file Localizable.strings, and then click Save.

Note that the “Localizable.strings” is the default filename; iOS looks for when dealing with localized text. If you rename the file, you’ll need to specify the name of the .strings file every time.

The format for the strings file is:

[sourcecode]"KEY" = "CONTENT";[/sourcecode]

For our ‘Account’ text add in:

[sourcecode]"TITLE" = "Account";[/sourcecode]

Now switch to “ViewController.m”, and find the “viewDidLoad” method. Now you can set the text as below:

[sourcecode]self.titleLabel.text = @"Account";[/sourcecode]

We want it to read from our “.strings” file. For this, you need to change the current line to use a macro called “NSLocalizedString” as shown below:

[sourcecode]self.titleLabel.text = NSLocalizedString(@"TITLE", nil);[/sourcecode]

Adding A Portuguese Localization

Steps to add a Portuguese localization are as follows:

  • You need to select “Localizable.strings”, and open the Info pane.
  • You can do this by selecting the 3rd tab in the top toolbar of the View section, and selecting the 1st tab in the top section, as shown in the below screenshot.

To add support for another language execute following steps:

  • You need to simply click on the ‘+’ (Plus) in that ‘Localization’ pane on the right of the view.
  • At first it will create localization for English.
  • If the “Localizable.Strings” deselect after your click then select the “Localizable.Strings” again. After the “Localizable.Strings” selected click the ‘+’ button once again and choose ‘Portuguese(pt)’ from the dropdown.

Now, Xcode has set up some directories containing a separate version of “Localizable.strings” for each language that you selected, behind the scenes. To view this for yourself, go to your project folder in Finder and open it. There you’ll get the following:

  • ‘en.lproj’ and ‘pt.lproj’ contain language-specific versions of files.
  • ‘en’ is the localization code for English, whereas ‘pt’ is for Portuguese.

To change the text for Portuguese, select ‘Localizable.strings (Portuguese)’ and change the text as follows:

[sourcecode]"TITLE" = "Conta";
“Back” = “Voltar”;
etc.
[/sourcecode]

It’s all about how to localize a string. But you also need to localize the UI, as the text length for a button may vary in different languages.

How To Adjust UI Elements:

Let’s discuss about how to localize the button text.

  • For Portuguese let’s say the button text is ‘MODIFICAR’.
  • The problem is that you need your button border to be relatively tight around the text. This isn’t a problem for title label because there is no constraint on its width, but here you’ll need to adjust the size of the button to make it look perfect.
  • If you simply change the text in “viewDidLoad” it will look odd, as the text of that button may or may not fit into it.

So you need to add localization to your “xib” and make the button bigger in Portuguese.

  • Go to “ViewController.xib” and in the info pane on the right of the view, click the ‘+’ button to add a Localization and choose Portuguese.
  • Note you may need to scroll down in the Info pane as it has some Interface Builder content in that side.
  • Now we have copy of “ViewController.xib” in our Portuguese folder (pt.lproj).
  • Select “ViewController.xib (Portuguese)”, and edit the button text in that version to say ‘MODIFICAR’.
  • It will resize the button by default.

Once, all the set up is done perfectly, delete the application from simulator/device and select Project>>Clean to get a fresh build and install. Then build and run your app.

How To Apply Localization For Images:

If you have text in your image you need to localize it.Follow the steps mentioned below.

  • Select the .jpg file and add localization for Portuguese.
  • Check out the project folder.
  • The ‘.jpg’ image file has been added to the English folder (en.lproj) and then copied to the Portuguse folder (pt.lproj).
  • To make a different image for the Portuguese version, you need to overwrite the image in the Portuguese folder.
  • Rebuild and get the final result!

Benefits:

It is better to have localization in your iOS apps to target the global users. The app will display the contents according to the visitor’s language.

  • Same information can be shared across the world.
  • Great user experience.